Website Builder - E-Commerce
HostGator Website Builder's Business Plan includes a Store feature for running your Ecommerce business. It is the perfect tool for getting your products online quickly and easily.
Please note that the Store feature is only available in the Website Builder Business plan.
To create a store in your Website Builder Business account:
- Log in to your Customer Portal.
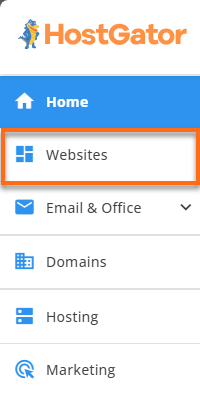
- Click Websites on the left-hand menu.
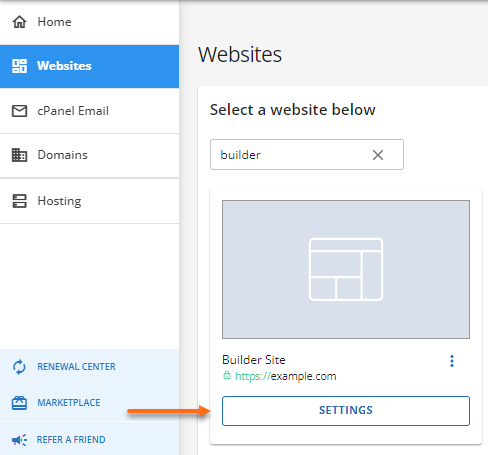
- Locate your Website Builder site and click its Settings button.
- Click the Login button in the upper-right pane.
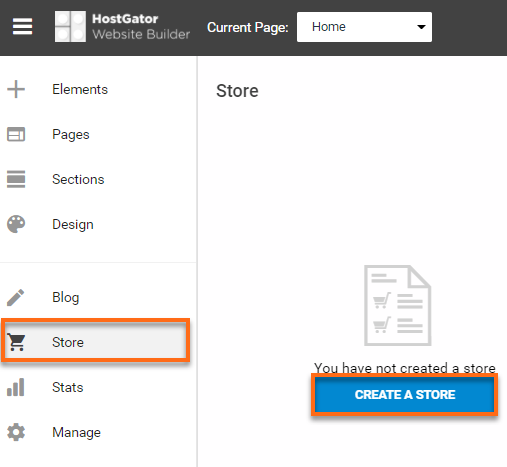
- Once inside the Website Builder dashboard, select Store from the left-hand menu.
- Click Create a Store.
- To set up your Store, please go to the Configure section⤵ of this article for more information.
To go to your Store homepage:
- Log in to your Customer Portal.
- Click Websites on the left-hand menu.

- Locate your Website Builder site and click its Settings button.

- Click the Login button in the upper-right pane.
- Once inside the Website Builder dashboard, select Store from the left-hand menu.
- Click Manage Products and Orders on the right pane.
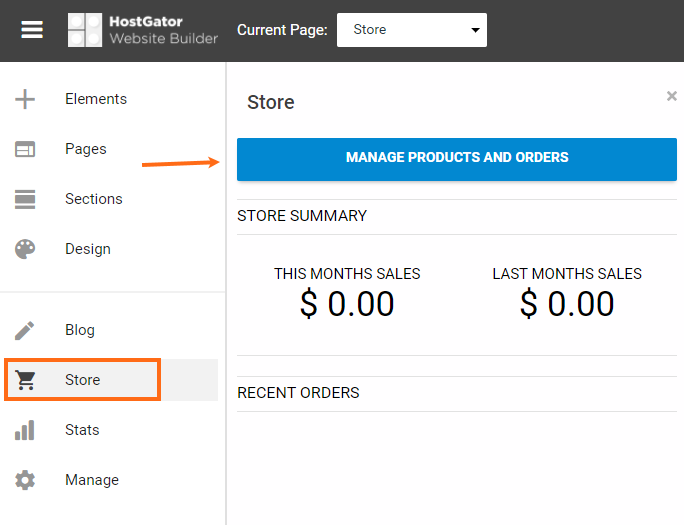
- You will now be redirected to the Store's homepage.
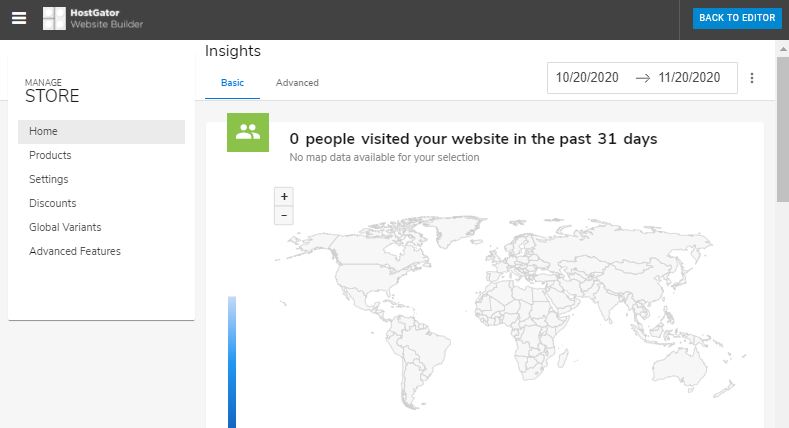
- Home - This is the section where you can see your Store's analytics.
- Products - This is where you will add, remove, or edit your Store's items.
- Settings - This section allows you to customize your Store and edit information like order email, taxes, payment options, shipping, and email layout.
- Discounts - This is where you can create discount codes for your products.
- Global Variants - This allows you to customize the different selections for your customers to pick from the same product. This setup also allows you to keep track of your inventory.
- Advanced Features - This section allows you to enable or disable certain settings in your Store by sliding the toggles.
- To go back to the main dashboard, click the Back to Editor button in the top right corner.
To configure your Store:
- Navigate to your Store.
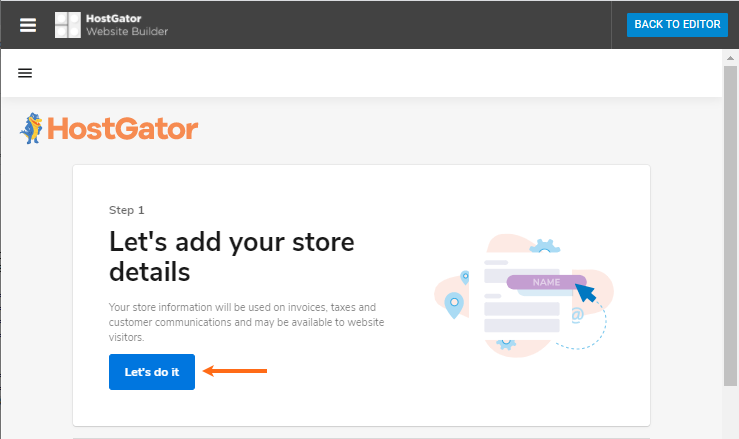
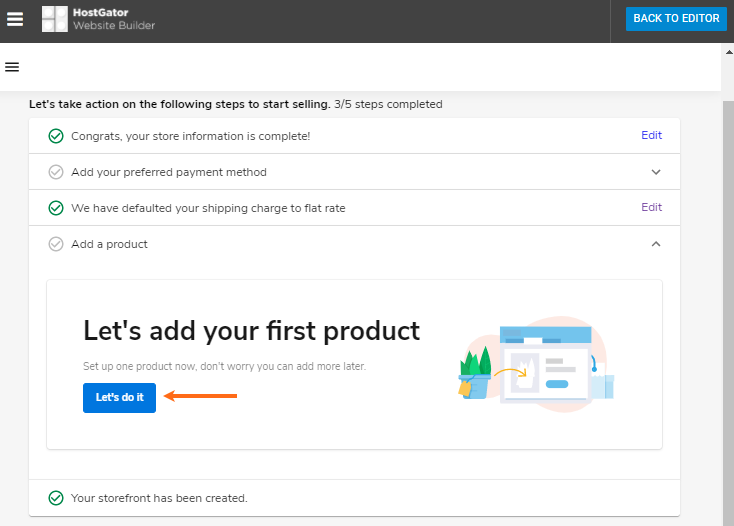
- If this is the first time configuring your Store, you will be prompted to add your Store details. Click the Let's do it button to proceed.
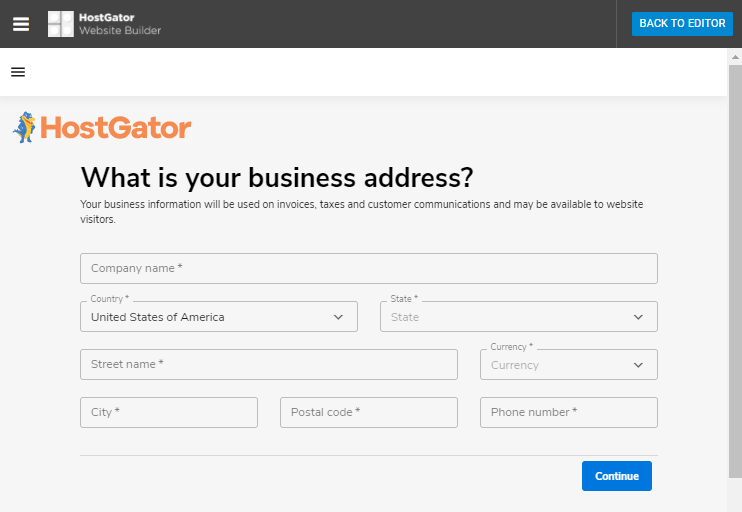
- Provide your business information in the fields below.
- Next, set up your payment method. Payment options and taxes are also set up here. Click Let's do it on the Let's Set up your payment method page (Step 2).
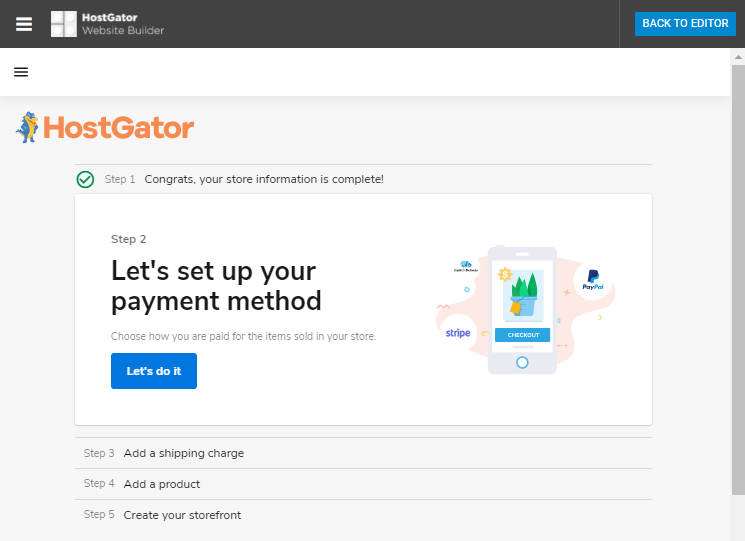
- Once done, set up your Shipping Rate (Step 3).
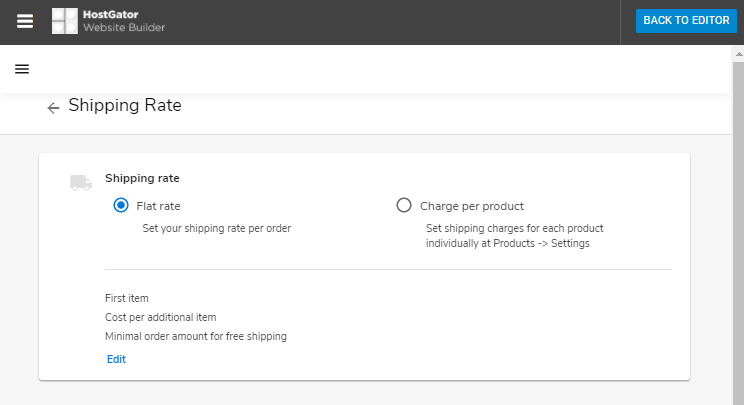
- The next step is to add your product information (Step 4).
- Enter your product details.
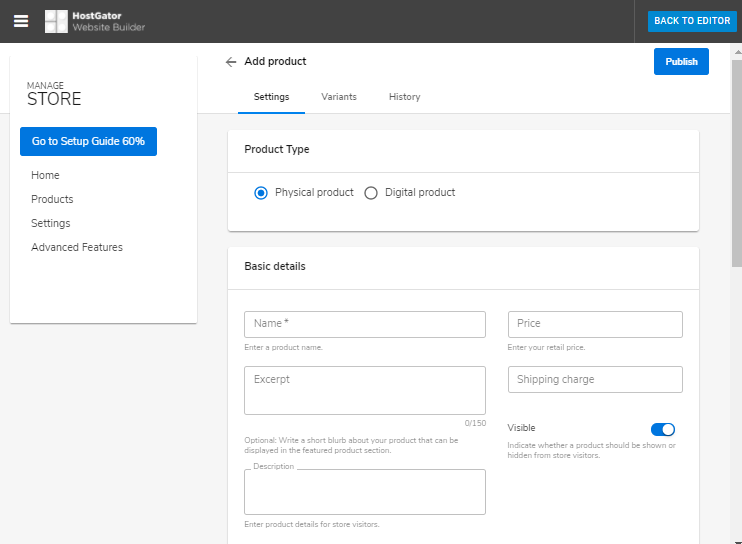
- Click Publish, located in the top right corner, to save the product details.
- You can edit your Store information by clicking the Edit link.
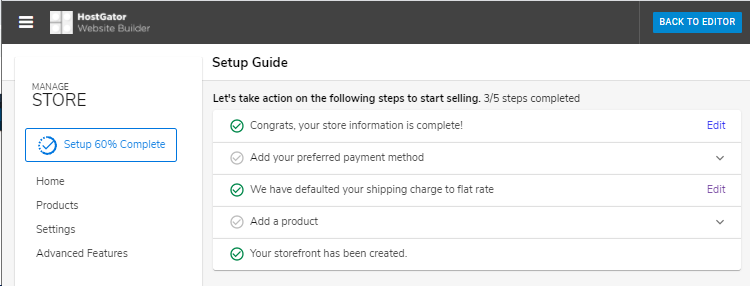
- Once setup is 100% complete, it will show this page:
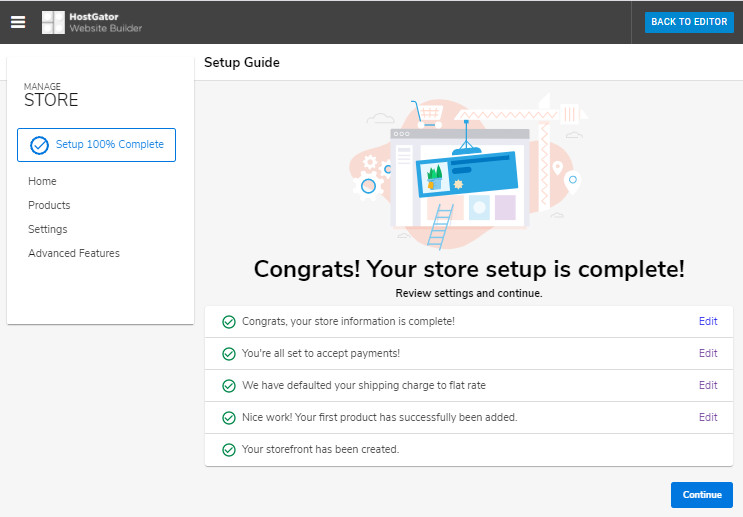
- Click Continue to proceed.
- To go back to the main dashboard, click the Back to Editor button located in the top right corner.
Click the links below for instructions on:
To add a product to your Store:
- Navigate to your Store homepage.
- Click the Products tab on the left side menu to display a list of your Store's items.
- To add a new product, hover over the + icon located in the lower right-hand corner and click the Add (+) button.
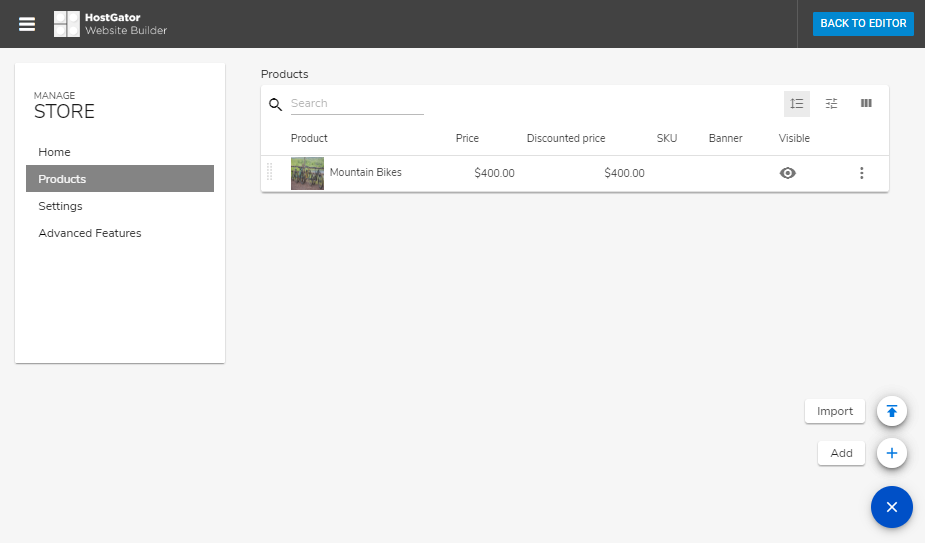
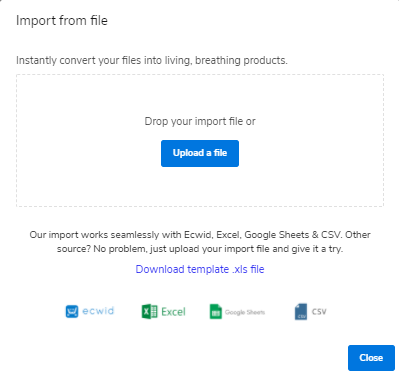
Note: Hovering over the + button will also provide a bulk product import option. Click Import to upload files (Excel, Google Sheets, and CSV).
- To view your product's details, click the product name.
Settings Tab - You can configure the product features.
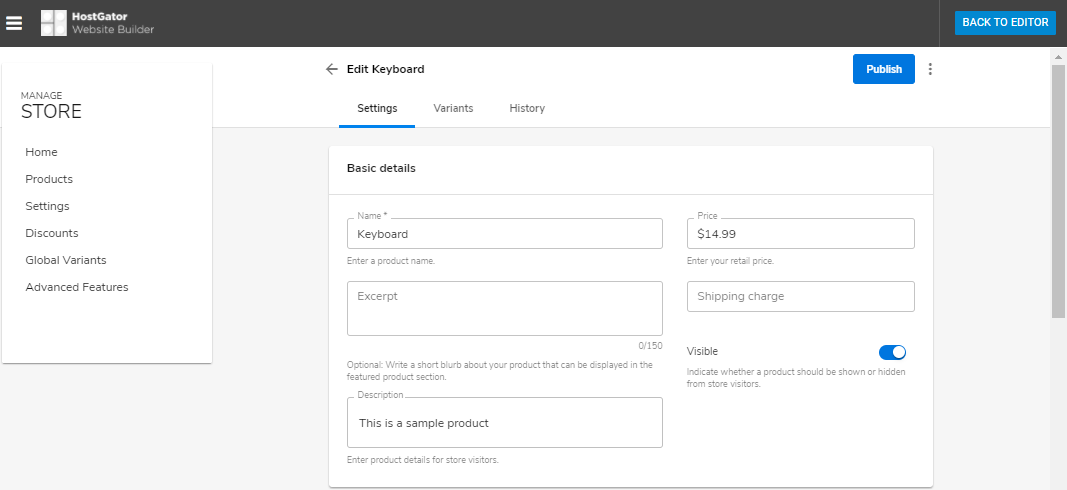
- Basic Details:
- Name: You can set a name for the product.
- Price: The price to charge for the item.
- Excerpt: It provides a summary of the product.
- Description: You can enter a description of the product.
- Visible: You can set whether or not the product is visible in the Store.
- Fulfillment Method: You can select if a product can be shipped or picked up.
- Manage product images: You can upload an image(s) for your product.
- Advanced Settings:
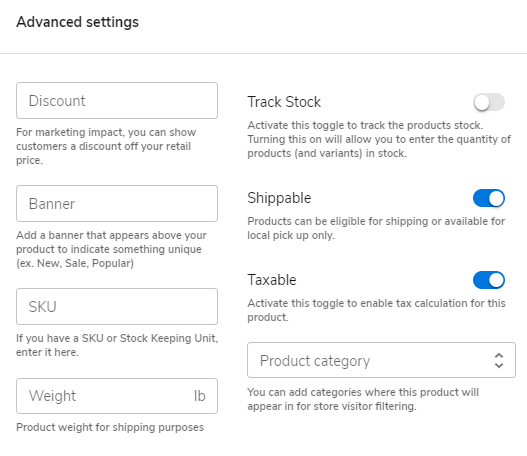
- Discount: Enter a percentage of a discount on a product.
- Banner: This will add text above the product as a banner.
- SKU: Use this to add an SKU for your product if you use SKUs for item tracking.
- Weight: Enter the product weight to configure shipping costs.
- Track Stock: Use this toggle to set how much inventory you have to sell.
- Shippable: Toggle shipping options for the product.
- Taxable: Toggle tax calculation for the product.
- Product Category: This space may be used to assign and change categories. (Note: Product categories must be enabled through Advanced Features in the side menu to assign categories to individual products.)
Variants Tab - This section allows you to set additional options.
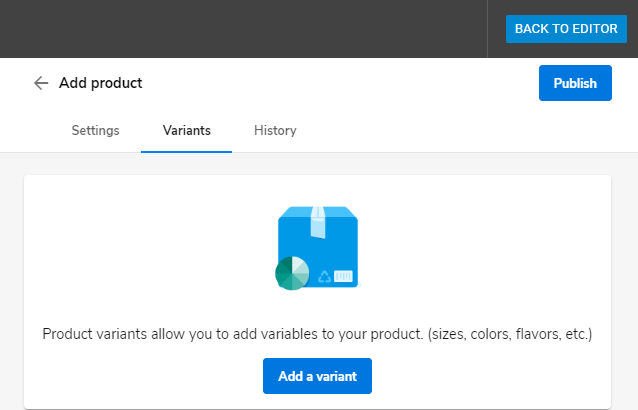
- Click the Add a variant button to show the pop-up window where you can configure the product variations.
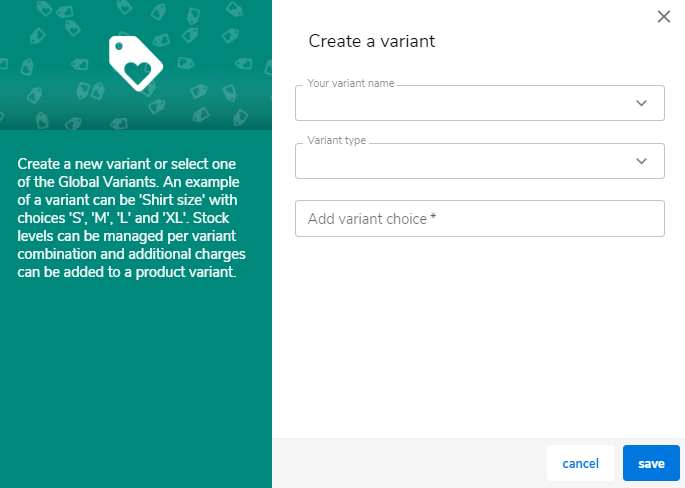
- Your variant name - The dropdown will allow you to select from the Global Variants options, such as color, size, and style.
- Variant type - It will automatically be filled out based on the set global variants.
- Add variant choices - Type in an additional option, click enter or Enter. To remove a variant, click the X next to the variant option.
- Click Save to add the variant to the product. You will be redirected back to the Variants tab.
- In the Variants tab, under the Product variants combinations section, you can set an additional charge, use a different SKU, enable stock to manage individual variations, and set if that variant is visible within the Store.
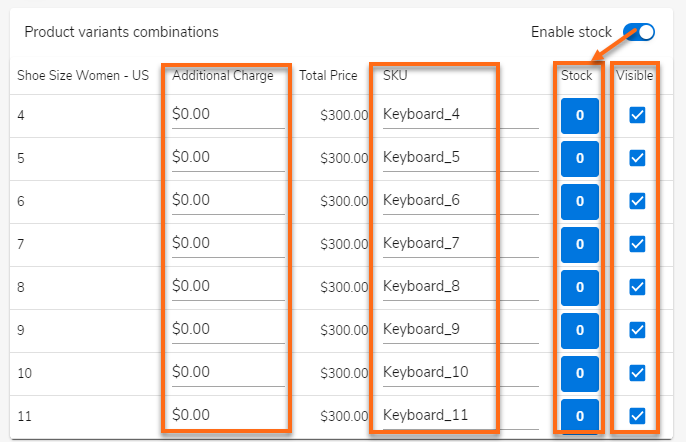
- Adding another product variant will create a combination with any current variant.
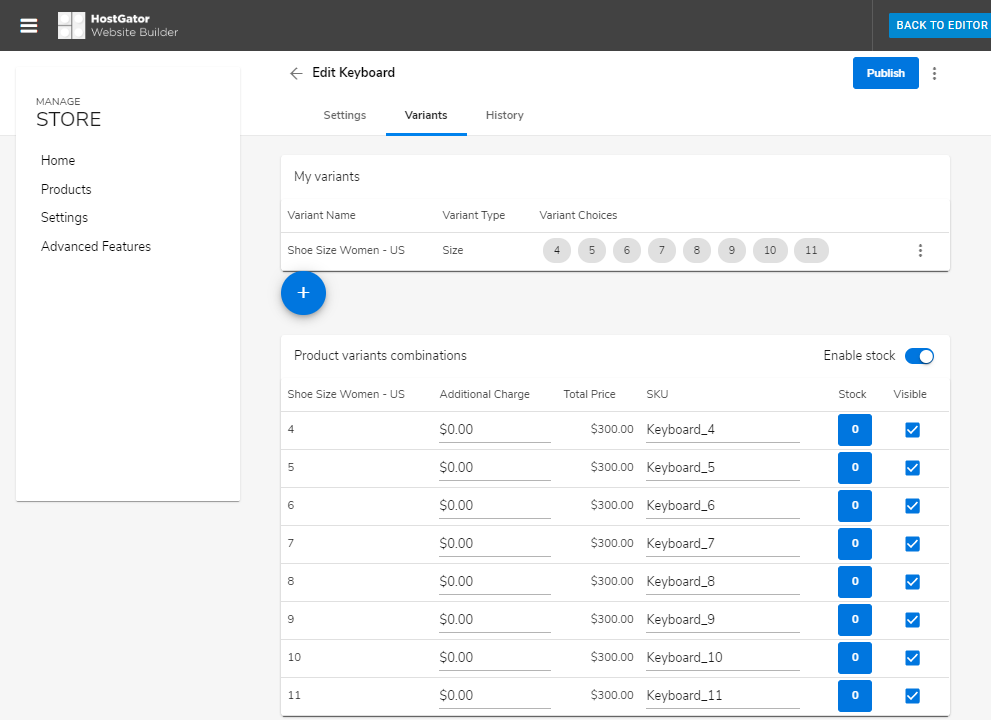
- When you are finished configuring your new product, click either Publish or click the back arrow ← to return to the product management page.
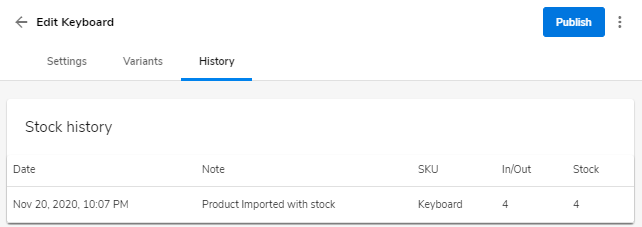
History Tab - This is where you can view your product's inventory.
To delete an item from your Store:
- Under the Products menu, locate the item you wish to delete.
- Put a checkmark in the item's box and scroll a bit to the right.
- Select Delete from the ellipsis menu.
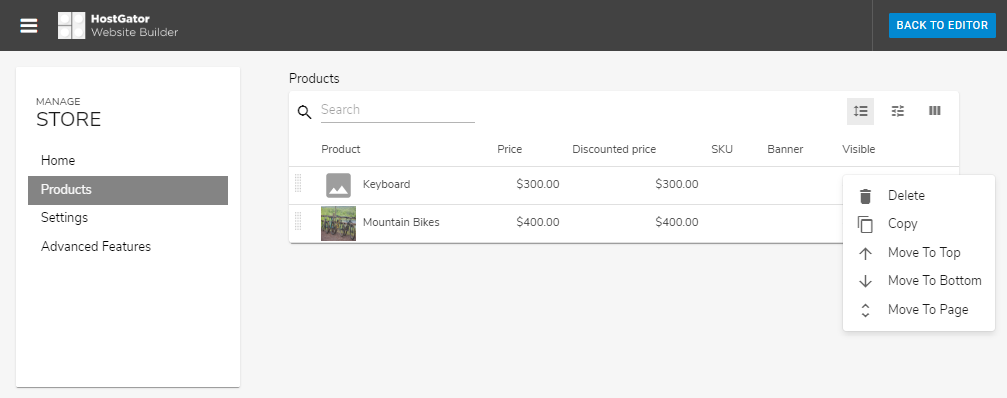
- Click Yes to confirm the deletion.

To add and/or view your categories:
- Navigate to your Store homepage.
- Click Advanced Features from the left-side menu of your Store homepage.
- From the features listed, enable Product Categories by sliding its toggle to the right.
- Once done, select Products from the left-side menu of your store dashboard.
- On the Products page, you will see a section for categories or an Add a category button if none exists.

- If no category exists yet, click the Add a category button.
- In the pop-up, enter a name for the category under which your products should be listed.
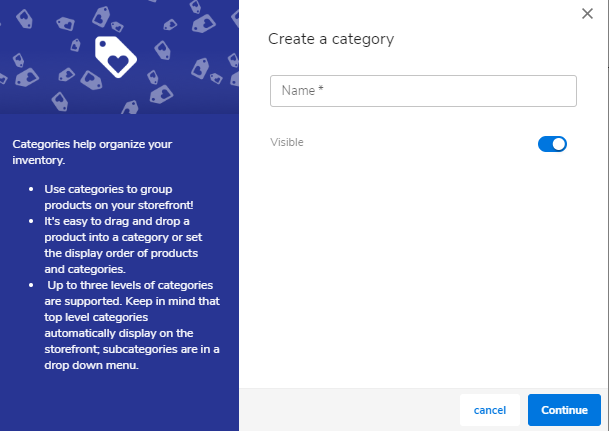
- You can toggle the visibility of the new category.
- Click Continue to add the new category to your Store.
To add new Parent Categories:
- Navigate to your Store homepage.
- Click Products from the left-side menu.
- Click + Add category from the right-hand column.
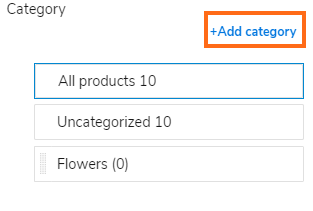
- Enter a name for the category under which your products should be listed.
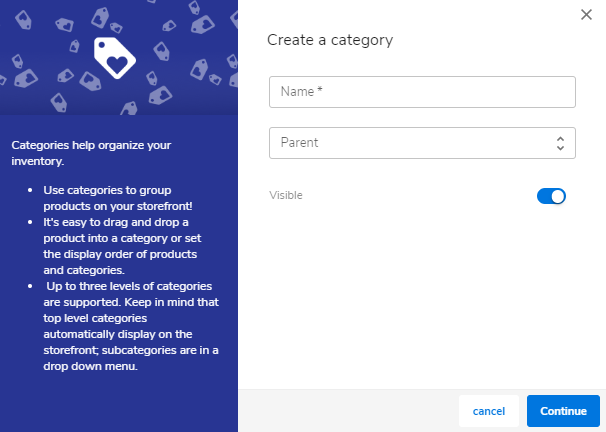
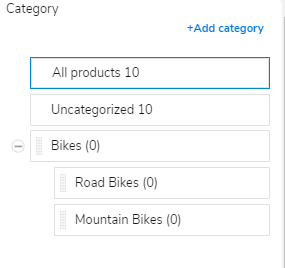
- Use the dropdown to select an existing category to be the parent of the new category. For example, the main parent category is Bikes. Under Bikes, you may have categories for Road Bikes, Mountain Bikes, etc.)
- Click Continue to add the new category to your Store.
- The new category will be displayed under the parent category.
To manage categories:
- Navigate to your Store homepage.
- Click on Products from the left-side menu.
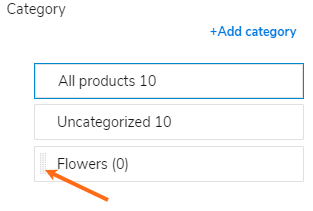
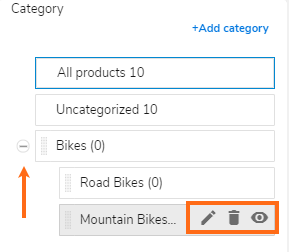
- Hover over the category on the right-hand side of the page to display the following options:
- Collapse (Plus or Minus icon) - For parent categories to expand or collapse a top-level category.
- Edit (Pencil icon) - Change the name of the category.
- Delete (Trashcan icon) - Remove the category completely.
- Visibility (Eye icon) - Hide the category from the storefront.
To change the categories for an item:
- Navigate to your Store homepage.
- Click Products from the left-side menu.
- Click on the name of the item you want to change.
- Scroll a bit down to the Advanced settings section and look for the Product category label.
- Use the dropdown to select which categories the product should be listed.

- Click the Publish button at the top to save your changes.
Shippo is an integrated software company that helps Ecommerce businesses incorporate shipping with multiple carriers through an API and web application. Website Builder users will now be able to utilize weight-based shipping with priorities like Next Day, 2 Day, or Standard Shipping within their online store. Follow the instructions below on how to set up Integrated Shipping with Shippo.
To enable or disable Integrated Shipping:
- Navigate to your Store homepage.
- Click Advanced Features from the left-side menu.
- Activate or deactivate Integrated Shipping by sliding its toggle.
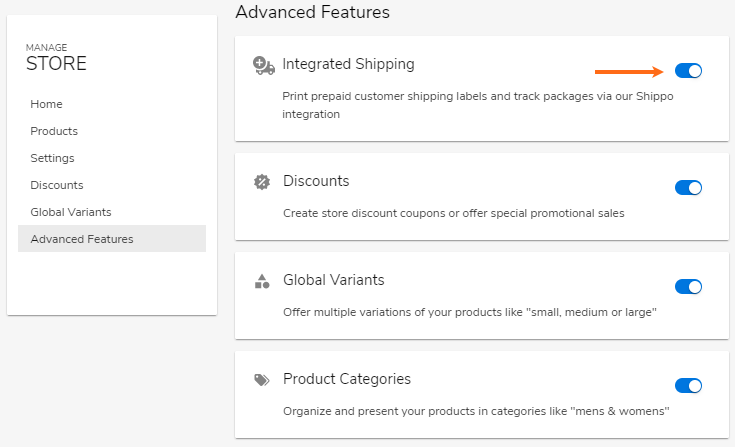
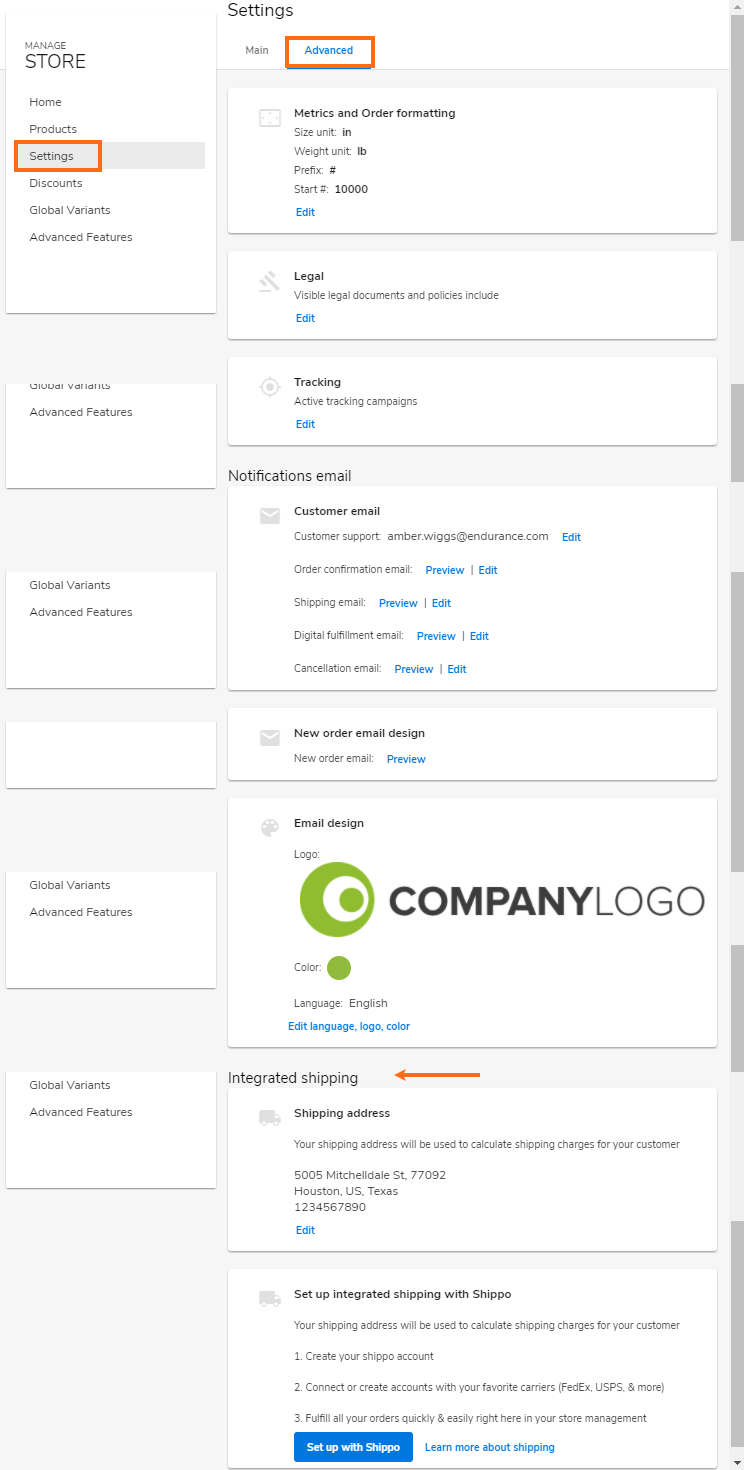
- If activated, the section to configure Integrated Shipping will appear within the Store Settings under the Advanced tab.
If it is deactivated, you will only see a Shipping section with the option to enter the Shipping address within the Store Settings.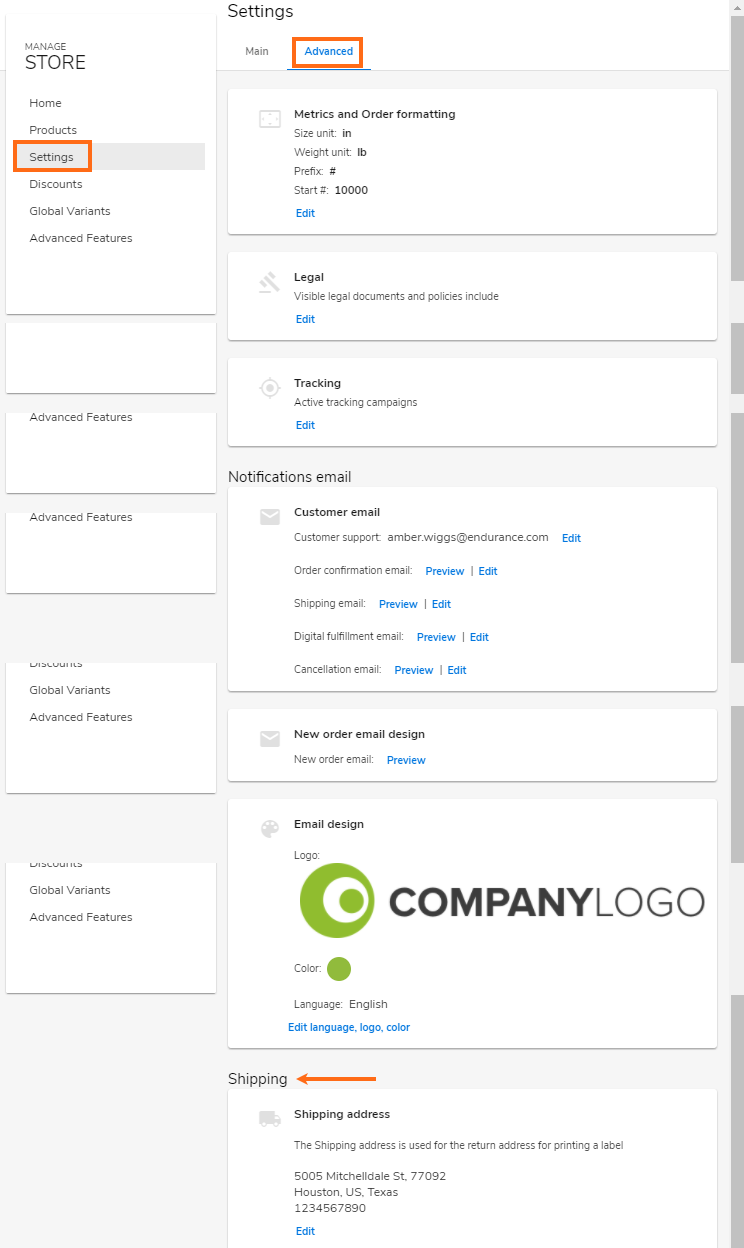
To configure Integrated Shipping:
- Navigate to your Store homepage using the directions above.
- Click Settings on the left-hand side menu.
- Click the Advanced tab at the top of the page.
- Scroll down to the section titled Integrated shipping.
- Within the Integrated shipping section, confirm that the Shipping address listed is correct. If not, click Edit to update the address and phone number.
- To set up Integrated Shipping on your website, you will need to create a Shippo account.
- Click the Set up with Shippo button to start the setup process in the Shippo UI.

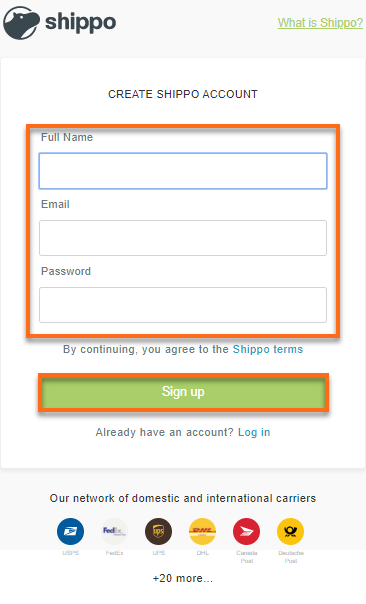
- Enter the details needed to create a Shippo account and click Sign up to continue.
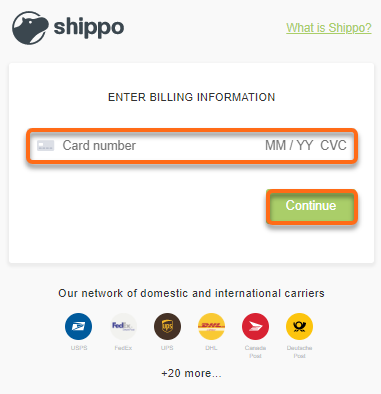
- Provide your billing information and click Continue.
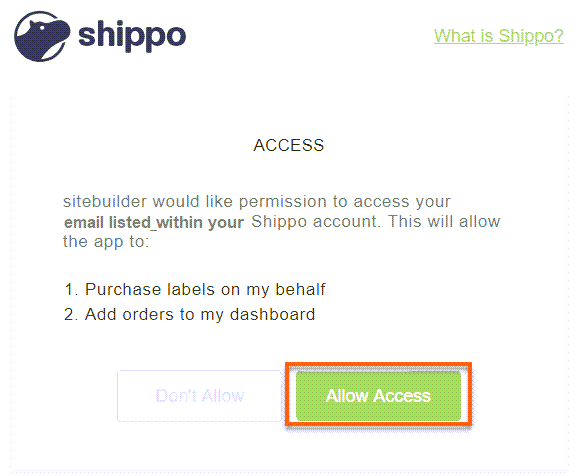
- Click the Allow Access button to add the shipping integration to your Store.
- Now that you have created an account with Shippo, you will want to select and set up the shipping carriers to use with your online store.
- Within your Shippo Account, click the Add carrier account button.
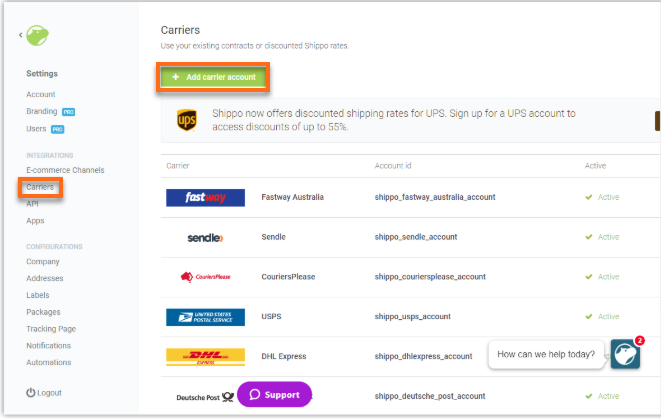
- You can Add New or enter an existing account (i.e., FedEx, UPS, or DHL).
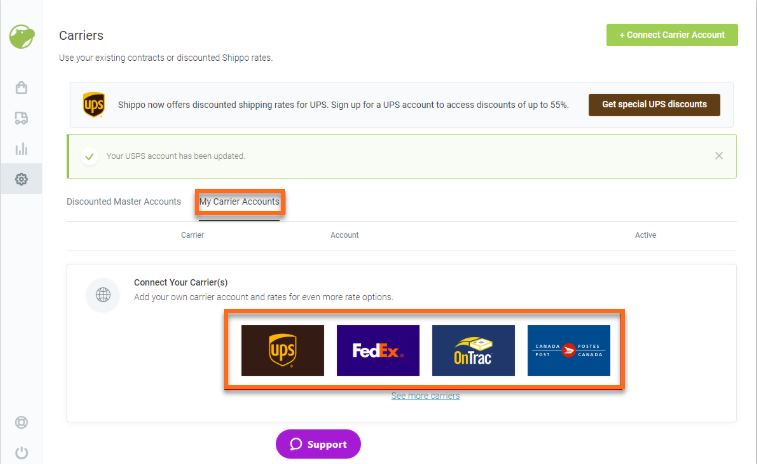
- After adding carriers, navigate back to your Website Builder store dashboard to set up default package sizes.
- Enter a default package size that is most common for your products to fit within. You may opt to manually enter a box size or select a standard package size from the dropdown menu.
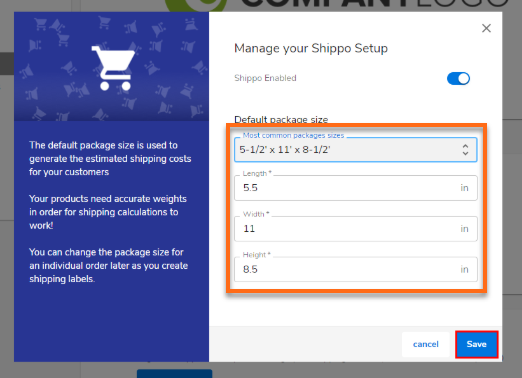
- Click Save.
- For the Store to use Integrated Shipping, you must provide the product weight.
- To add weight to products already within the Store:
- Click Products from the Store's left-hand menu.
- Click on the name of the product to edit.
- Go to the Advanced settings section and find the Weight.
- Enter the weight for that product.
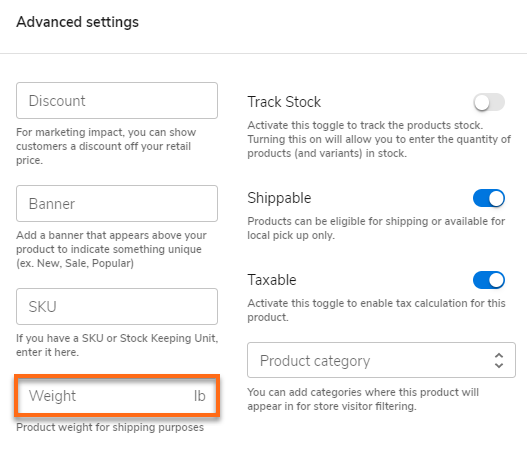
- Make sure to pay attention to the weight unit listed so that the entered amount is an accurate weight for the product.
- Click Publish.
- To add weight when adding a new product:
- When adding the product information, go to the Advanced settings section and find the Weight.
- Enter the weight of that product.

- Make sure to pay attention to the weight unit listed so that the entered amount is an accurate weight for the product.
- Click Publish.
- To add weight to products already within the Store:
To add a new discount for your Store:
- Navigate to your Store homepage.
- Click Advanced Features from the left-side menu.
- Click the toggle to activate Discounts.
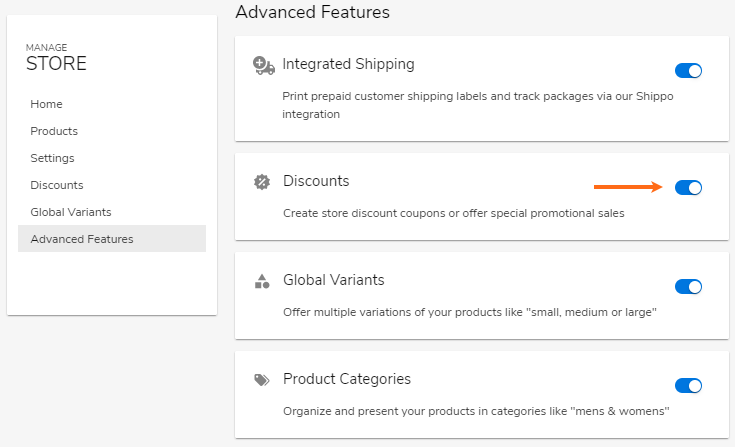
- If activated, you should see Discounts on the left-hand menu.
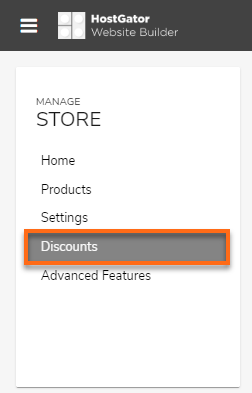
- Once the toggle is enabled, select Discounts on the left-hand side menu.
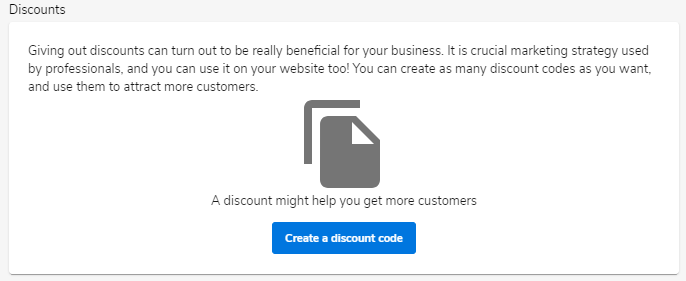
- Click the Create a discount code button.
- On the next page, select the Coupon type.
- Pending upon your selection, you will then fill out the Price amount or Percentage amount.
- Fill out the remaining fields for the coupon name, coupon code, and the duration for which the code will be valid.
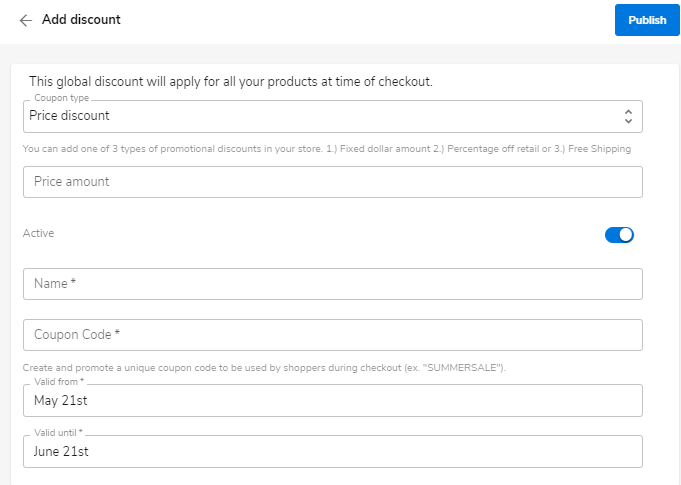
- Price or Discount Amount - Enter an amount that will be discounted from an order.
- Active - Use the toggle to enable or disable if the code can be used.
- Name - Enter a name for the discount code.
- Code - Enter a unique code for the customer to enter during checkout.
- Valid from - Set a date for when the discount will start working.
- Valid to - Set a date for when the discount will stop working.
- Click Publish.
To manage a discount code:
- Navigate to your store dashboard.
- Click Discounts from the left-hand side menu.
- From here, you can see all of the discount codes that have been created. Using the eye icon found under the Active header column, you can toggle on and off the discount code.

- Note: Clicking on the three vertical bars in the upper right-hand corner will display options for which columns are used to display discount codes' details.
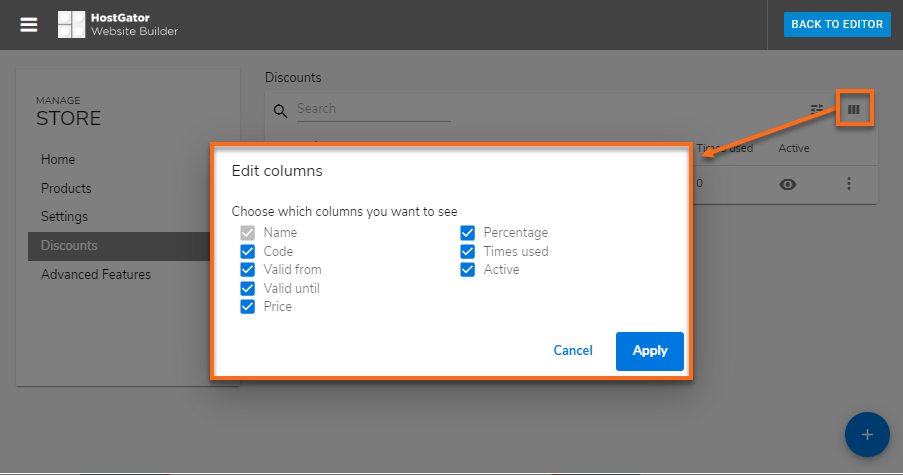
- Note: Clicking on the three vertical bars in the upper right-hand corner will display options for which columns are used to display discount codes' details.
To delete a discount code:
- Navigate to your store dashboard.
- Click Discounts on the left-hand side menu. Then click the three dots to the right of the code.
- Select Delete from the dropdown.

- Click Yes to confirm the deletion.

To set up a new payment method:
- Navigate to your Store homepage.
- Click Settings on the left-hand side menu.
- Find the section for Payment providers and click Edit.

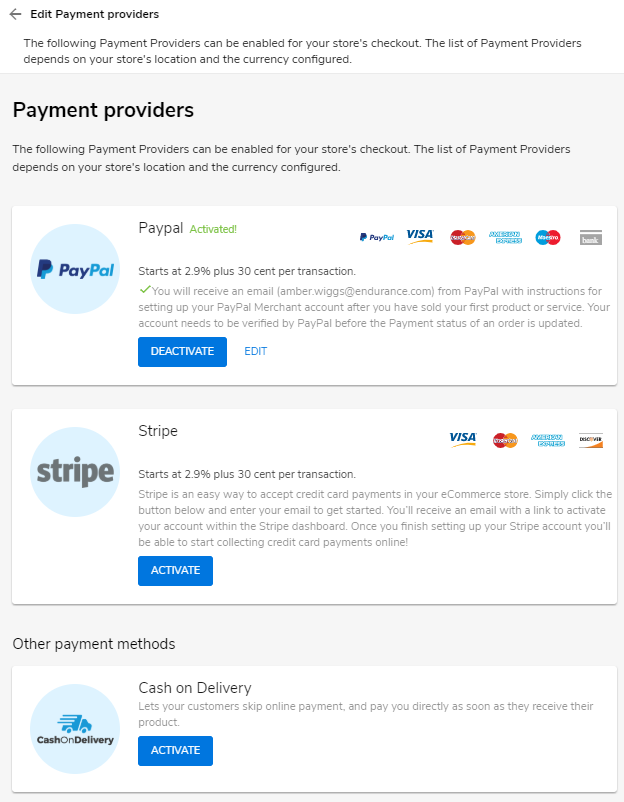
- On this page, you will have the option to set up your PayPal account, Stripe account, or Cash on Delivery to accept payments. Click the Activate button next to the payment provider to add that payment method to your Store.
To enable or disable Global Variants:
- Navigate to your Store homepage.
- Click Advanced Features from the left-side menu.
- Click the toggle to the right of Global Variants to activate or deactivate this advanced feature.
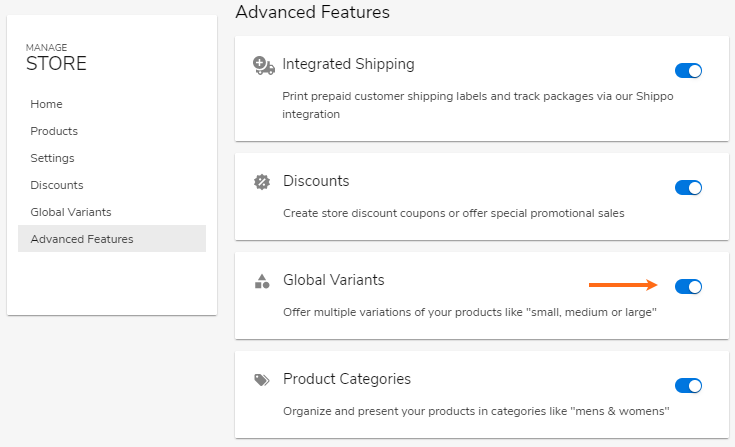
- If activated, Global Variants will appear in the menu.
If deactivated, Global Variants will be removed from the left-hand menu.
To add a new Global Variant:
- Navigate to your Store homepage.
- Click Global Variants on the left-hand side menu.
Note: If you do not see Global Variants listed in the left-hand menu. - Hover over the + button in the lower right-hand corner, then click Add.
- Enter a Name for the global variant.
- Next, select the type of Variant type:
- Size: This will provide a list of options.
- Color: This will provide a color picker with predefined colors or a color scale.
- Other: This will provide a list of options.
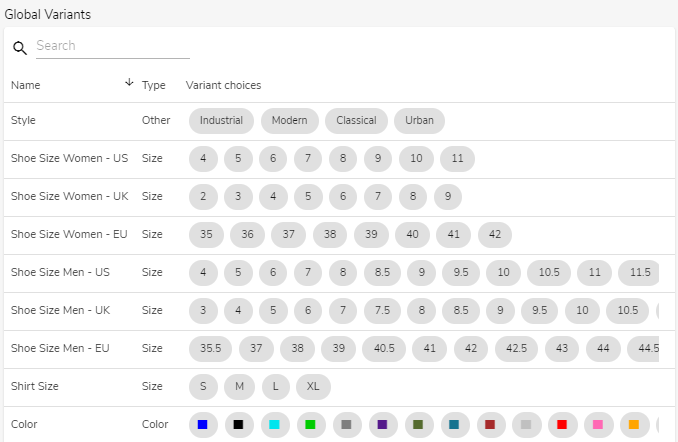
- Depending on the variant type selected, you will use the color picker to set the various colors or type in the name for each product choice.
- Click Publish to save your changes and return to the global variant page.
To edit a global variant:
- Navigate to your Store homepage.
- Click the Global Variants on the left-hand side menu.
Note: If you do not see Global Variants listed in the left-hand menu. - Click on the name of the item you want to change.
- Make any changes to the variant, click Publish to save your changes, and return to the global variants page.