Knowledge Base
Categories: WordPress
W3 Total Cache WordPress Plugin
One way to optimize WordPress is to install W3 Total Cache (W3TC) from your WordPress Dashboard under Plugins.
We do not recommend using W3 Total Cache while other caching plugins are enabled, as it causes numerous issues upon activation. We recommend using WP Super Cache. You can activate the plugin from the WordPress Dashboard unless you need advanced features such as CDN integration or enhanced caching. WP Super Cache is easier to configure and is lighter in weight.
How to install W3 Total Cache
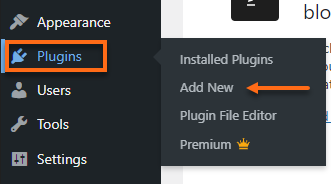
- Log in to your WordPress Dashboard.
- Navigate to Plugins, then click on Add New.
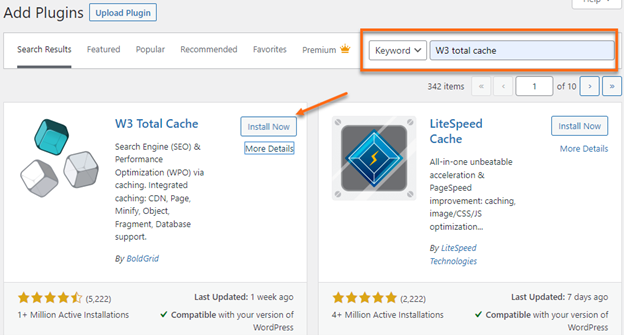
- Search for W3 Total Cache, then click the Install Now button.
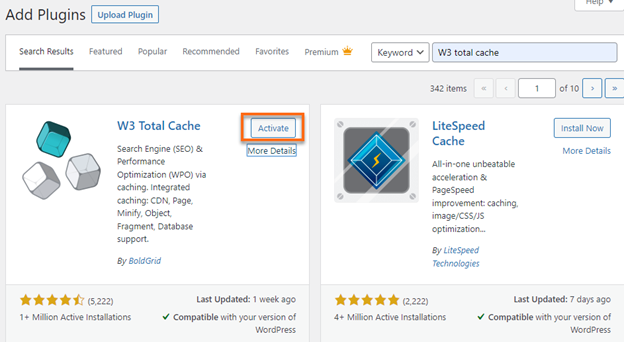
- Click Activate.
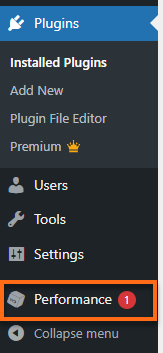
- Upon activating the plugin, the Performance option will appear in the left menu.
- Click on Performance, then go to General Settings for configuration.
Recommended Settings
- Page Cache: Enable
- Page Cache Method: Disk (Enhanced)
- Database Cache: Disabled
- Object Cache: Disabled
Other options for optimizing WordPress include WP Super Cache, an alternative to W3 Total Cache.
How to uninstall W3 Total Cache
- Log in to your WordPress Dashboard.
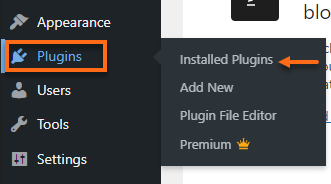
- Go to Plugins, then click on Installed Plugins.
- Locate W3 Total Cache, then click Deactivate.

- Afterward, click on the Delete link.

- To confirm deleting the plugin, click OK.
Did you find this article helpful?