Pointing Your Domain to SquareSpace
Many HostGator customers order service from Squarespace to build and host their website.
Squarespace does not use nameservers and requires its customers to have DNS hosting elsewhere and manually set up the DNS to point to Squarespace. This article will show you how to point your HostGator domain name to a Squarespace website.
This is a two-step process. You will need to edit existing DNS zone records for your domain with the Zone Editor in the Domains section of your cPanel.
- In the examples below, replace example.com with the domain name you wish to redirect.
- For the CNAME and A record(s), you will need to use the values provided to you by Squarespace. These are frequently different for each user and must be specific to your account.
You may find some links below that will redirect you to your cPanel and its features, provided that the following conditions are met:
- You are logged in to your Customer Portal. You can also log in after clicking the link.
- The hosting package you are attempting to access is either Shared or Cloud.
Step 1: Editing your CNAME record
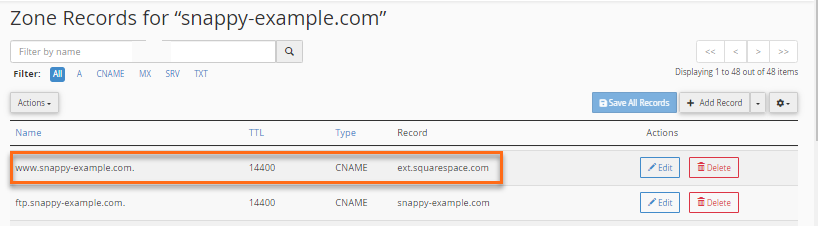
You almost certainly already have a CNAME entry set up in your domain's Zone File for www. You will edit this existing CNAME to direct traffic to ext-cust.squarespace.com.
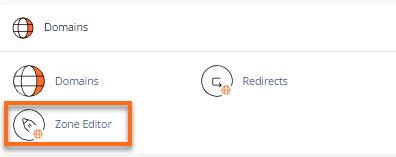
- Log in to your cPanel.
- Navigate to the Domains section, then click on the Zone Editor icon.
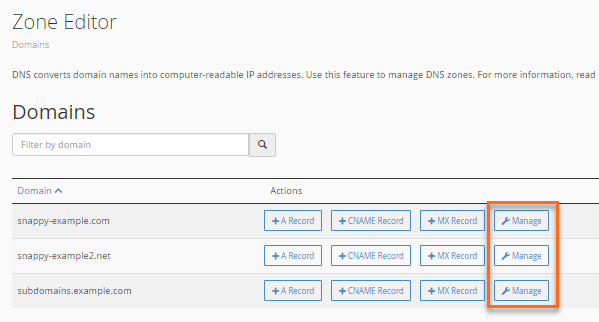
- Click on the Manage button for the domain you are modifying.
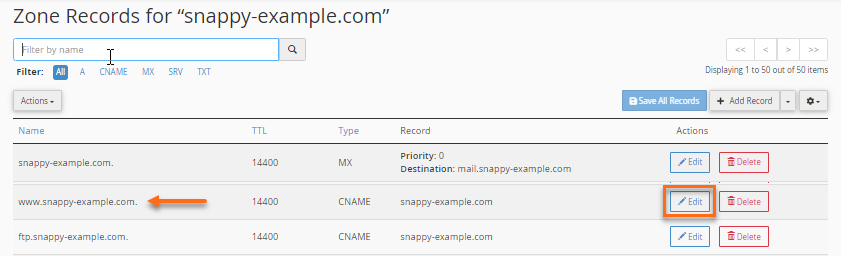
- Click the Edit button on the entry for www.example.com.
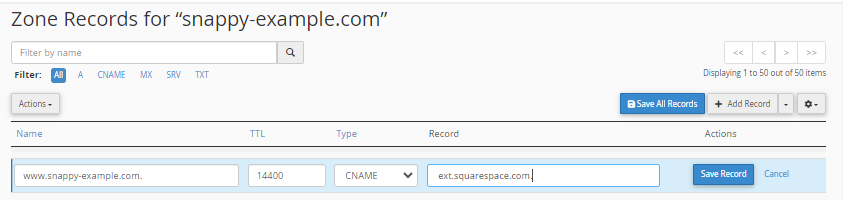
- Replace the CNAME text with the CNAME provided by Squarespace and click Save Record. (Usually, the CNAME they provide is ext.squarespace.com.)
- You will now see the entry with your domain name directing to ext.squarespace.com.
Step 2: Editing your A record(s)
This step will direct the A record for your domain to a Squarespace IP. Before performing this step, you will need to be provided with that IP address by Squarespace.
- Log in to your cPanel.
- Navigate to the Domains section, then click on the Zone Editor icon.
- Click on the Manage button for the domain you are modifying.
- Click Edit on the domain's A record.
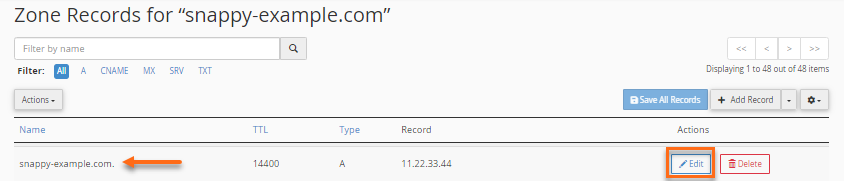
- Replace the IP Address provided by Squarespace under the Record field.
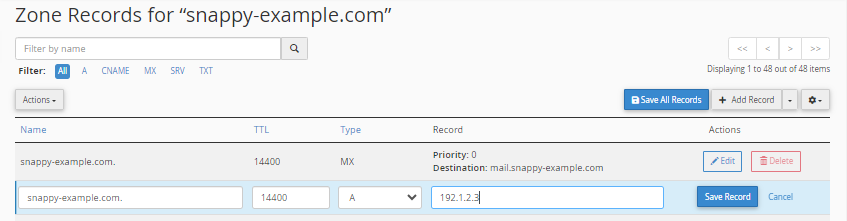
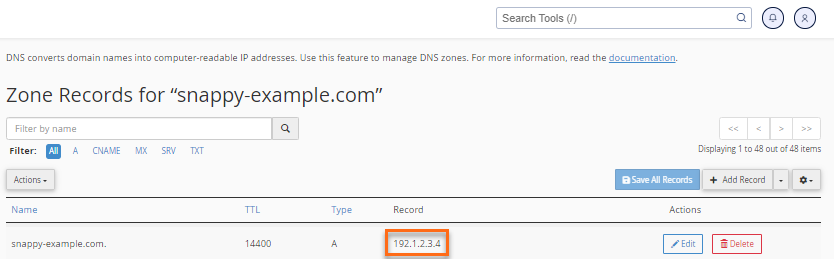
- The entry will now show your domain name pointing to Squarespace's IP address.
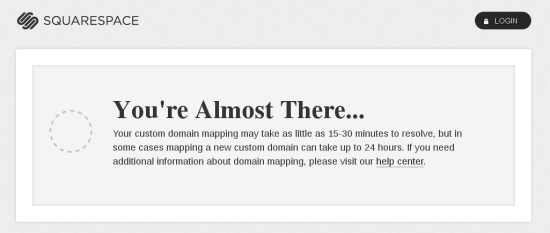
- Since the propagation of these changes will take time, you may not be able to access your Squarespace site immediately. Until the changes are propagated, you may see a message similar to this one:
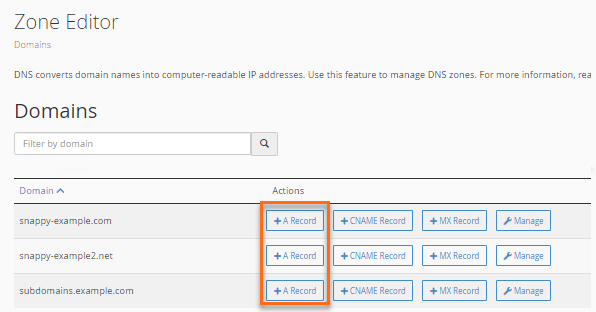
Squarespace may provide you with up to 4 IP addresses. You can create multiple A records for your domain. First, edit any existing records to match using the instructions above if you already have more than 1 A record. Then, if additional A records are required:
- Log in to your cPanel.
- Navigate to the Domains section, then click on the Zone Editor icon.
-
Click on the + A Record button.
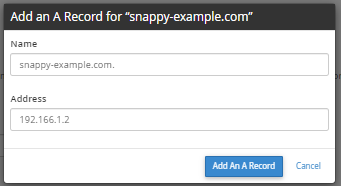
- There will be a pop-up box; enter the additional IPs provided by Squarespace.
-
After editing and adding the desired records from Squarespace, check if you have any additional A records with different values from those provided by Squarespace. If yes, you should remove them:
- In the DNS Zone Editor, select the excess A record.
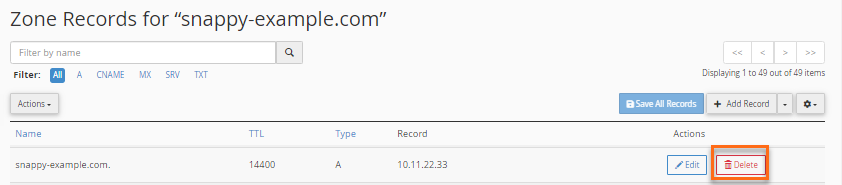
- Click Delete.
- In the new section that appears, click the Delete button to confirm the removal of the excess A record.
After completing all of your modifications, there may be up to 8 hours of propagation before your site functions correctly.
You may also consult Squarespace's support documentation for further information. The following link is for reference only and will open in a new tab. Please note that HostGator cannot offer direct support for the information provided below. - In the DNS Zone Editor, select the excess A record.