Plesk File Manager Guide: Tools, Navigation & File Control
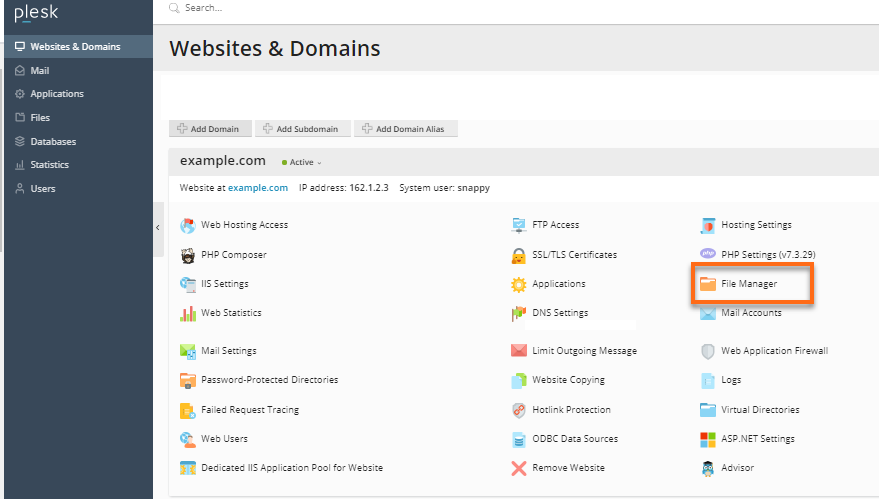
Plesk provides a built‑in File Manager so you can manage all files on your hosting subscription. You can access the File Manager by:
- Log in to Plesk.
- In the Websites & Domains tab, select the File Manager from the icons on the page.
The various features and functions of the File Manager are covered in the following.
Plesk File Manager Toolbar
In the Toolbar section of the File Manager, you’ll find multiple tools for file management in Plesk:

- + symbol
- Upload File. To upload a single file.
- Upload Directory. To upload a single file, multiple files, or a directory with the files therein.
- Import file via URL. To upload a file not from your computer but another website or FTP server.
- Create File. To create a new, blank file.
- Create Directory. To create a new directory.
- Copy. To copy the selected file or directory to another directory.
- Move. To move the selected file or directory to another directory.
- Archive
- Extract Files. To extract files from selected archives to the current directory.
- Add to Archive. To add selected files to an archive.
- More
- Calculate Size. To calculate the size of selected files.
- Change Timestamp. To change the timestamp of selected files.
- View Options. To change File Manager Settings.
- Remove. To delete a file or a whole directory of files.
Files section in the Plesk Manager
In the Files section of the File Manager, there is a listing of all the files and directories at the root level of your account. Clicking on any of the directory names will take you inside the directory. Clicking on a filename will show you the file's contents if they are a text format.
File Listing
The file listing contains the following columns:
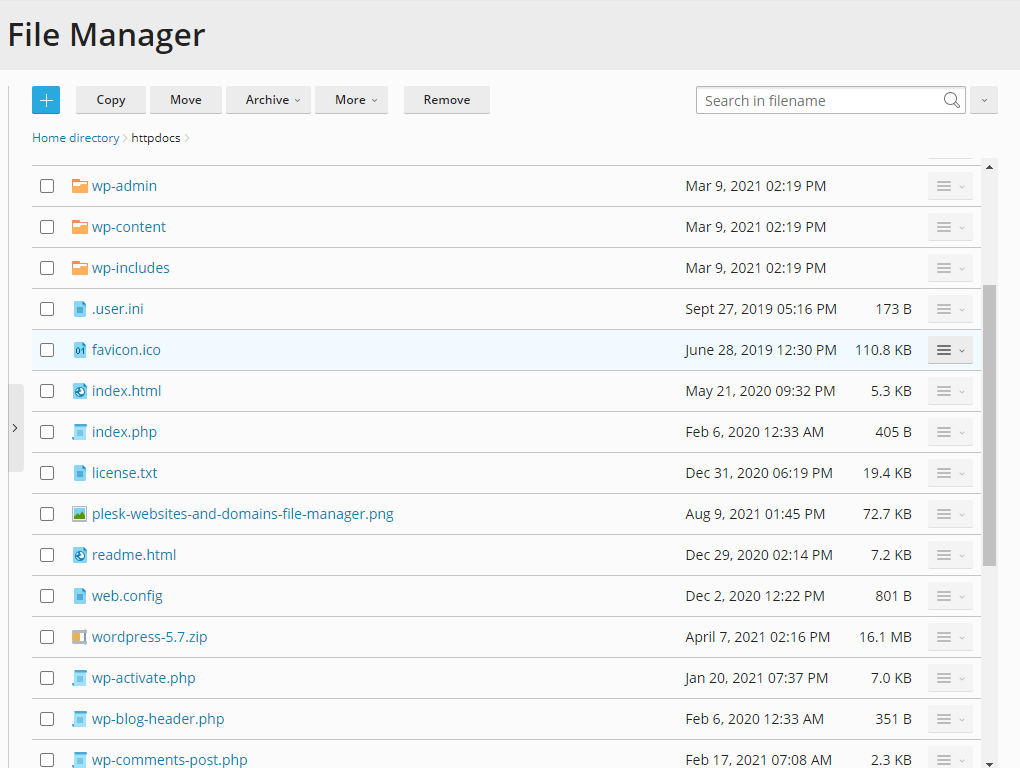
- Name. Shows the file name
- Modification date. Shows when the file or directory was last modified on the server
- Size. For files, this column will show the size of the file on disk, but directories will only show the size of the directory entry and not the total size of all the files within it. To see the size of a directory's contents:
- Select the checkbox to the left of the directory's name.
- Click More and select Calculate Size in the toolbar, and the Size column will update to show the new value.
- ≡ three-line menu icon
- Edit in Code Editor and Edit in Text Editor. This is where you can add code or change code in your file.
- View. This is where you can view the code in your file.
- Open in Browser. This is where you open the current file in your default browser.
- Open in Log Browser. This is where you can troubleshoot issues with your websites.
- Download. This is where you can download the current file.
- Rename. This is where you can rename the current file.
- Change Permissions. This is where you can allow or deny permissions for files or directories.
Navigating Directories in Plesk
If you are in a directory below your subscription's root level, there is a ![]() at the top, which is the Linux idiom for up one directory. You can use this link to navigate backward.
at the top, which is the Linux idiom for up one directory. You can use this link to navigate backward.
In addition, there are breadcrumb navigation lines just above and below the listing that you can use to navigate up more than a single directory at a time; to the right of those is a selection to limit the number of entries displayed.
How to upload files in Plesk File Manager
To upload a file:
- Click the + symbol to expand the options.

- Select Upload File from the options.
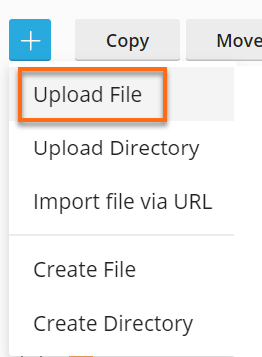
- Browse for the file you want to upload and click Open.
To upload several files, the best way to do this is to package them as a .zip archive file, upload it and then select Extract Files from the toolbar of the Files section.
How to Copy or Move Files
If you want to copy or move a file:
- Select the checkbox next to one of the files in the listing.
- Click Copy/Move from the toolbar. You will be brought to a menu that lets you specify where the file should go.
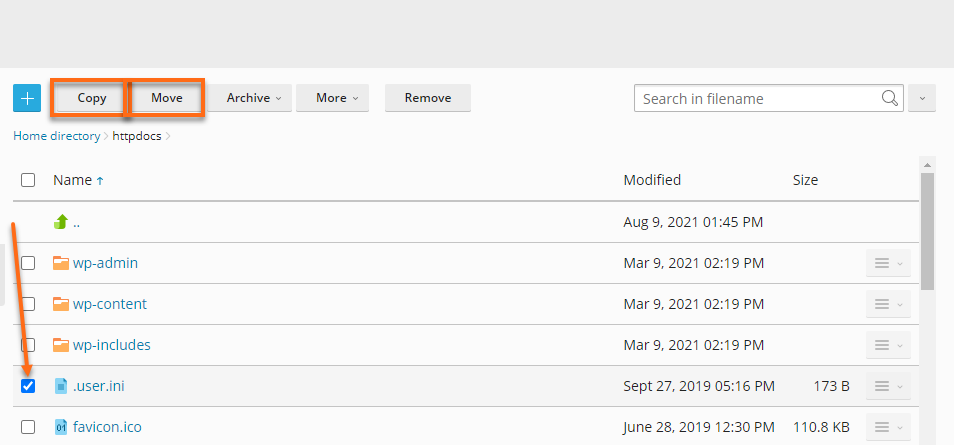
- Once you have chosen a path, click OK to finish the task.
The file will be copied or moved into place; otherwise, an error message will inform you of what went wrong.
Next: Basic Linux File Permissions