Order Management - Warehouse
To manage orders, you must first set up your shipping system. A warehouse is vital for tracking and managing inventory.
In this article, we will discuss the following:
Once you've established that your dropship supplier is suitable for your website, proceed to manage your warehouses as outlined below:
- From your WordPress Dashboard, log in to Ecomdash.
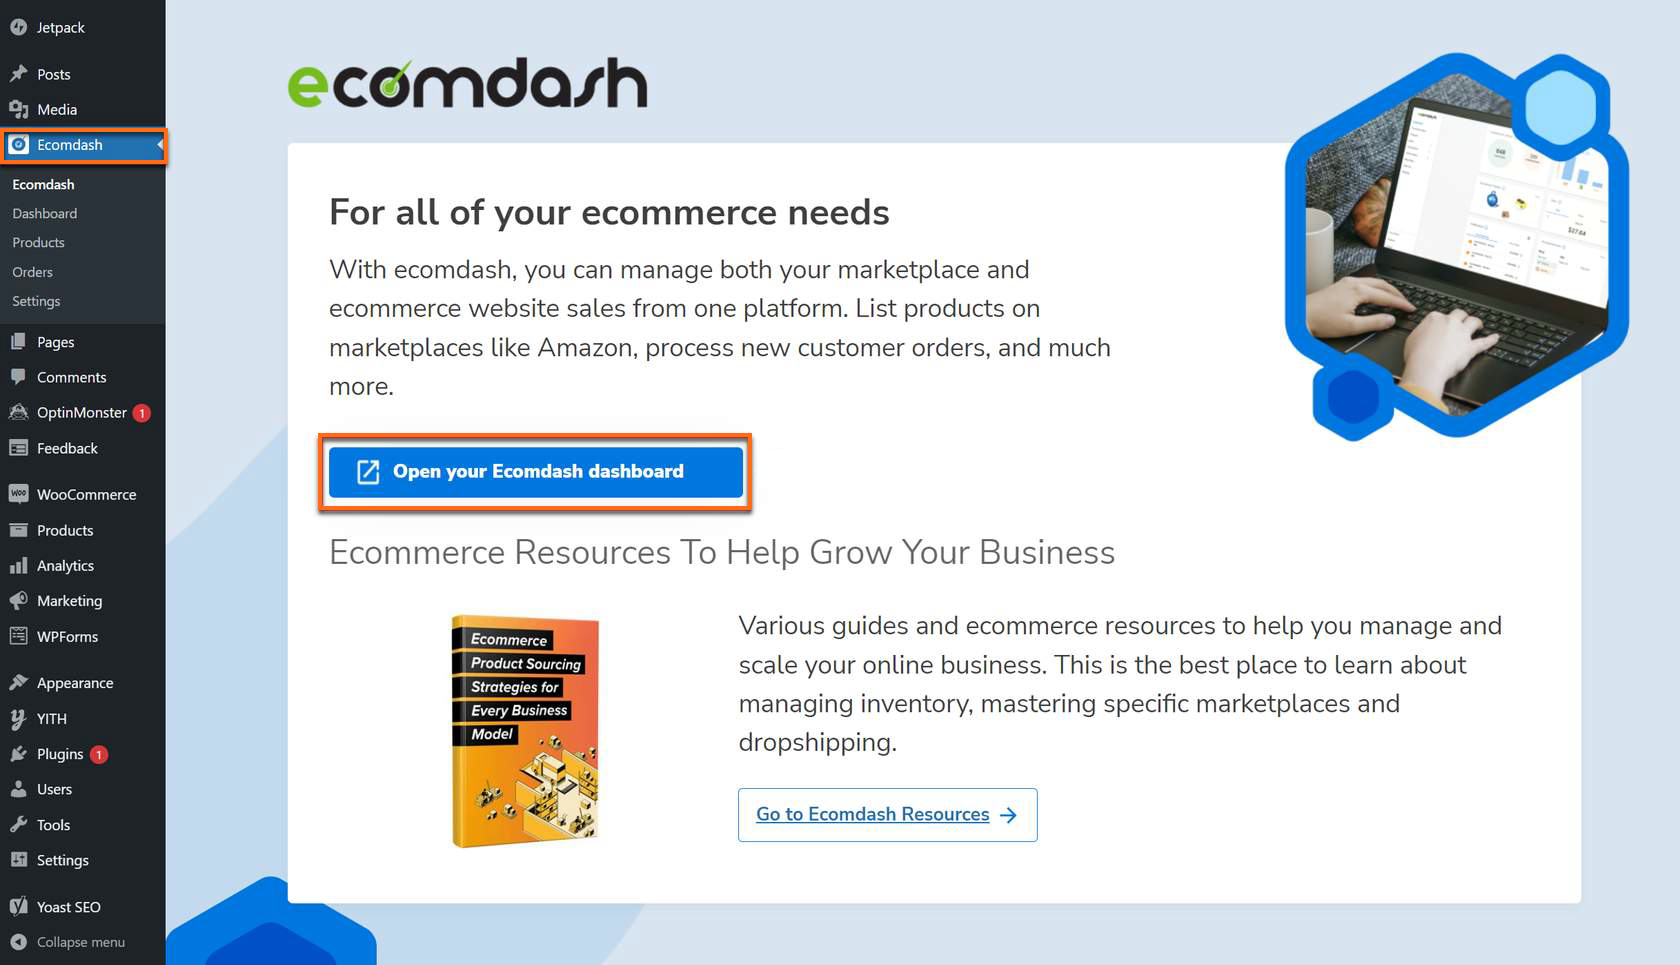
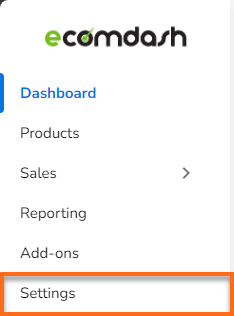
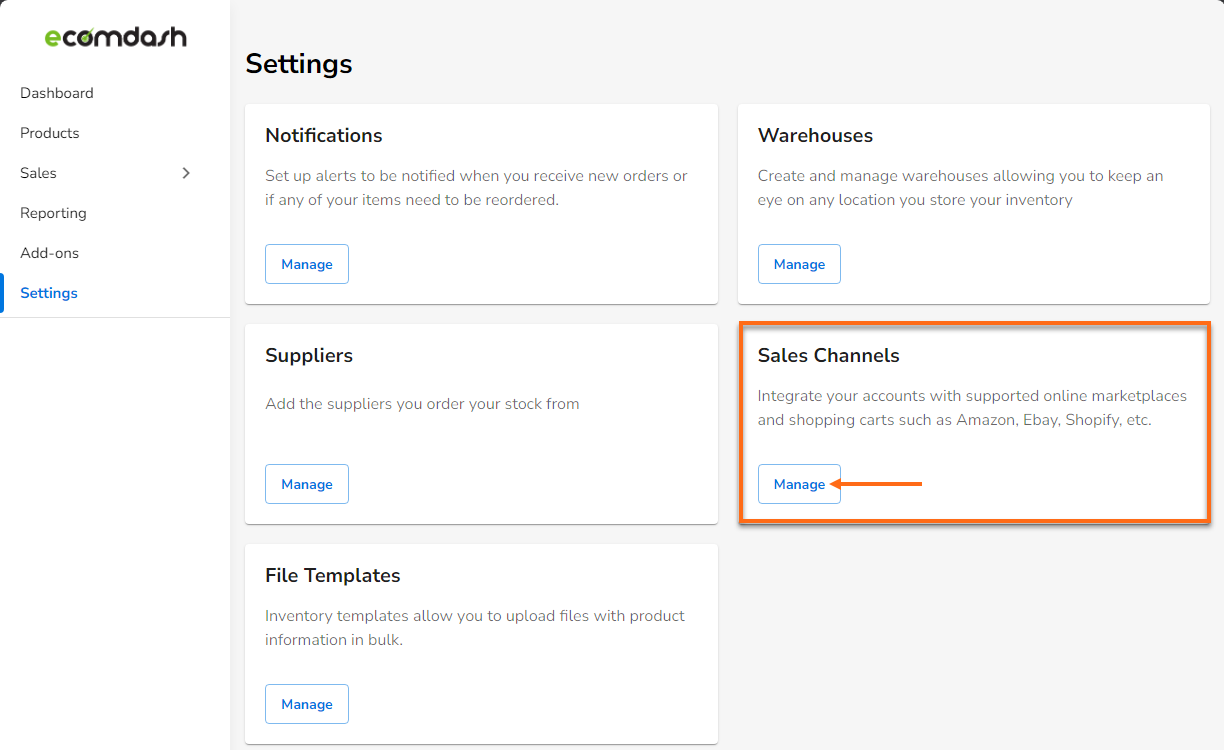
- Once in the Ecomdash, click Settings in the left-hand navigation menu.
- Look for the Warehouses tile, then click the Manage button.
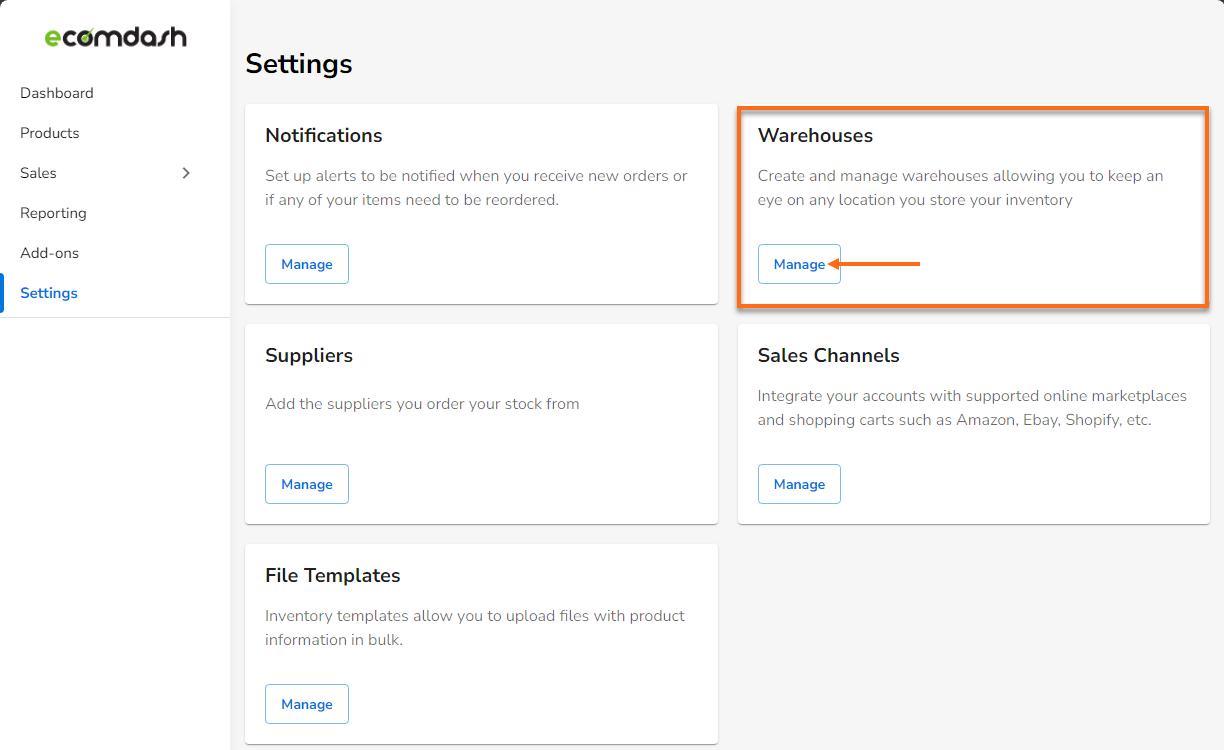
This redirects you to the Warehouse page, where you can create and edit warehouses.
Create a New Warehouse
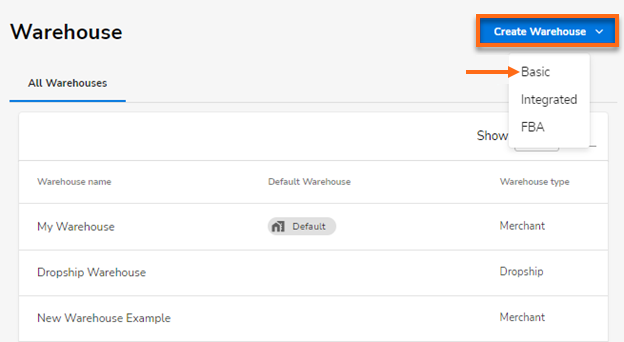
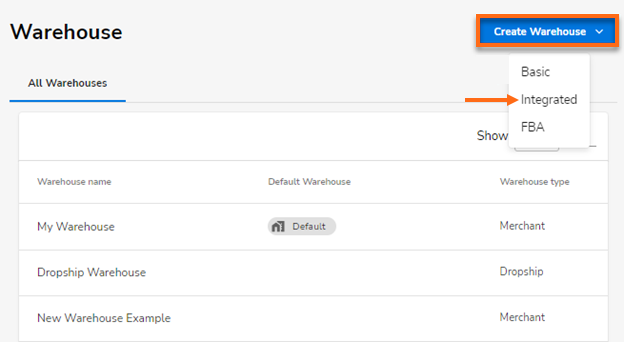
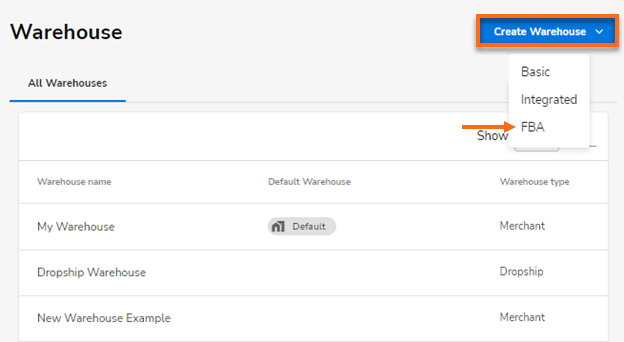
There are 3 options for creating a warehouse: Basic, Integrated/Dropship, and Fulfillment by Amazon.
- Click the Create Warehouse dropdown on the upper right side of the Warehouse page.
- Select Basic, Integrated, or FBA (Fulfillment by Amazon) from the dropdown, depending on your store's inventory needs.
Basic Warehouse
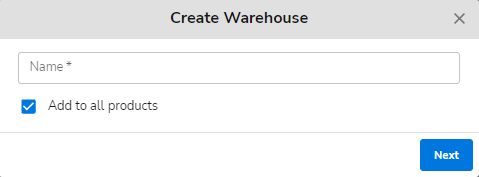
- Choose Basic from the Create Warehouse dropdown.
- Enter your new warehouse's name in the Create Warehouse pop-up and click Next.
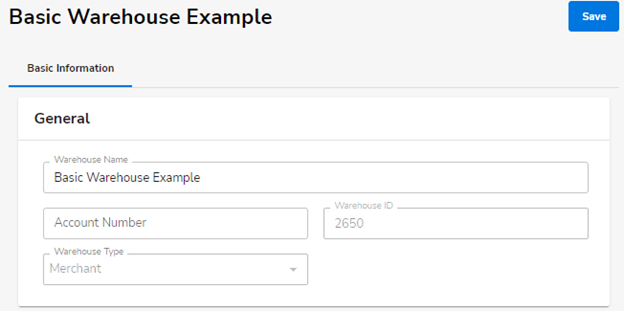
- In the Basic Information tab, enter all required warehouse details.
- General - Enter a new Warehouse Name, add an Account Number and a Warehouse ID, and select a Warehouse Type.
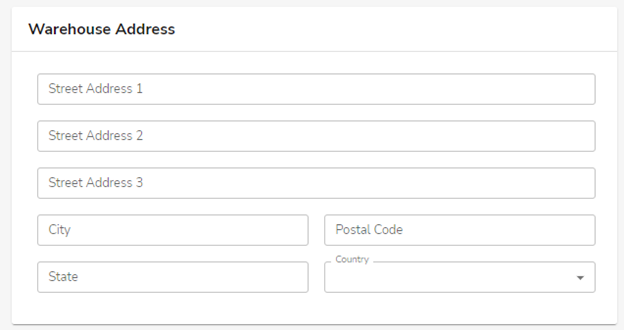
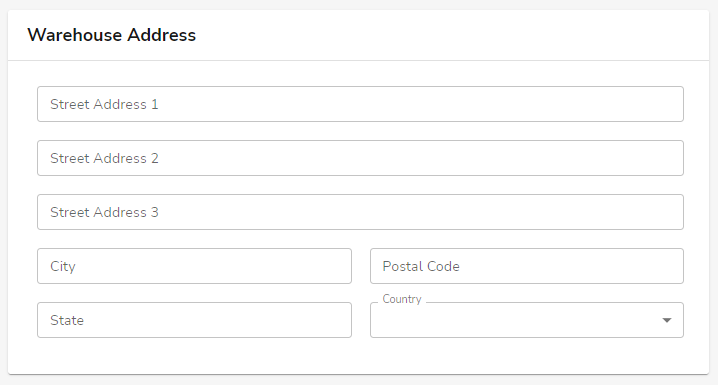
- Warehouse Address - Enter the Street Address, City, Postal Code, State, and Country.
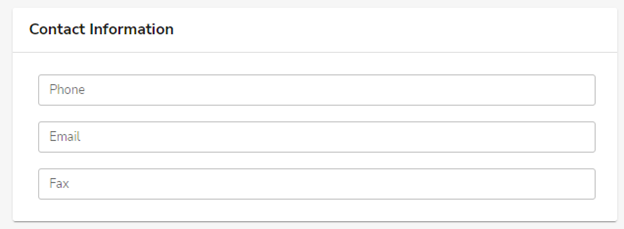
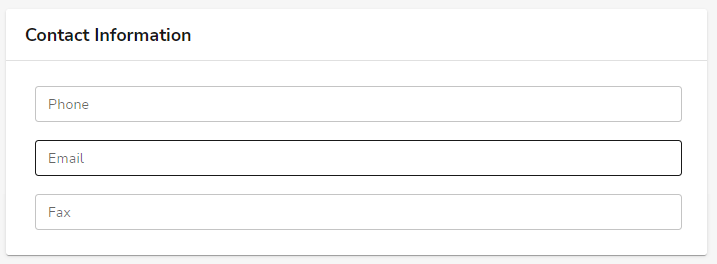
- Contact Information - Enter the Phone number, Email Address, and Fax number.
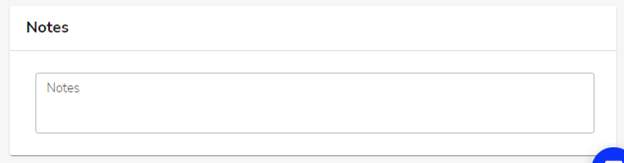
- Notes - Input any related warehouse information. You can add essential highlights for the warehouse details.
- General - Enter a new Warehouse Name, add an Account Number and a Warehouse ID, and select a Warehouse Type.
-
Click the Save button in the top-right corner.
Integrated/Dropship Warehouse
- Choose Integrated from the Create Warehouse dropdown.
- Enter your new warehouse's name in the Create Warehouse pop-up and click Next.
- In the Basic Information tab, enter all required warehouse details.
- General - Enter a new Warehouse Name, add an Account Number and a Warehouse ID, and select a Warehouse and an Integration Type.

- Warehouse Address - Enter the Street Address, City, Postal Code, State, and Country.
- Contact Information - Enter the Phone number, Email Address, and Fax number.
- Notes - Input any related warehouse information. You can add essential highlights for the warehouse details.

- General - Enter a new Warehouse Name, add an Account Number and a Warehouse ID, and select a Warehouse and an Integration Type.
-
Click the Save button on the top right.
Fulfillment By Amazon Warehouse
To create an FBA Warehouse, you must first integrate your Amazon account into your Online Marketplaces account.
Integrating your Amazon account will allow the website to import your sales orders. You can also choose to list new products and update existing product listings.
- Click Store on the left menu, then select Settings. Look for the Sales Channels tile on the right, then click Manage.
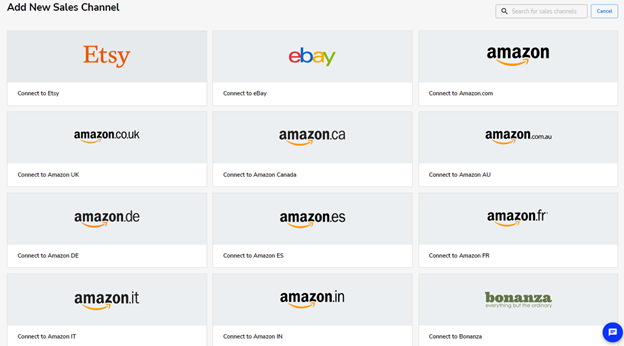
- Under the Marketplaces tab, click the Connect Marketplaces button.

- Different sales channels will show up. Click the Connect button for the specific Amazon marketplace you want to connect to.
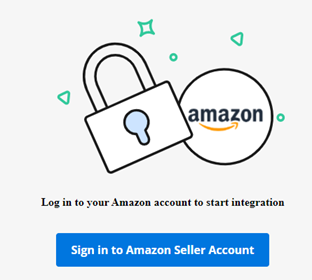
- This will redirect you to the Amazon integration page. Click the Sign in to Amazon button and log in to your account.
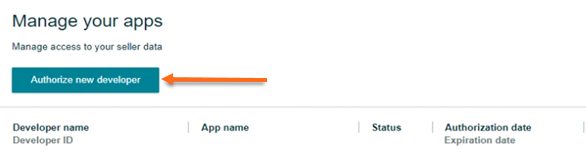
- Once logged in, you will see the User Permissions page of the Amazon Seller Account. Go to the Third-party developer and apps section, then click Visit Manage User Permission.

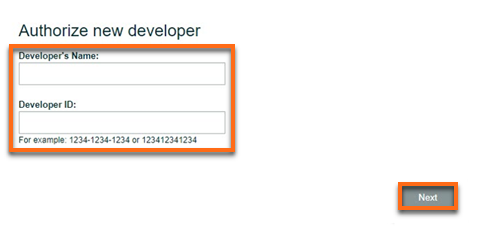
- Click the Authorize new developer button in the Manage your apps section of your Amazon Seller Account.
- Once done, enter Ecomdash in the Developer's Name field and the 12-digit code from the Ecomdash integration page for Amazon (this code will differ by country). Click the Next button to continue.
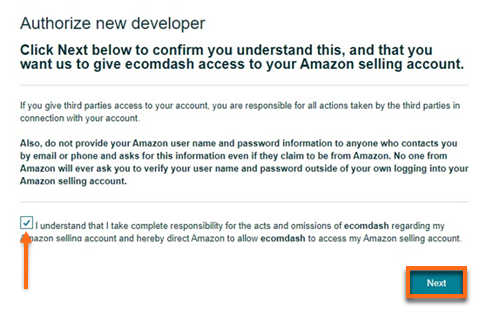
- Authorize Ecomdash as a new developer. Make sure to tick the checkbox before you hit the Next button.
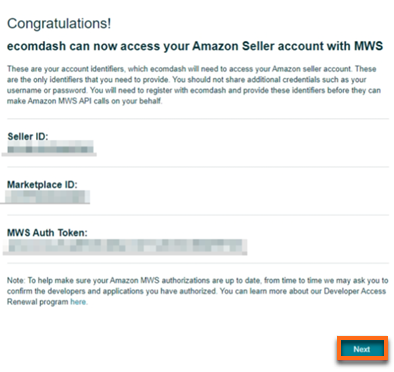
- Capture this information from your seller account before you click Next.
- Input the captured information into your Ecomdash account, then click Connect Store.
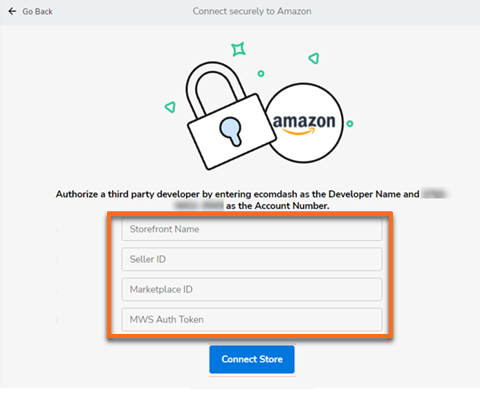
- Storefront Name - Customize this channel name in your Ecomdash account.
- Seller ID
- Marketplace ID
- MWS Auth Token
-
Click Next in Amazon, and it will reload your list of apps/developers and save it in your Ecomdash account. You will also now be able to see Amazon listed in your integrations.
- Select FBA from the Create Warehouse dropdown.
- Select Amazon from the Sales Channel tab, then click Next.
- Provide all required details, then click Save to proceed.
Edit an Existing Warehouse
- In the Warehouse tab, select the warehouse you want to edit.
- Click the vertical ellipses on the right side of the chosen warehouse and select Details.
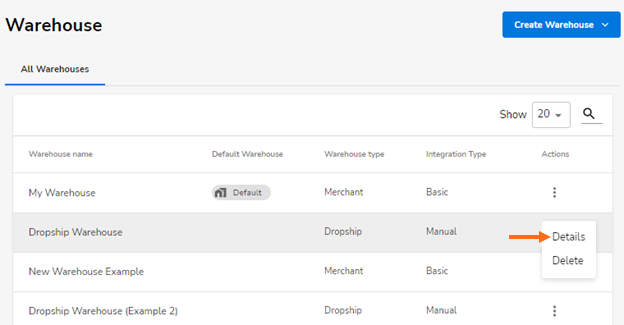
- In the Basic Information tab, enter all the necessary warehouse details.
- Click Save on the top-right.
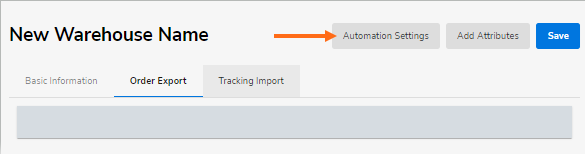
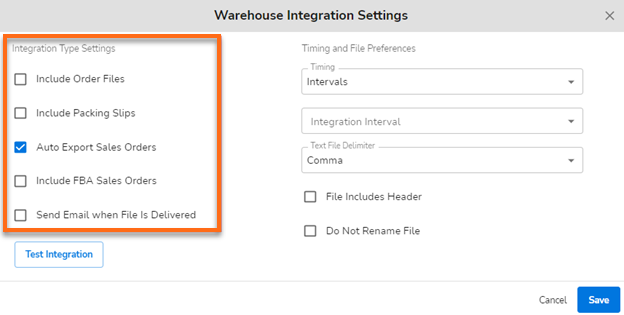
Set Up an Order Export Feed
- In the Warehouse tab, select the warehouse you want to edit.
- Click the vertical ellipses on the right side of the chosen warehouse and select Details.
- In the Order Export tab, hit the Automation Settings button.
- Enable the Auto Export Sales Orders.
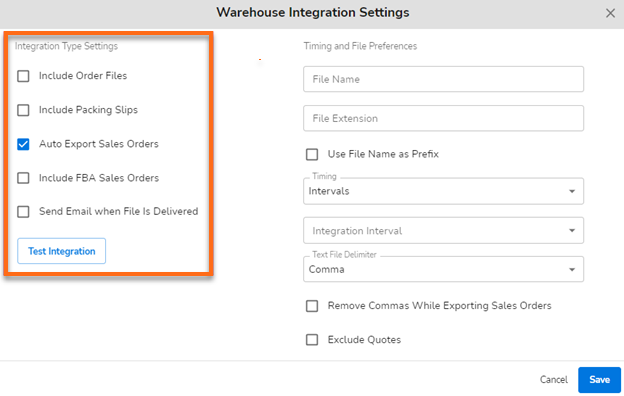
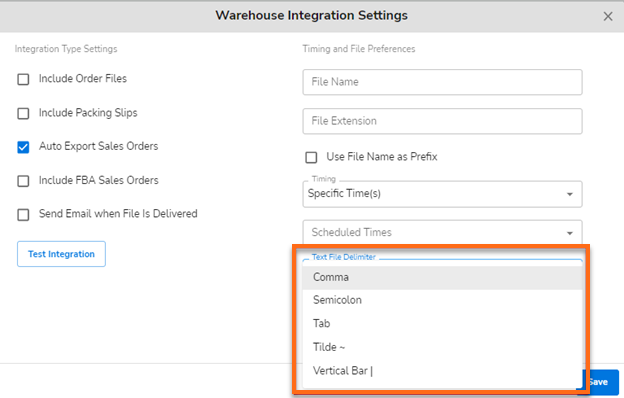
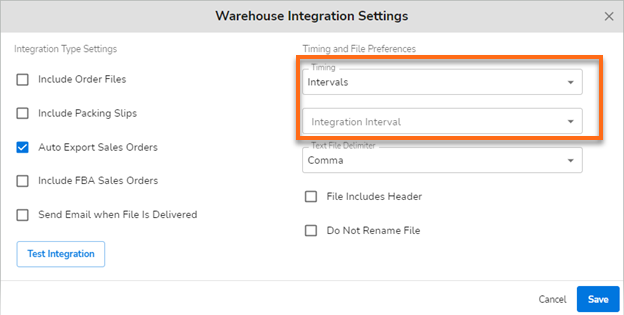
- Select the desired Timing and Integration Interval from the dropdown menu.
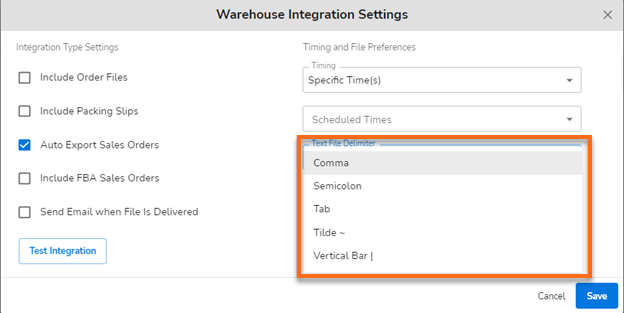
If you choose Specific Time(s), click the dropdown to set your preferred Scheduled Times.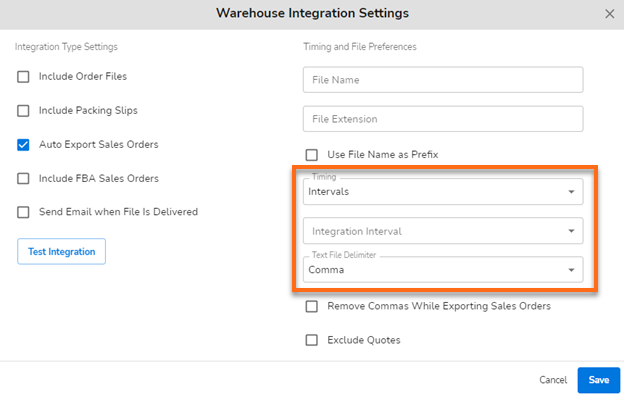

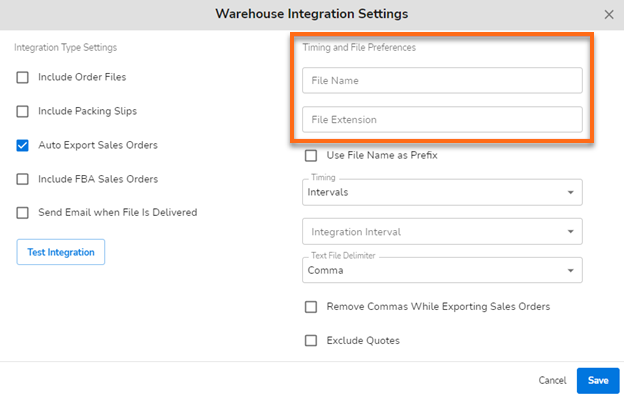
- Enter your File Preferences.
- Choose the preferred Text File Delimiter by clicking the dropdown icon.
 You can run a quick integration test to verify that we can connect to the source (e.g., FTP). Click on the "Test Integration" button to verify that the credentials you provided are correct. This step is important because it ensures we can connect with your source (i.e., FTP). If the test fails, please double-check the credentials you entered and perform the test again.
 - Click the Save button in the lower right corner of the Warehouse Integration Settings.
- You may now click the Add Attributes button right next to Automation Settings.
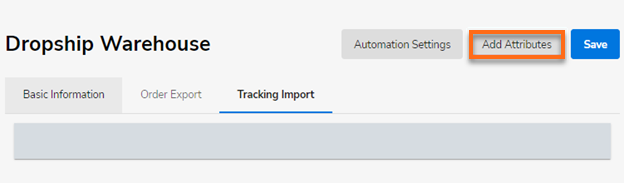 To configure the Add Attributes section, you must go through all the available data points your account can include in the file. Your dropship supplier determines these data points, and they will decide the order in which they appear. For instance, your supplier may want the shopper's name in the first column and the 'ship to' postal code in the second column.
Set Up a Tracking Import Feed
- In the Warehouse tab, select the warehouse you want to edit.
- Click the vertical ellipses on the right side of the chosen warehouse and select Details.
- In the Tracking Import tab, hit the Automation Settings button.

- Enable the Auto Export Sales Orders.
- Select the desired Timing and Integration Interval from the dropdown.
- If you select Specific Time(s), click the dropdown to choose your preferred Scheduled Time(s).

- Choose the preferred Text File Delimiter by clicking the dropdown icon.
- Click the Save button in the lower right corner of the Warehouse Integration pop-up settings.
- You may now click the Add Attributes button right next to Automation Settings.
By configuring the Add Attributes section, you can create the format for CSV or other files received from the FTP site.
- Click the Save button once done.