How to Set Up the IP Blocker
An IP Blocker is a security tool that allows website owners to deny access to their site from specific IP addresses or ranges. This prevents hackers, spammers, and bots from potentially harming the website. Administrators can easily enter the IPs they want to block. Visitors trying to access the site from these blocked IPs will see a '403 Forbidden' error message, indicating that access is denied.
Implementing an IP Blocker is a proactive step towards a more secure online presence. By preventing unauthorized access, you can minimize the risk of data breaches, website defacement, and other cyberattacks.
This article discusses how to add and remove IP Addresses from the IP Blocker. Click on the link below to jump into a specific section.
- How to Block an IP Address in the Customer Portal ⤵
- How to Remove a Blocked IP Address ⤵
- How to Block All Access by Setting up a "Deny from All" ⤵
How to Block an IP Address in the Customer Portal
- Log in to your Customer Portal.
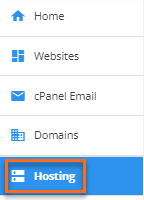
- Click the Hosting tab.
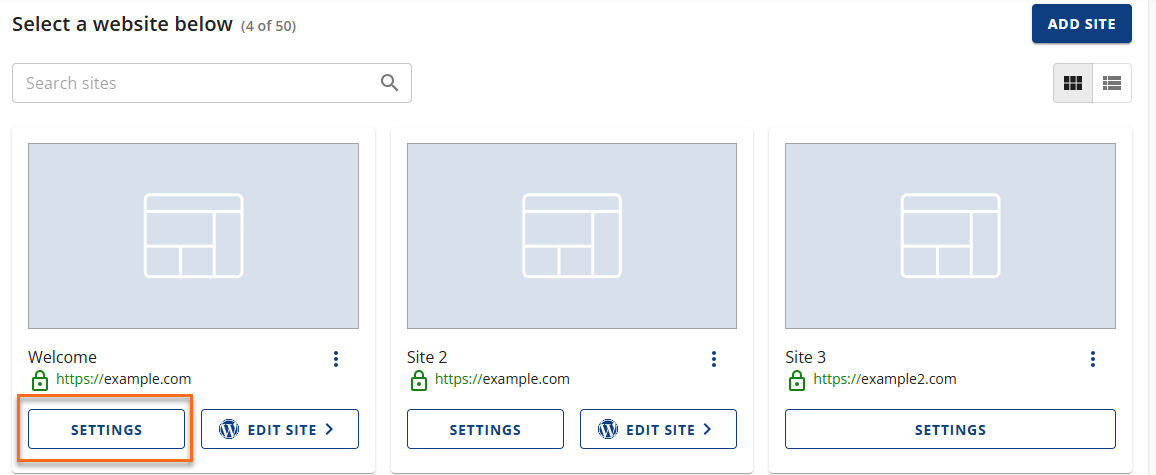
- Click the Settings button of the site you are working on.
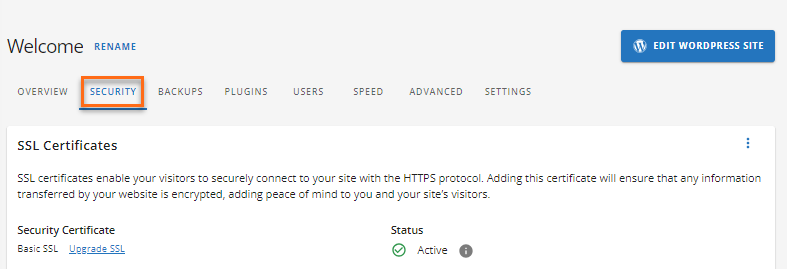
- Navigate to the SECURITY tab.
- Scroll down to the IP Blocker section. Then, click the MANAGE button.

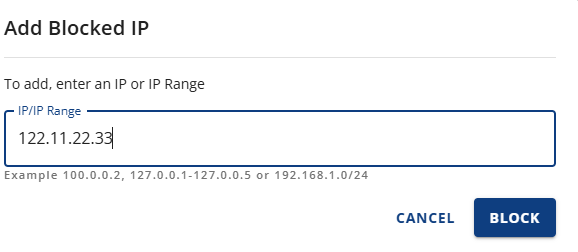
- Click the BLOCK IP button.

- Add the IP address or IP range that you wish to block.
- A notification will show that the IP Address has been blocked. You will also see the recently blocked IP address in the IP/IP Range list.
How to Remove a Blocked IP Address
- Log in to your Customer Portal.
- Click the Hosting tab.
- Click the Settings button of the site you are working on.
- Navigate to the SECURITY tab.
- Scroll down to the IP Blocker section. Then, click the MANAGE button.
- Click the BLOCK IP button and add the IP address that you wish to block.
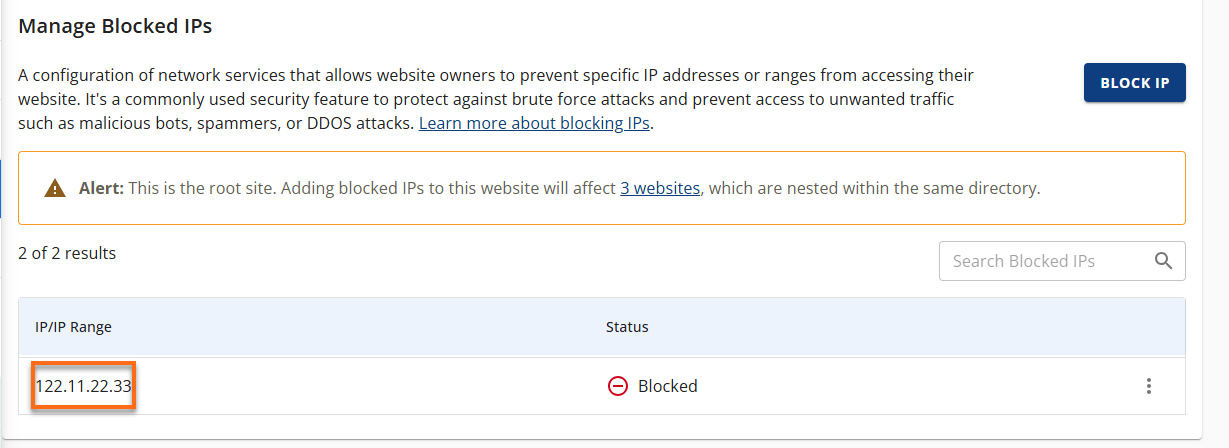
- Locate the IP Address that you wish to remove.
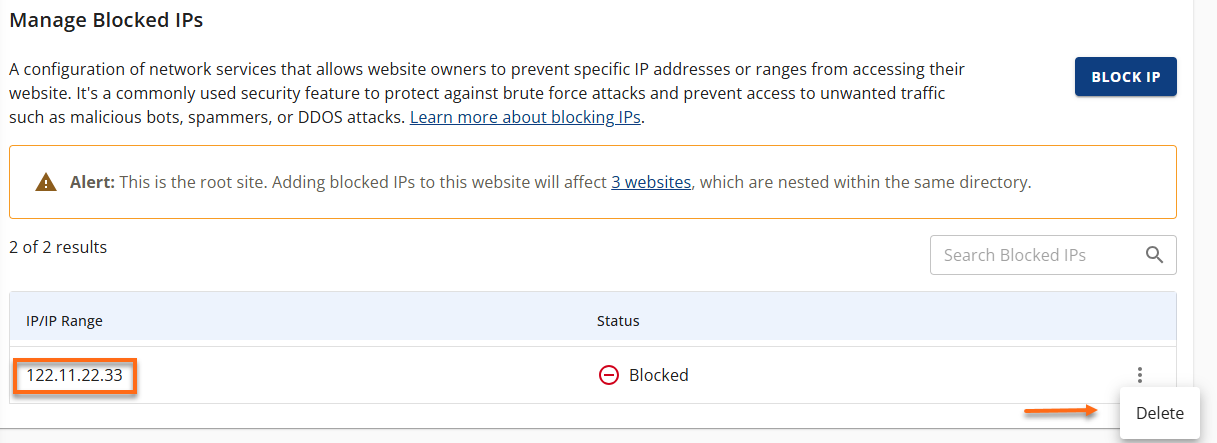
- Click the three-dot icon on the right side, then click Delete.
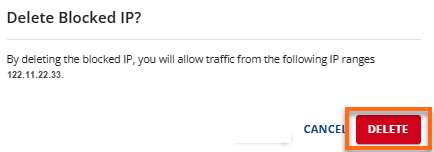
- Confirm the deletion of the IP Address by clicking the DELETE button once again. Confirm deletion of blocked IP.
- A notification will show you have deleted a blocked IP.
How to Block All Access by Setting up a "Deny from All"
You can block all access by adding the following code to your .htaccess file:

Blocking all access using .htaccess is possible, but should be done with extreme caution. While the "deny from all" option effectively blocks everyone, it can also lock you out. It's generally safer to use "deny from" and list specific IP addresses or domains you want to block.
See the article on How to Edit Your .htaccess File for generic instructions that apply to all .htaccess changes.