How to Install Google Tag Manager
Thank you for choosing our Pro PPC Team to build and manage Google Ads for your business! We’re excited to start building performance. To track phone calls that resulted from your Google Ads campaign, we’ll need you to set up and install Google Tag Manager on your website.
Why do I need to create my own Google Tag Manager account?
Account privacy and security are paramount to Google, and Google deploys multi-factor authentication to ensure it is really you who is logging into your account. You’ll find that they may send a code to your phone or email to verify that it is truly you and may even confirm your location and the browser you are using.
Help! I’m not tech-savvy. I’m not sure how to install Google Tag Manager.
You’ll find step-by-step instructions below on setting up Google Tag Manager. We encourage you to follow the instructions, but please remember that we are a phone call away if you need additional guidance. Simply give our Online Marketing Support team a call at 844-309-1121and select the PPC menu option.
Google Tag Manager setup instructions:
- Go to https://tagmanager.google.com and log in with a Google account (or create one).
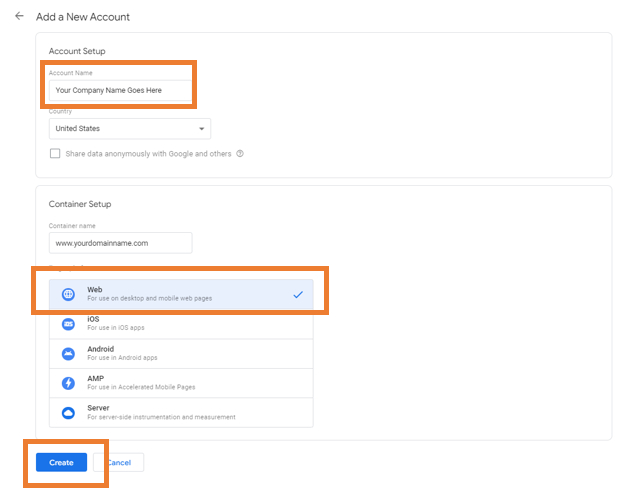
- Once you’re in https://tagmanager.google.com, click Create Account.
- Account Name: Your business name
- Container Name: Add your website URL here, such as www.domainname.com
- Target Platform: Choose Web.
- Click Create.
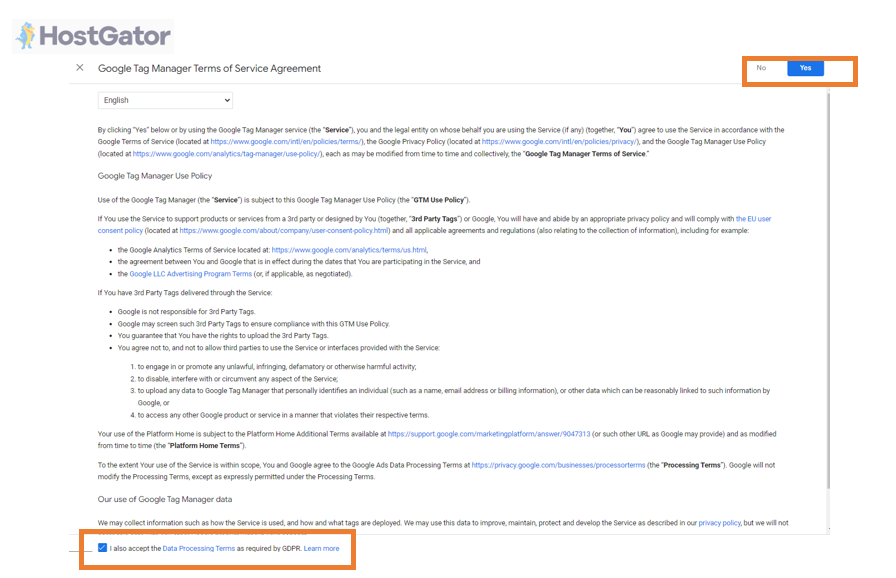
- Agree to the Google Tag Manager Terms and Conditions by selecting the check box (bottom of page) and clicking Yes (top right of page).
- You’ll then need to install the Google Tag Manager script on key pages of your website, such as your Homepage, Contact Us page, and main Service/Product pages. The box below shows where you can find your unique Google Tag Manager ID.
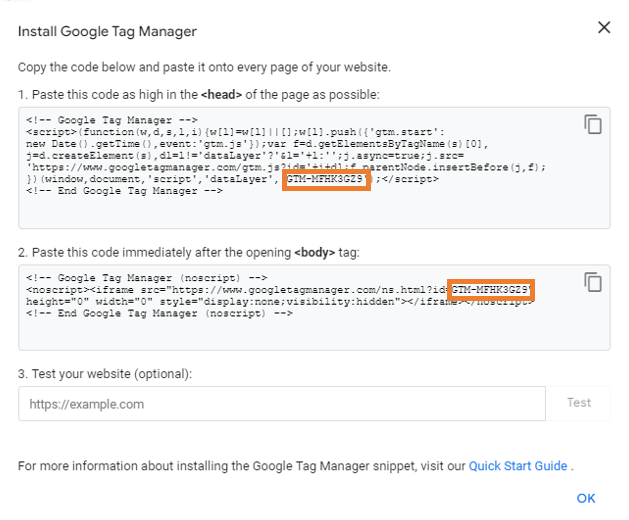
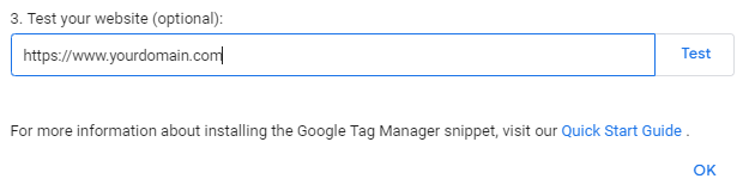
- Publish your website to ensure the code is live. In the Install Google Tag Manager box, add your domain name to the Test your website box above and click Test to ensure the code is placed correctly. Press OK once Google Tag Manager confirms the tag is detected on your website.
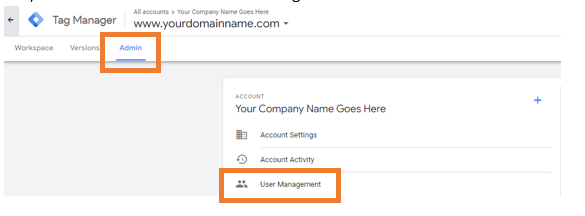
- Next, click Admin and then User Management.
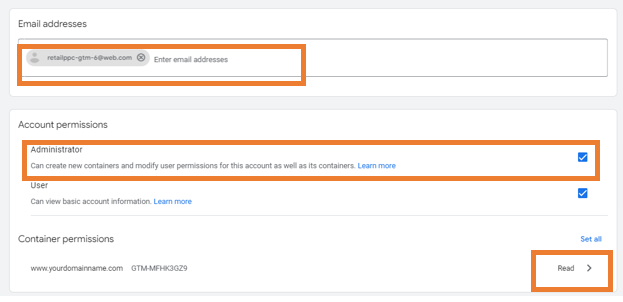
- Click the blue plus sign, then select Add Users, and add [email protected]. Select Administrator access. Then, click Read.
- Select Publish and then select Done.

- Then, click Invite.

- Our Pro PPC team will receive an invitation to access Google Tag Manager on your behalf. We’ll take it from here and will reach out if we have any additional questions!
- Then click the blue Invite button to send us the notification that you’ve connected Google Tag Manager with our account.
Set up instructions for HostGator Website Builder
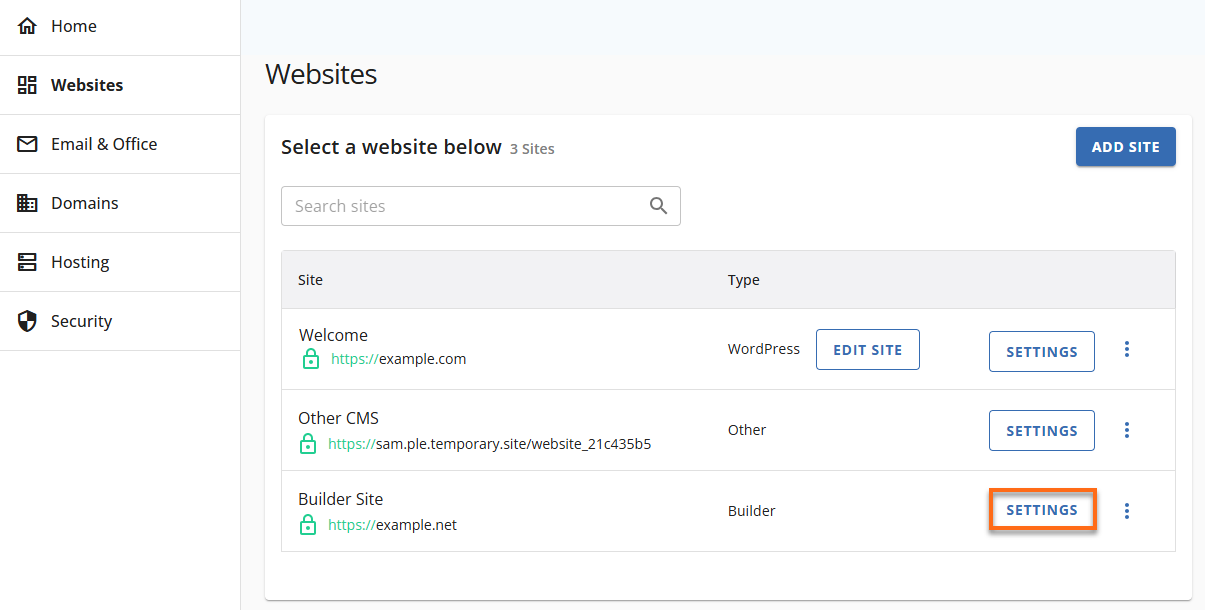
- Log in to your Customer Portal.
- Click Websites on the left-hand menu.
- Locate your Website Builder site and click its Settings button.
- Click the SiteBuilder Login button in the upper-right pane.

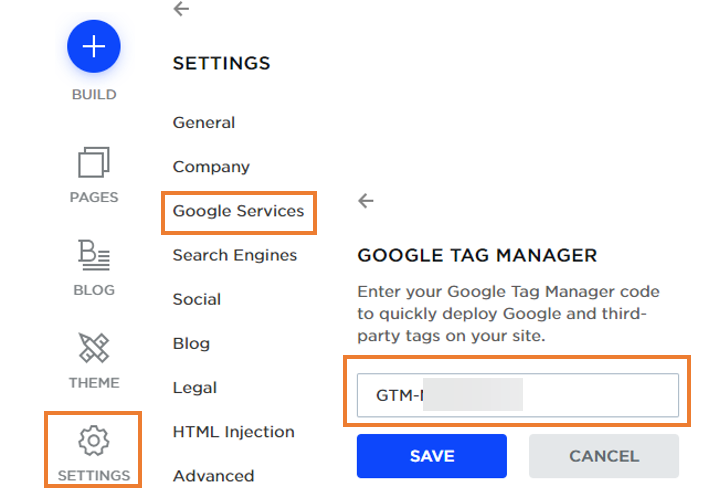
- Click Settings, then Google Services, and Google Tag Manager.
- Add your unique Google Tag Manager ID to the field.
- Then, publish your website to make the code live.
Set up instructions for WordPress
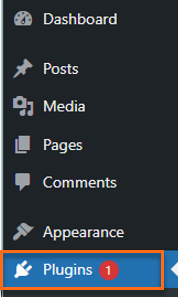
- Log in to your WordPress Dashboard.
- Click Plugins on the menu on the left.
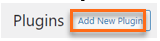
- Click Add New Plugin.
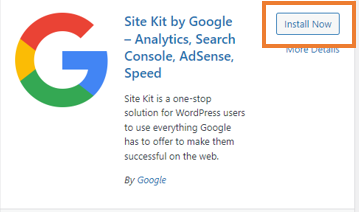
- Search for Site Kit by Google.

- Look for the Site Kit by Google plugin and select Install Now.
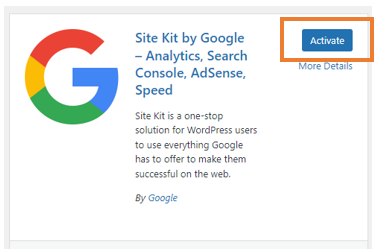
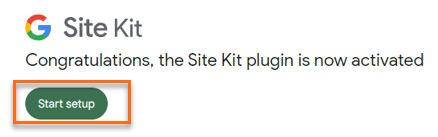
- Once installed, click Activate.
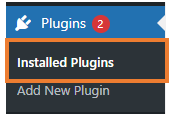
- In the left menu under Plugins, click Installed Plugins.
- There should be a message at the top of the screen from Google Site Kit. Click the Start setup button.
- Click the Sign in with Google button. No need to check any of the other boxes.

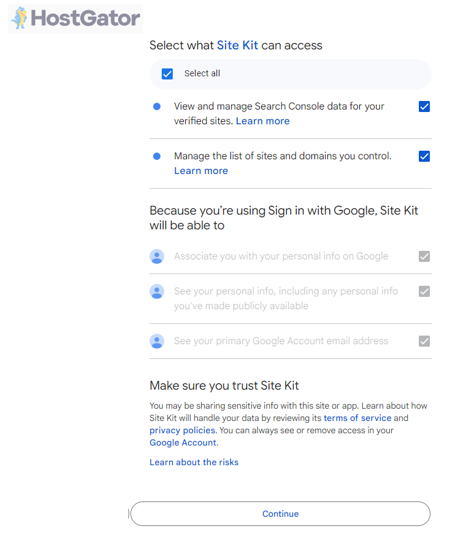
- Google will take you through the sign-in process to access your Google account. Follow the steps to sign in and select to have Site Kit access. Search Console data and manage the list of sites and domains you control. Click Continue.
- Google will then verify that you own your WordPress site. Click Verify to allow Google to add a tag to your website. Click Allow to turn on metrics, and then Set Up to set up Search Console.
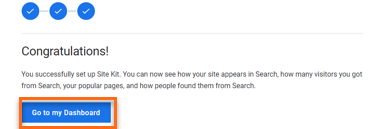
- Finally, click Go to my Dashboard.
- This will take you back to your WordPress dashboard.
- In the left menu under Site Kit, click Settings.
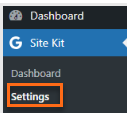
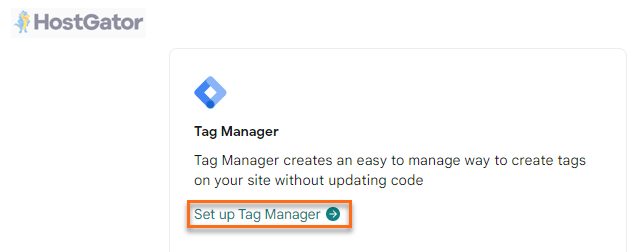
- Click Connect More Services, and then under Tag Manager, click Set up Tag Manager.
- Google will prompt you to log in to your account again. Follow the steps.
- You’ll then be redirected back to your WordPress dashboard and into the Site Kit plugin.
- In Account, select the website to which you’re adding the Google Tag Manager. The Container will automatically update with your Google tag ID.
- Click Complete Setup.

Did we design your website? Let us know, and we’ll see how we can help.
If we didn’t design your website, you can call your website design company, check out their support documents, and/or log into your builder to see if there is an area to add the code to. Most modern website builders have a field where you can add the code once, with the builder deploying it across each page of your website.