Knowledge Base
How to Change an Application
HostGator Self-Managed VPS runs one application image at a time, so switching to different software means replacing the application that's already installed. Rather than digging through server configuration yourself, you can make the change from the HostGator Portal with a guided flow. Below is a walkthrough of the whole process.
How to Change an Application in Your HostGator Self-Managed VPS
Warning:
- Changing the server image will permanently erase all data and settings on this VPS. This action cannot be undone. Back up any files or databases you want to keep before you continue.
- Before choosing an application to reimage your server, make sure your hosting plan meets its minimum system requirements to prevent installation issues.
- Log in to your Customer Portal.
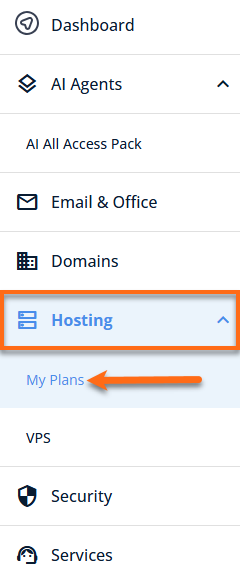
- From the left-hand menu, navigate to Hosting and select My Plans.
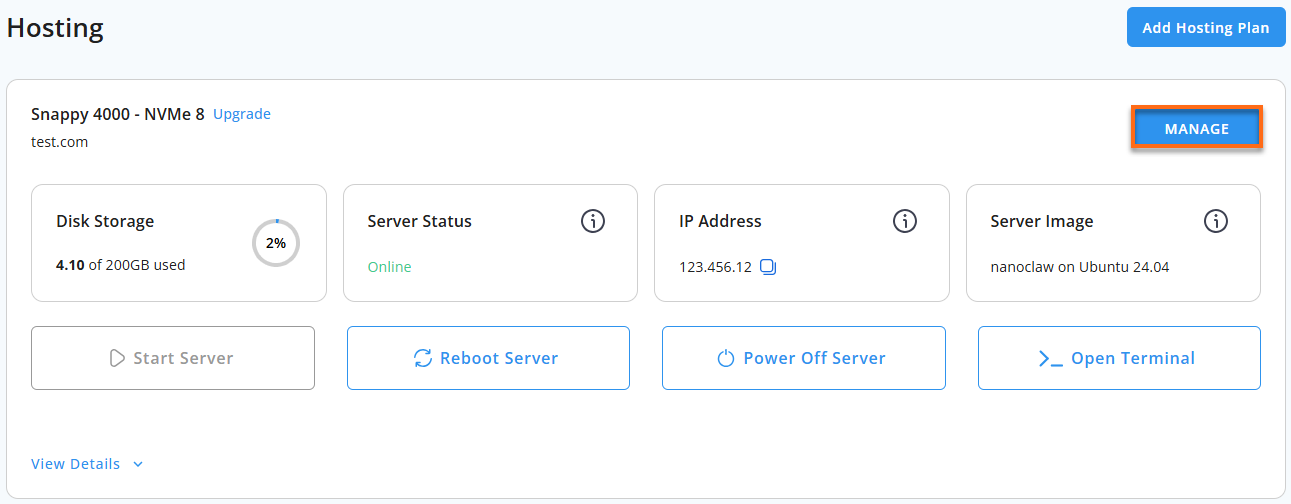
- Click Manage next to the hosting package you wish to reimage.
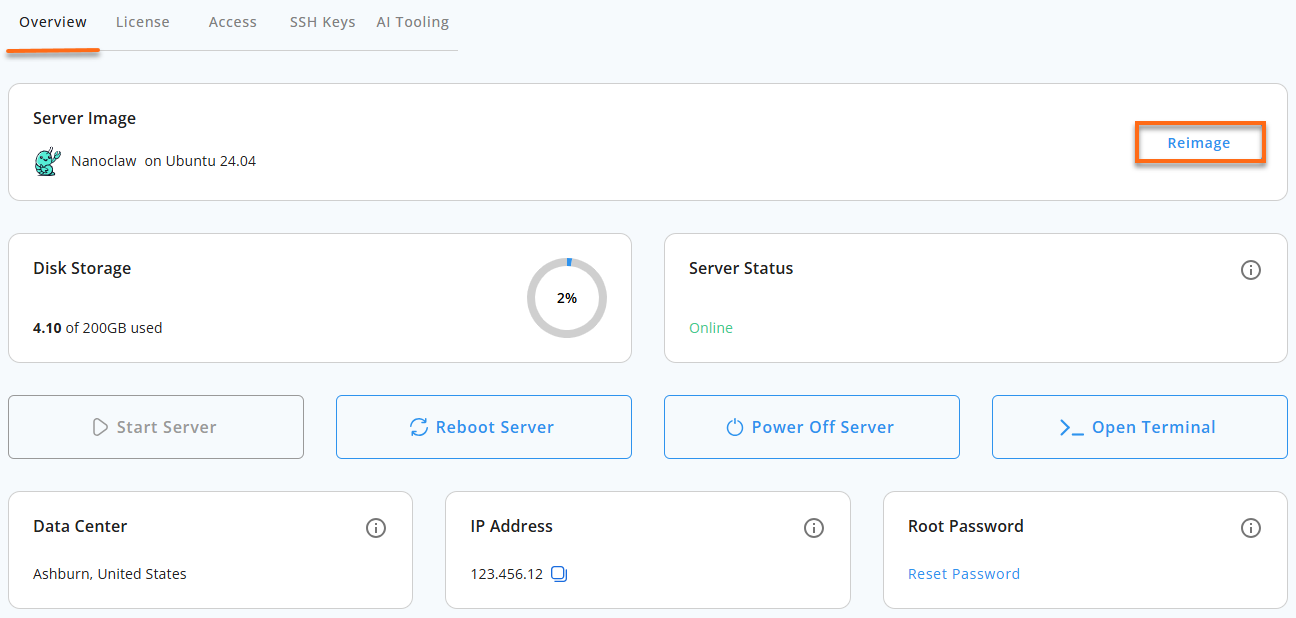
- In the Overview tab, click the Reimage button on the right side of the Server Image section.
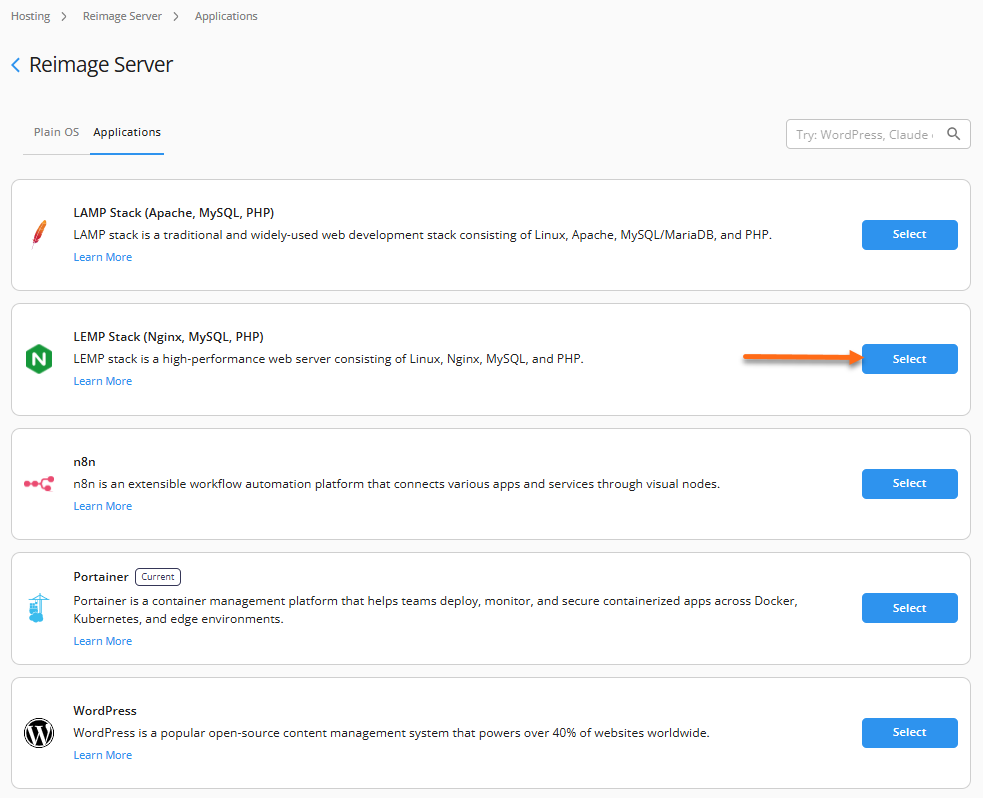
- Go to the Applications tab.
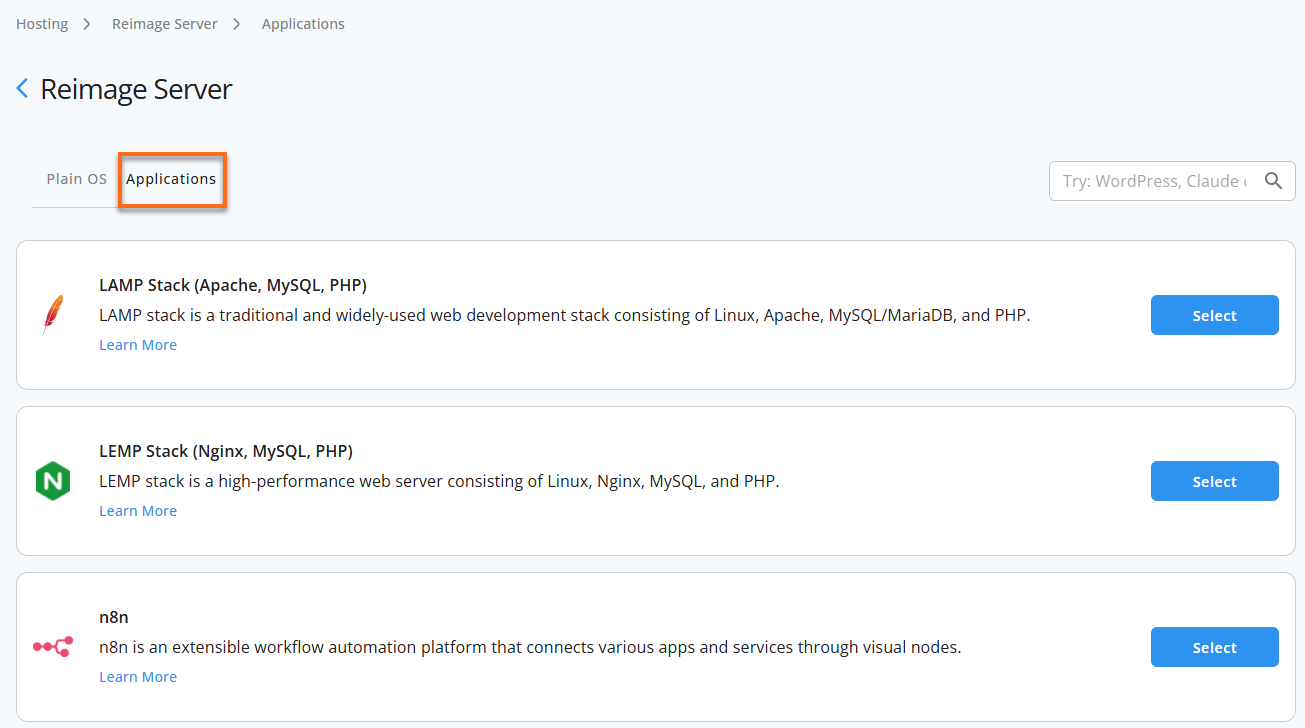
- Choose your preferred application from the list, then click Select.
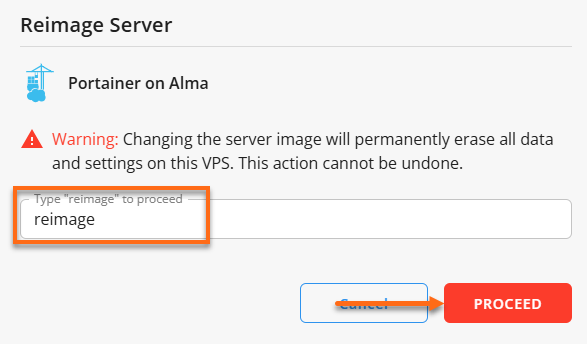
- Type reimage into the field to confirm, then click Proceed.
- Allow time for the installation to finish. This usually takes a few minutes but can take longer depending on the application.

- Once done, the new application will appear in the Server Image section.
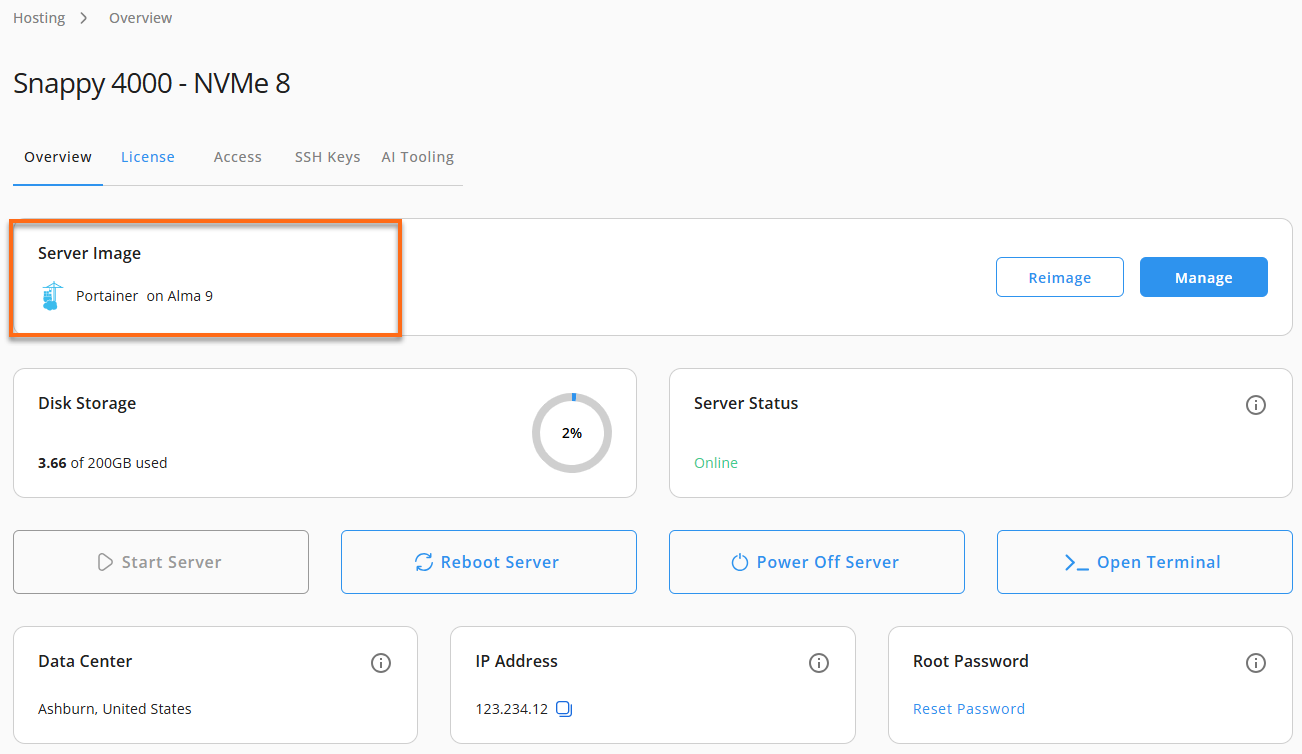
Your server is now running the newly selected application, with the previous one fully removed.
Did you find this article helpful?