Enable/Disable WordPress Plugins using Database
If your WordPress admin login page is only showing a blank screen, it could be due to an issue with one or more plugins that have been installed. This will usually happen if you install a plugin that is not compatible with the currently installed theme. It can also occur if the installed WordPress version has recently been updated as plugin developers don't constantly update plugins to keep up with WordPress security updates.
You can quickly determine if a plugin is causing the issue by disabling all plugins temporarily.
Step 1: Determine the Database Name
Find out which database is associated with WordPress' installation that you wish to change by following the instructions below:
- You are logged into your Customer Portal. You can also log in after clicking the link.
- The hosting package you are attempting to access is either Shared or Cloud.
- Log in to cPanel.
- In the Files section, click File Manager.

- On the left side, open the public_html (or the domain's document root).
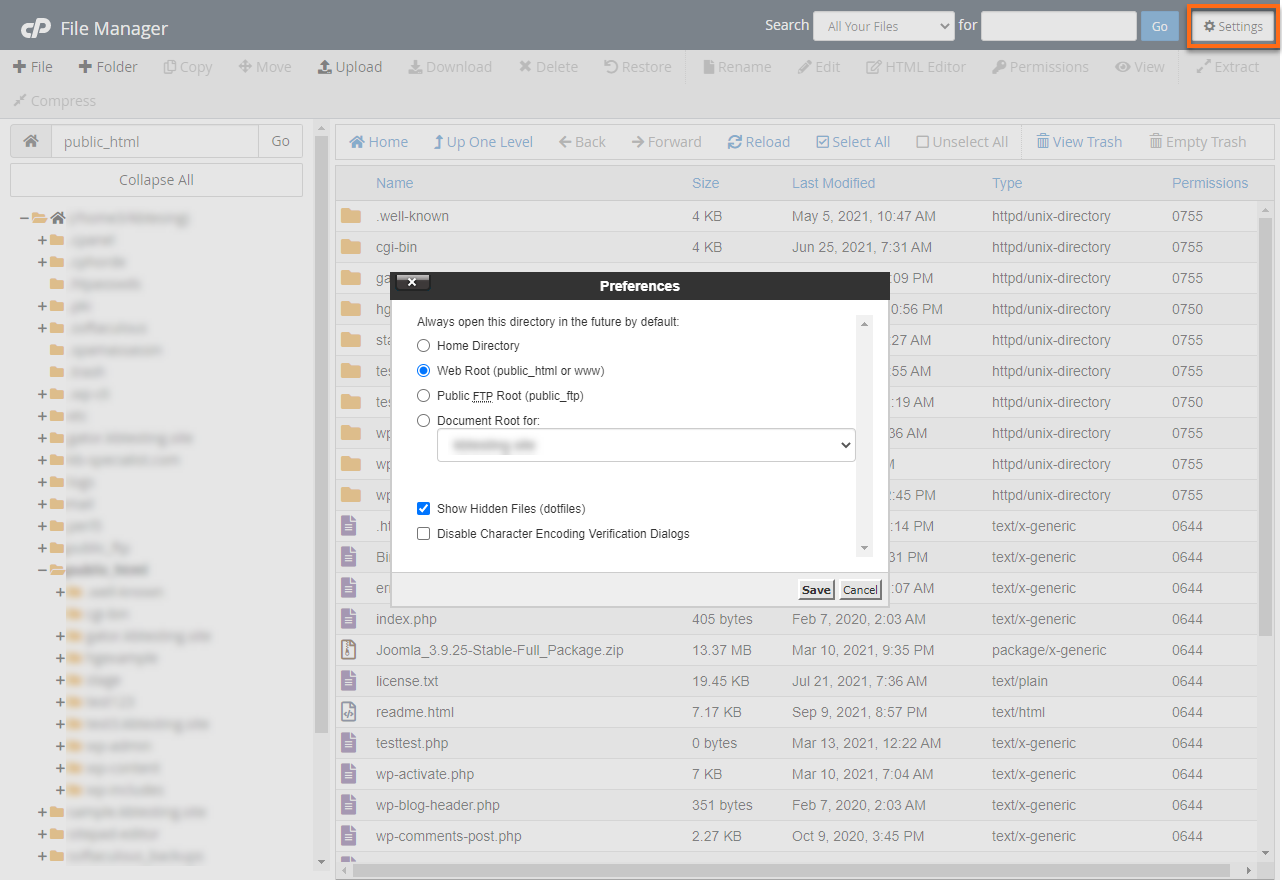
- Click the Settings button found on the top right-hand corner. Put a checkmark on the Show Hidden Files (dotfiles) box. The WebRoot (public_html or www) is selected in default.

- Click Save.
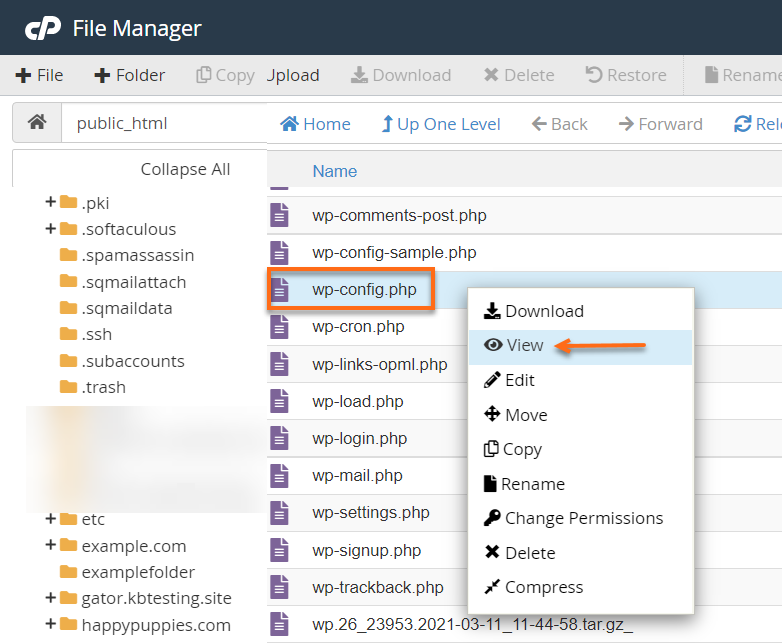
- Locate the wp-config.php file, right-click and select View.
Alternatively, you can click the View button found in the top right-hand corner.
-
Make a note of the database name. It will look similar to this:
(Domain will be a prefixed form of the actual domain name or cPanel username being used.)define('DB_NAME', 'domain_wrdp1')
Step 2: Disable All Plugins
In the cPanel:
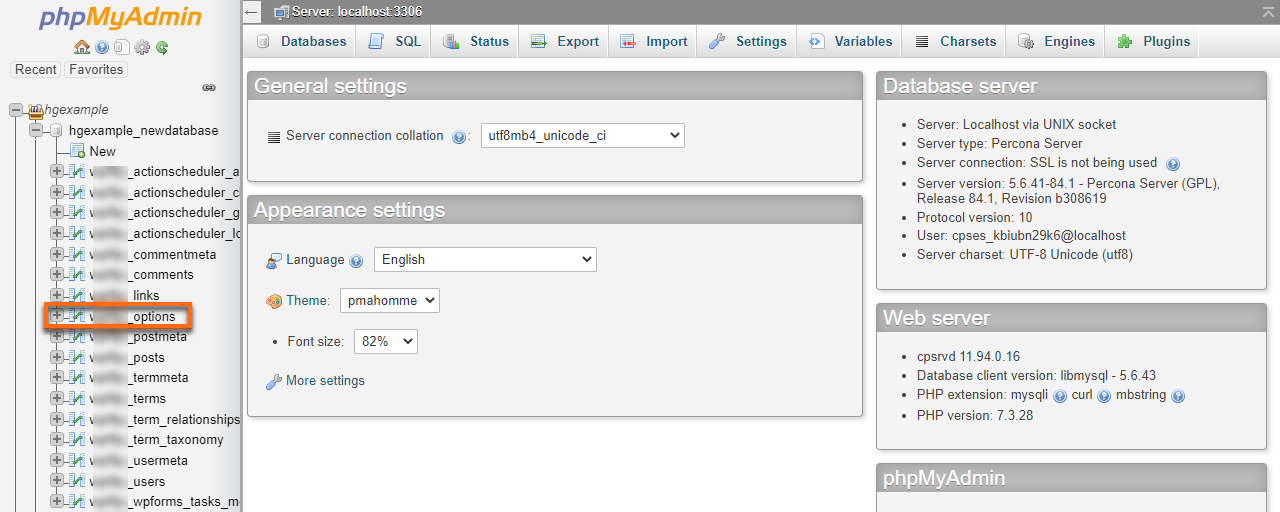
- In the Databases section, click phpMyAdmin.

- From the left-hand navigation menu, click on the appropriate database name.
- From the left-hand navigation menu, click wp_options.

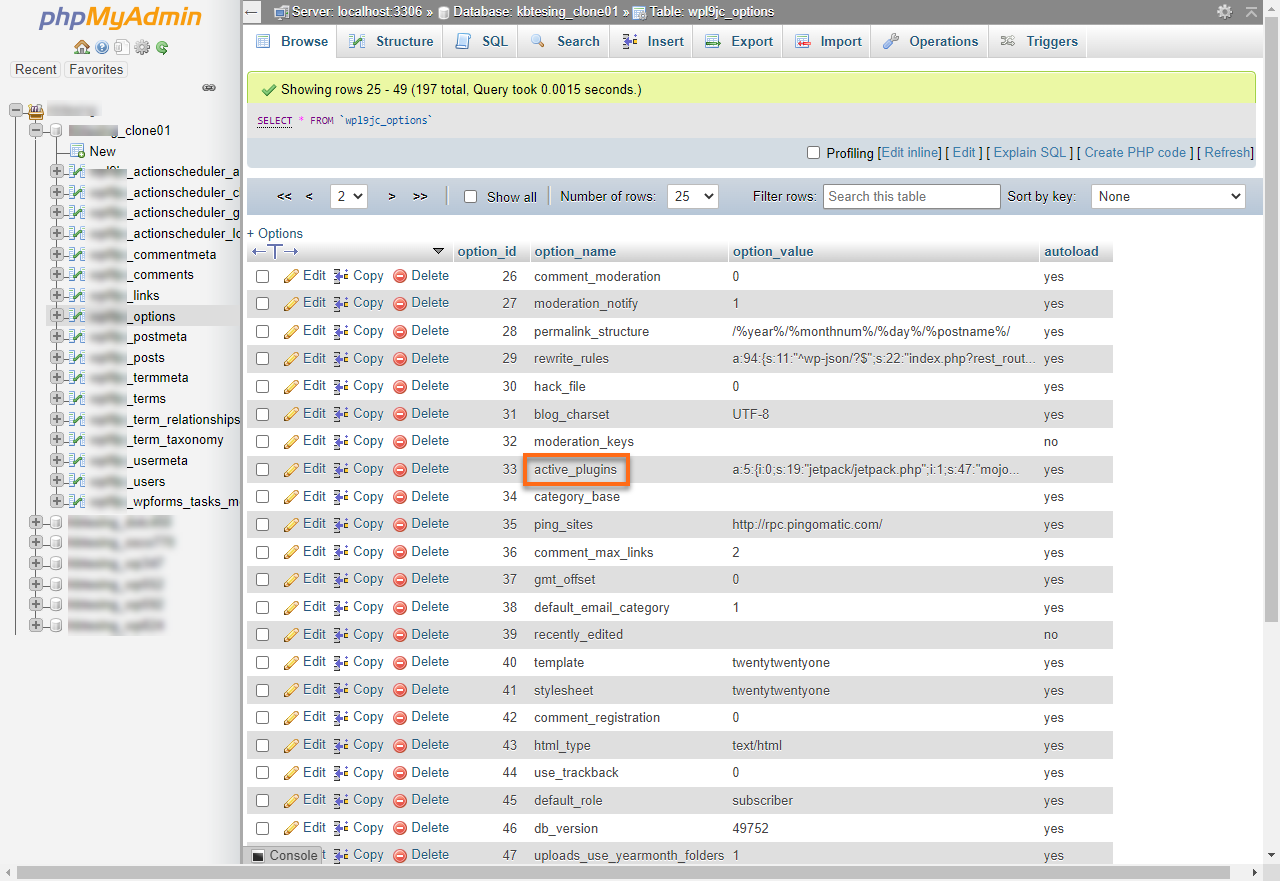
- In the options table, find the option_name column and find the line named active_plugins. (You may have to click the > at the bottom of the page to view more columns.)

- On the active_plugins line, click edit. You will see something similar to this:
a:5:{i:0;s:35:"add-from-server/add-from-server.php";i:1;s:25:"age-verify/age-verify.php";i:2;s:19:"jetpack/jetpack.php";i:4;s:69:"simple-full-screen-background-image/simple-full-screen-background.php";i:6;s:27:"wp-super-cache/wp-cache.php";} - Highlight the entire box of code, cut it out, and paste it into a text file to be saved on your local PC.
- Once the code has been removed, click Go.
The plugins are now successfully disabled but are still installed with all options intact.
Step 3: Isolate the Plugin Causing Issues
The most effective way to determine which plugin is causing the issue is to enable each plugin one at a time, following the instructions below:
- Visit your WordPress admin login page and refresh it, then log into WordPress.
- Go to Plugins > Installed Plugins. To know where to find your WordPress plugins, you can use this video as a guide.