How to Manage SSH Keys in the Customer Portal
SSH keys are important for cybersecurity, providing a secure method to authenticate and protect communications between computers over networks. With HostGator, you can easily manage SSH keys through your Customer Portal, simplifying the process of securing your server connections.
This article will walk you through the SSH Management panel in the Customer Portal and how to manage your SSH keys.
How to Access the SSH Management Panel
The Customer Portal now has the SSH Management panel, where you can add and manage your SSH keys while securely connecting to your hosting server.
Already logged into your Customer Portal? Use the following link to go to your SSH Management panel.
Not yet logged into your Customer Portal? Follow the steps below.
To access the SSH Management panel:
- Log in to your Customer Portal.
- Go to Websites from the left navigation menu.
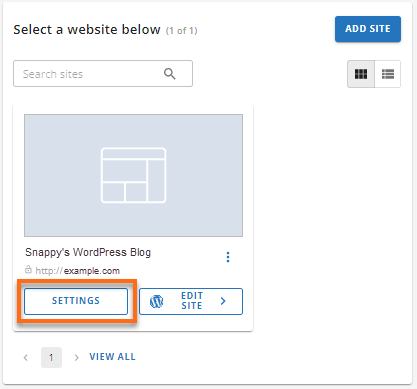
- Click Settings next to the website you want to manage.
- On the top menu, click the Advanced tab.

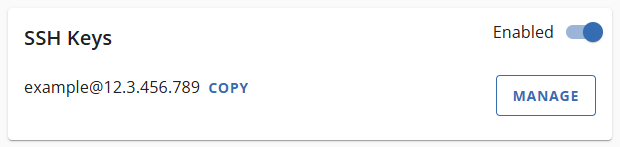
- Under the SSH Keys card, click the Manage card.
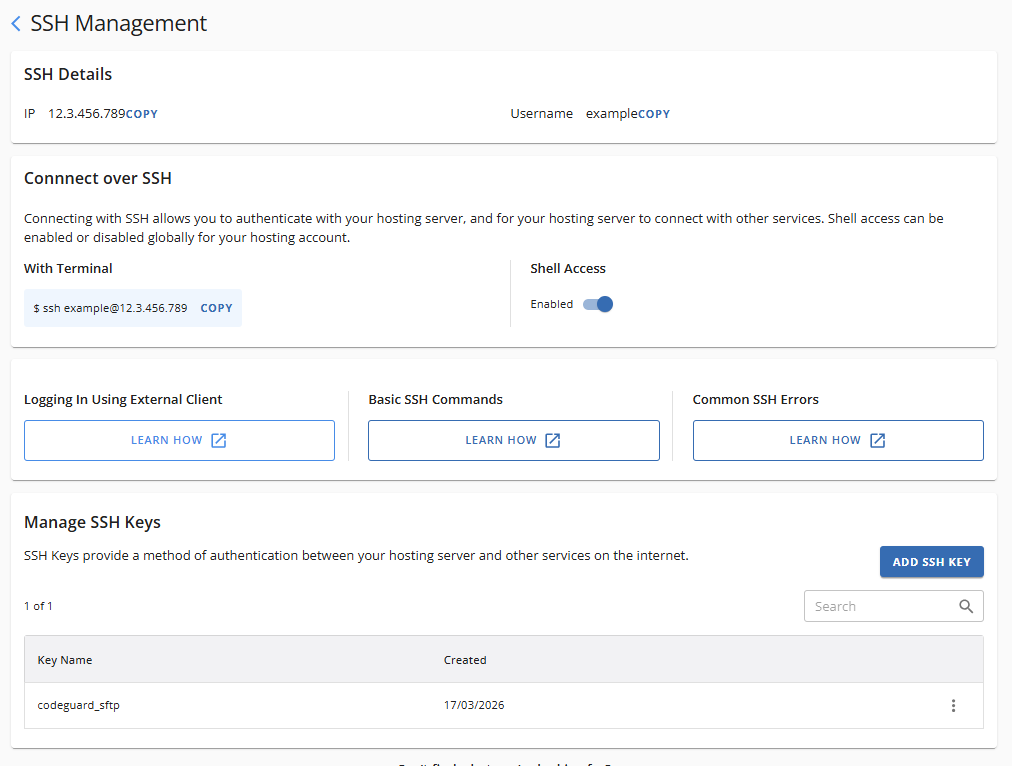
- You'll be redirected to the SSH Management panel, where you can add and manage your SSH keys.
How to Add SSH Keys to the Customer Portal
Here are the steps to add the SSH keys to your Customer Portal.
Step 1: Generate the SSH Keys
To add your SSH keys to the Customer Portal, you will first need to generate both your private and public keys. The methods for generating SSH keys can differ based on your operating system. Please visit the following articles for more information on how to generate your SSH keys.
Step 2: Add the SSH Keys to the SSH Management Panel
Once you have generated your private and public keys, you can add them to the SSH Management panel located in your Customer Portal.
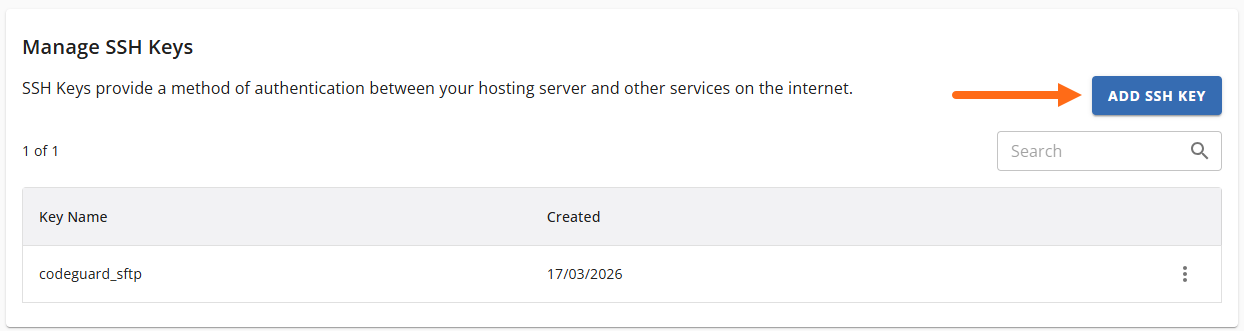
- Navigate to your SSH Management panel and click the Add SSH Key button in the Manage SSH Keys section.
- In the Add a Public Key pop-up, enter a key name and your generated public key.
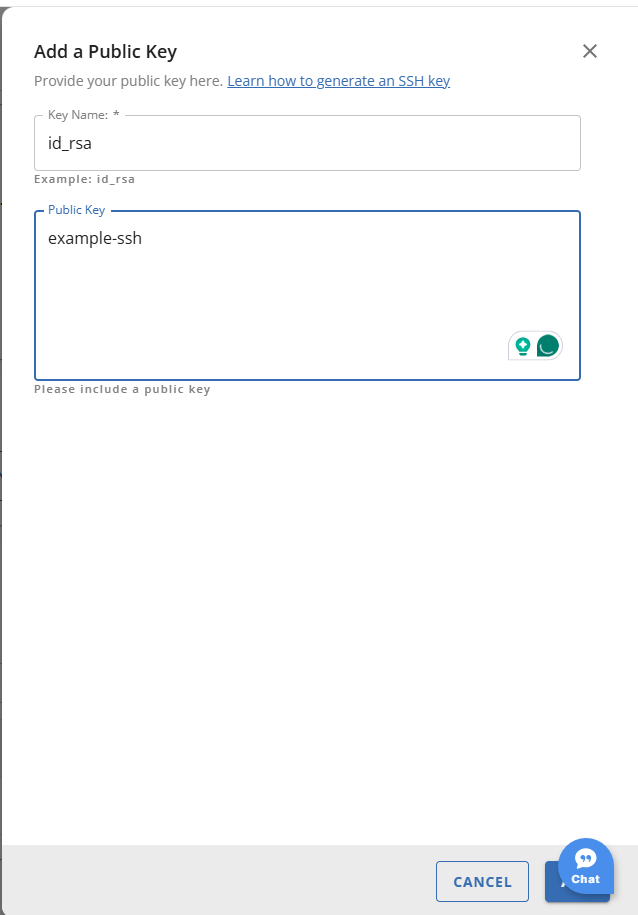
- Click the Add button. You should now see your new SSH key in the Manage SSH Keys section.
How to Manage SSH Keys
In the SSH Management panel, you can take the following actions to manage your SSH keys.
You can also access support guides to learn more about SSH keys, including how to use an external client, basic SSH commands, and common SSH errors.
Toggle the Shell Access On/Off
In addition to the toggle in the SSH Keys card on the Advanced tab, you can also enable or disable SSH access from the SSH Management panel.
- Click the toggle under Shell Access.
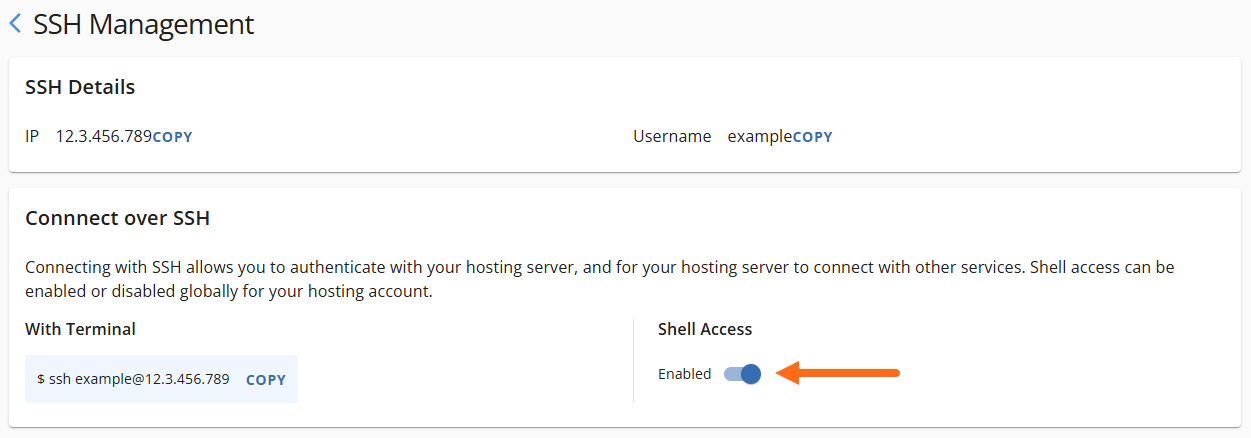
- A notification will display at the top of the page confirming whether SSH access is enabled or disabled.
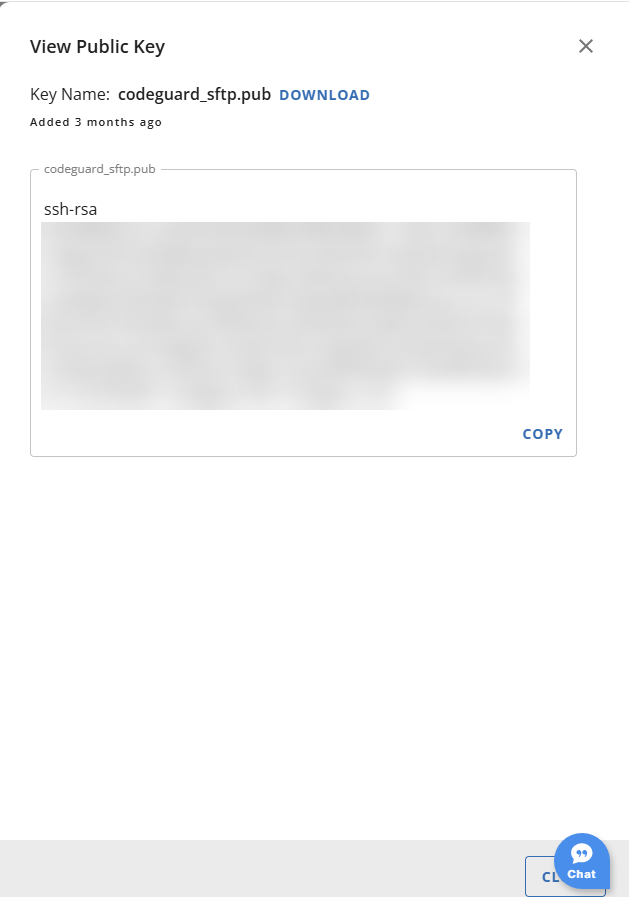
View the SSH Key Details
- In the Manage SSH Keys section, locate the SSH key for which you want to view details.
- Click the vertical ellipsis icon on the right and select View Key.

- In the View Public Key pop-up, you can copy the public key by clicking the Copy link in the bottom-right corner.
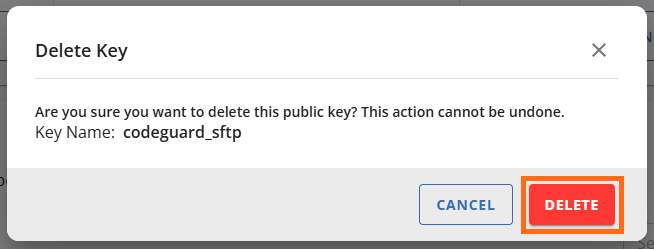
Delete an SSH Key
- In the Manage SSH Keys section, locate the SSH key you want to delete.
- Click the vertical ellipsis icon on the right, then select Delete Key.
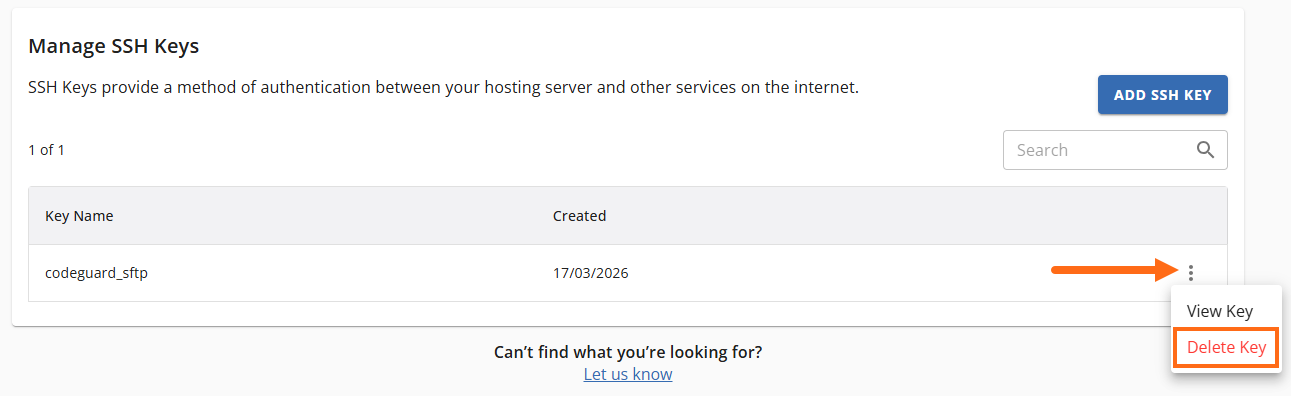
- In the Delete Key pop-up, click the Delete button to confirm the removal of the SSH key.
The SSH key has now been removed from the Manage SSH Keys section.