How to Create and Manage Indexes in the Customer Portal
The Folder Index Manager panel within your Customer Portal allows you to manage indexes and how your website directories are presented to search engines and visitors, impacting your site's SEO rankings, security, and overall performance.
This article will walk you through the steps to manage indexes in the Customer Portal.
Understanding how indexing works
When a site visitor tries to pull up a directory on your website, the server typically displays a list of files and sub-directories included within that directory. This feature is known as directory indexing. It is important to understand how to manage these indexes, as improper management can result in security risks and negatively affect the user experience on your site.
Index Types
Indexing allows web admins to choose if directories without an index file show a list of files (indexing on) or give a "403 Forbidden" error (indexing off). It improves site security by blocking access to sensitive files or allowing users to see directory contents when needed.
The index types available in your Account Manager are as follows.
- Default System Setting: No indexing rules are applied to the folder. It will inherit the index settings of the parent folder. If the parent folder has no defined indexing preference, the default settings will apply.
- Fancy Indexing - Filename and description: A detailed directory listing with filenames, sizes, last modified date, and file icons.
- No Index - Hide folder contents: This option prevents the contents of a folder from displaying.
- Standard indexing - Filename only: The directory listing shows only the file names.
How to create and manage Indexes
To create or manage your indexes:
- Log in to your Customer Portal.
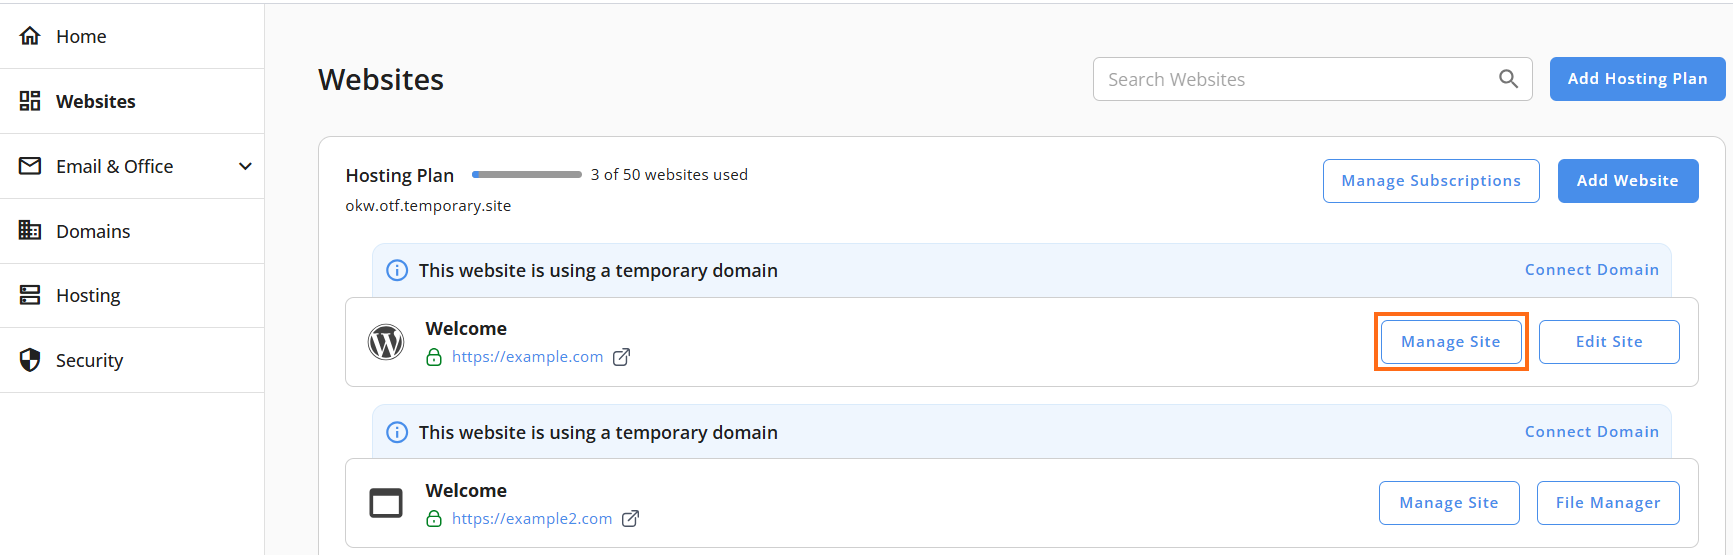
- Go to Websites from the left navigation menu.
- Click Manage Site next to the website you want to manage.
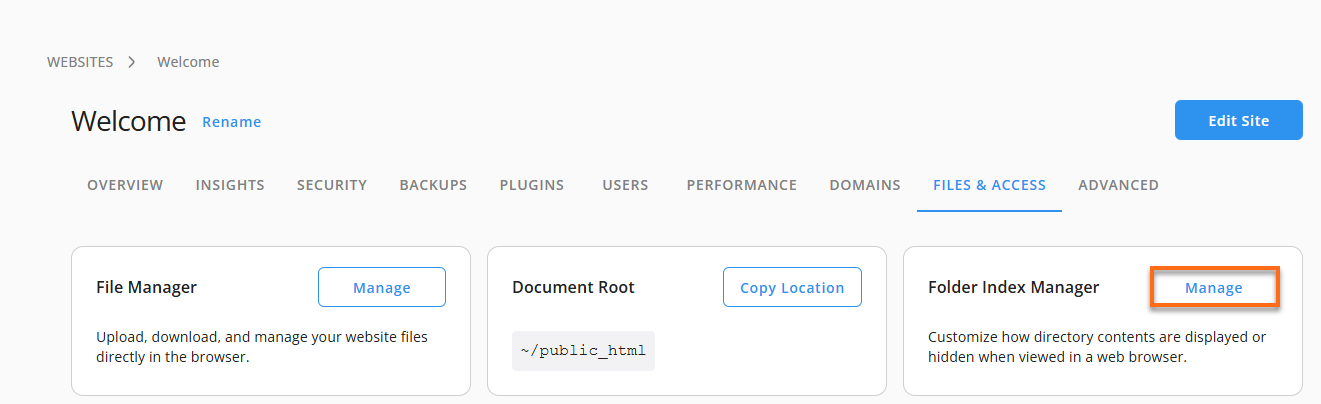
- On the top menu, click the Files & Access tab.
- Click the Manage button under the Folder Index Manager card.
- On the Folder Index Manager page, you can perform the following actions to manage your indexes.
Add a new index
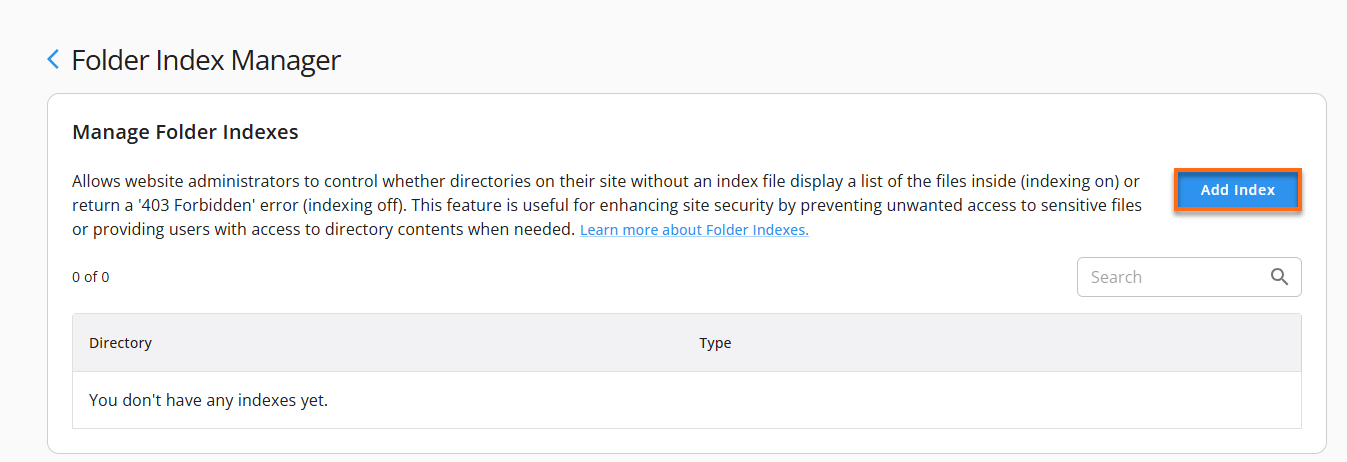
- On the Folder Index Manager page, click the Add Index button on the top right.
- Click the Manage button under the Folder Index Manager card.
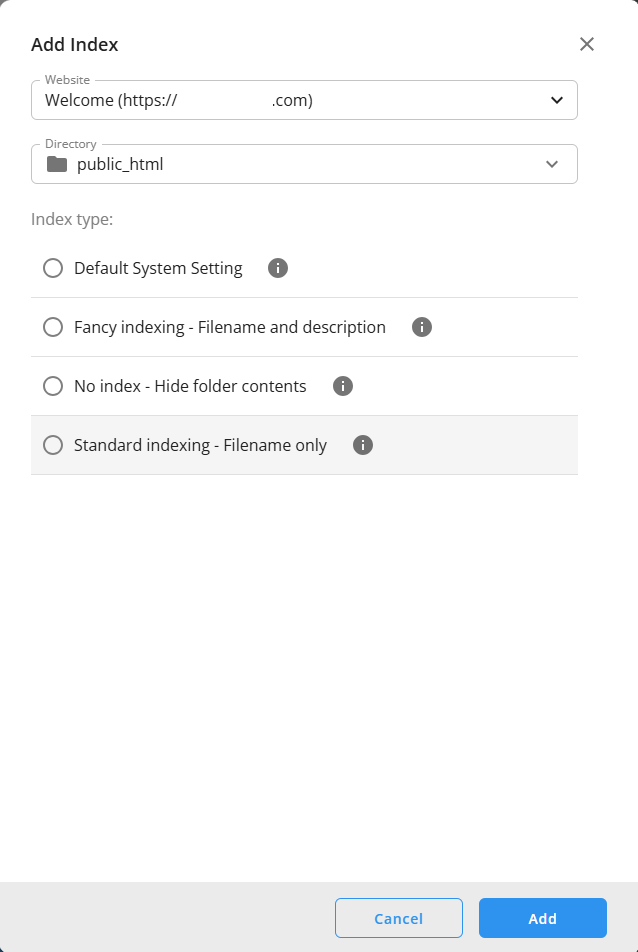
- In the Add Index side panel, select the Website and Directory you want to index from the dropdown menu.
- Select your Index type, then click on the Add button.
Edit an index
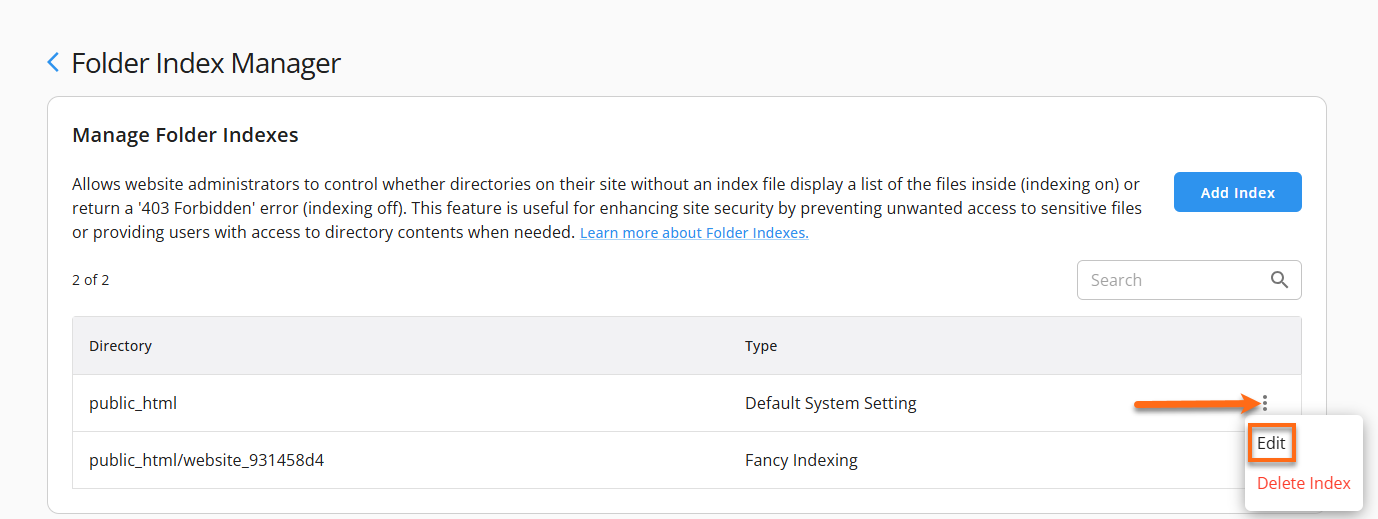
- On the Folder Index Manager page, locate the directory you want to edit.
- Click the ellipsis icon on the right, and then select Edit from the options.
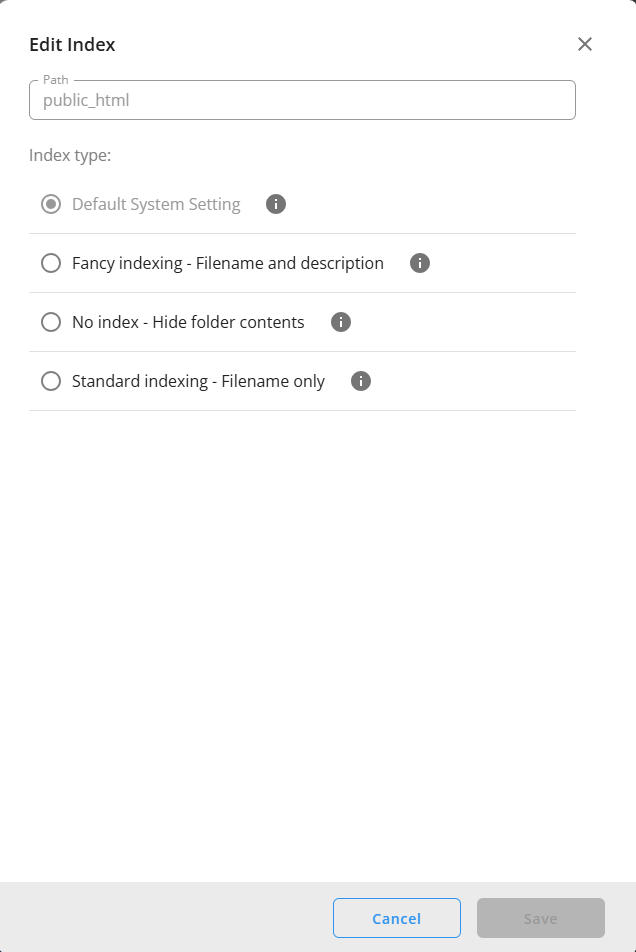
- In the Edit Index side panel, update your preferred Index type, and then click on the Save button.
Delete an index
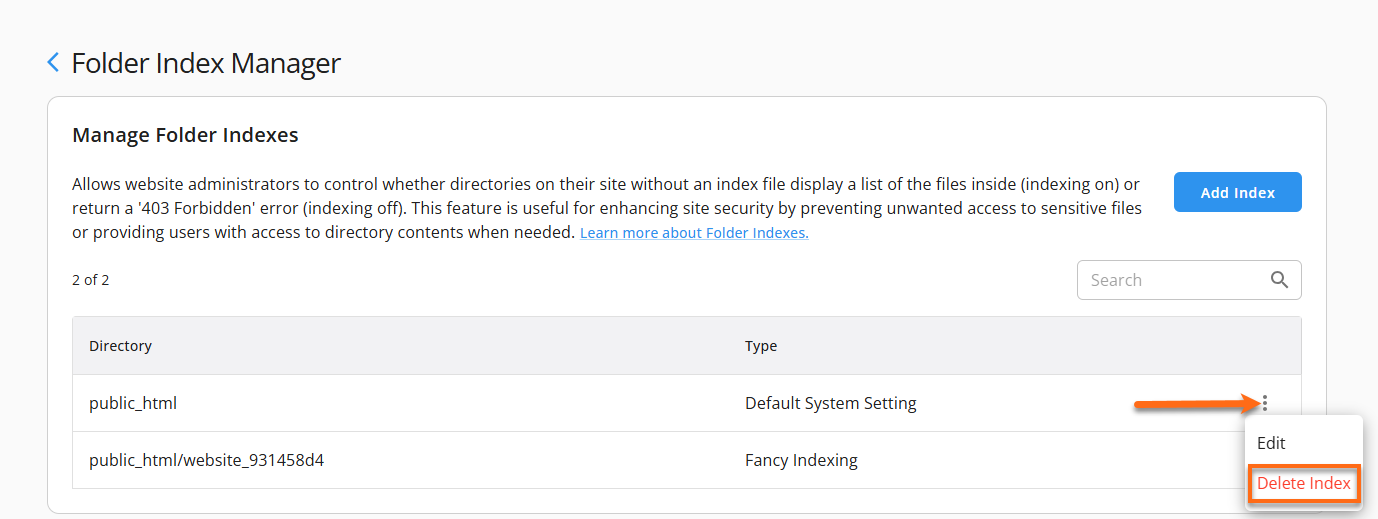
- On the Folder Index Manager page, locate the directory you want to delete.
- Click the ellipsis icon on the right, and then select Delete Index from the options.
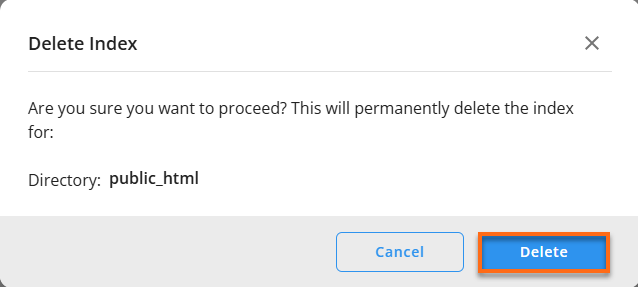
- In the Delete Index pop-up, click the Delete button to confirm and successfully remove the index.
Best practices for directory management
Here are some best practices for optimizing directory management:
- Regularly review and adjust your directory indexing settings. It is important to ensure that sensitive directories are marked with "No Indexing," preventing search engines from indexing them.
- Create a clear, logical directory structure to enhance SEO by making the website easier to navigate for both users and search engines.
- Use meaningful and descriptive directory names. This helps search engines better understand your content, ultimately boosting its visibility.