Knowledge Base
Categories: Management
How to Enable HostGator Directory Privacy Protection
In the digital age, securing sensitive data is crucial for website administrators. HostGator Directory Privacy offers a robust solution by allowing password protection for specific directories, ensuring only authenticated users can access or modify them. This feature not only prevents data breaches but also strengthens overall site integrity, making it essential for maintaining privacy and security.
In this article, we’ll discuss how to enable or remove the directory privacy protection in HostGator:
How to enable Directory Privacy Protection
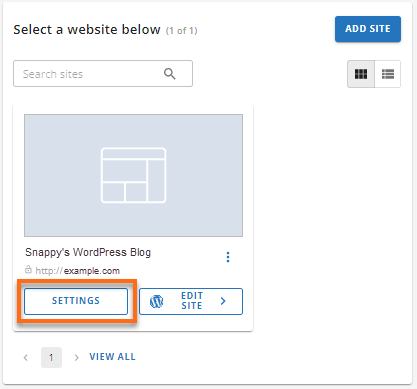
- Log in to your Customer Portal.
- Go to Websites from the left navigation menu.
- Click Settings next to the website you want to manage.
- You will see a list of tabs on the Settings page. Find and click the Advanced tab.
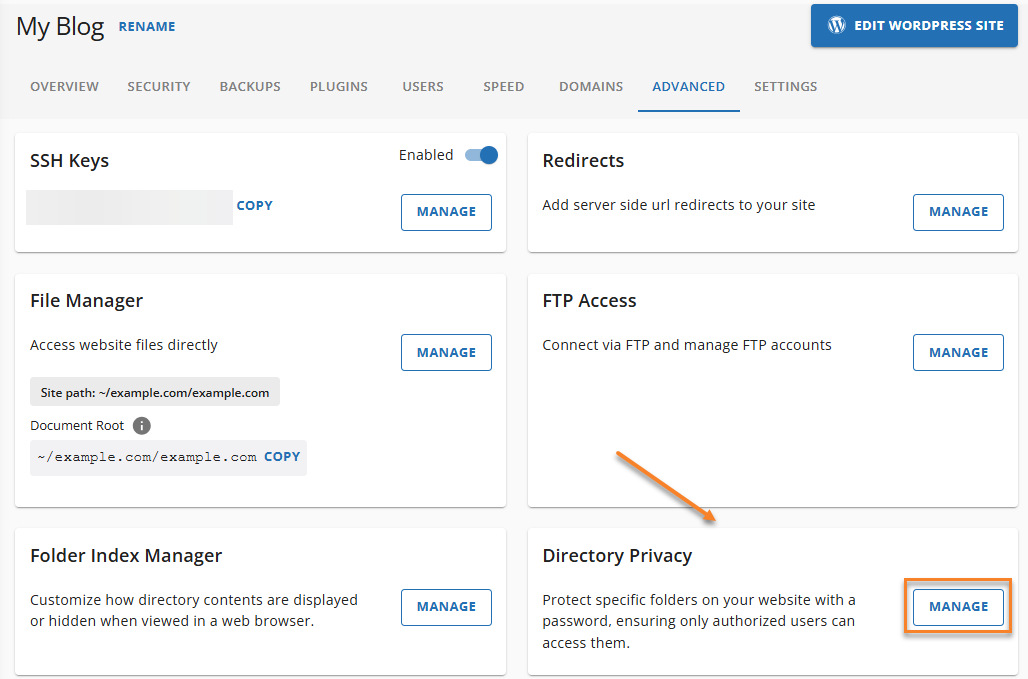
- Locate the Directory Privacy card under the Advanced tab and click on the Manage button.
- Click Add Privacy for the pop-up menu to appear on the right side.
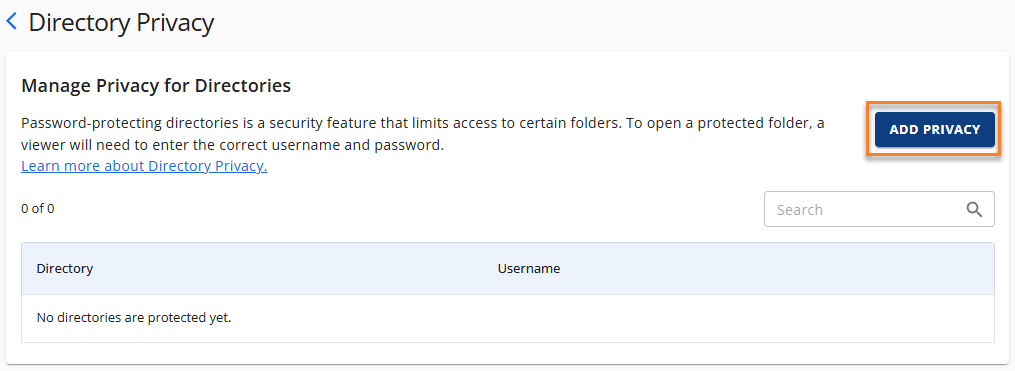
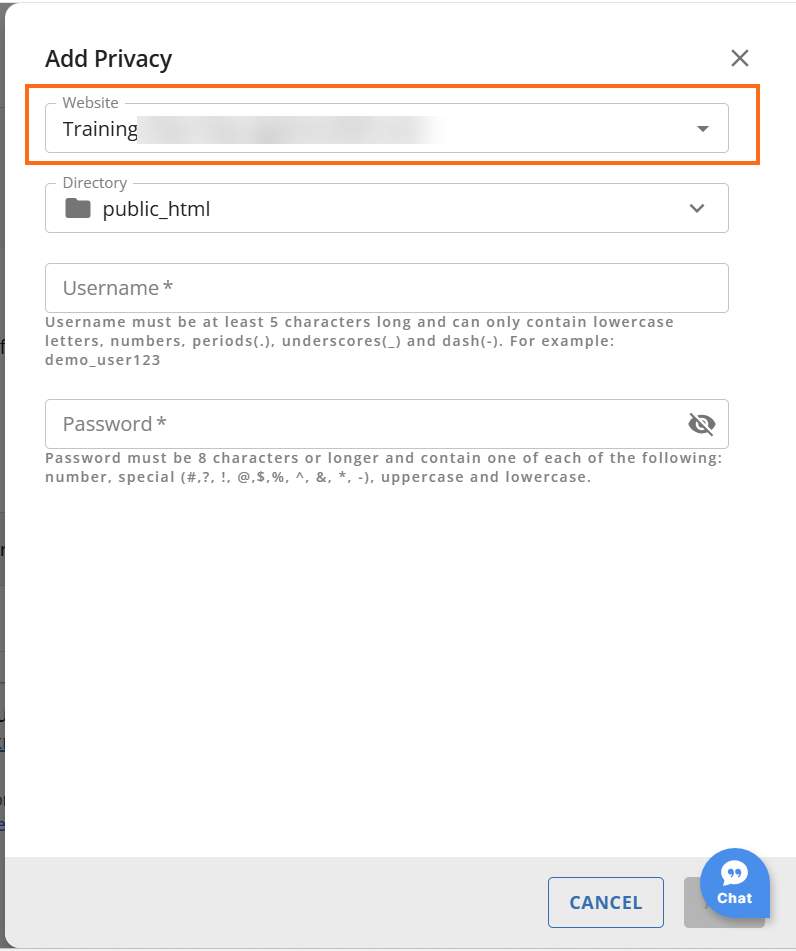
- Click the drop-down menu and select the website where you want to enable privacy. The directory will fill in automatically. Make sure you choose the correct website and directory before continuing.
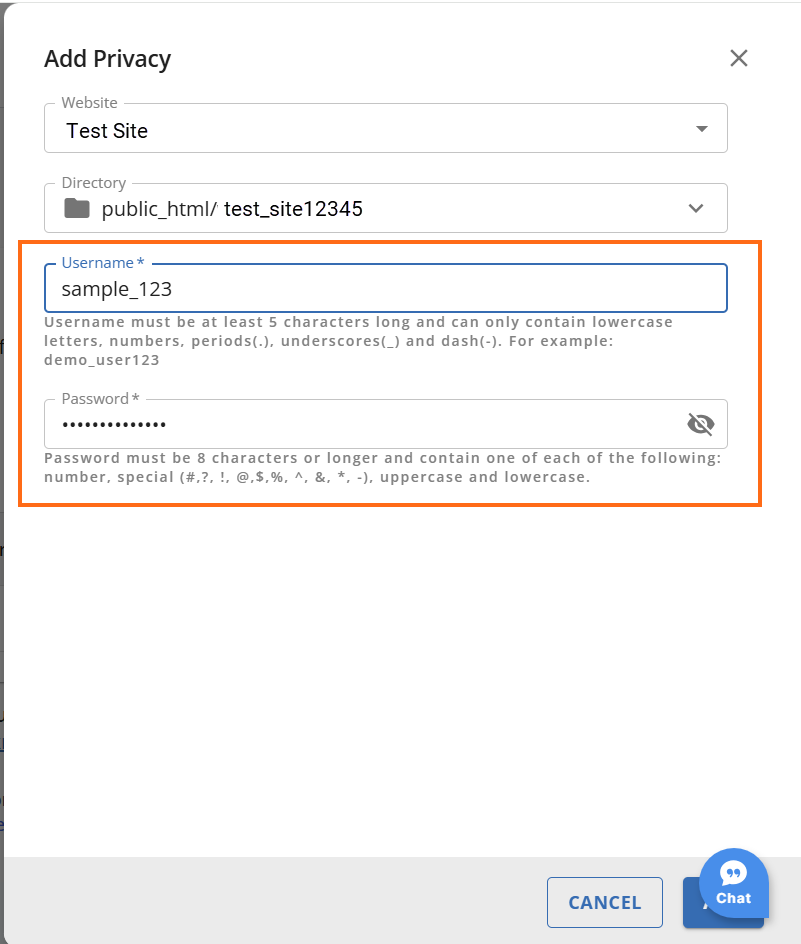
- You need to set up your Username* and Password* once you’ve chosen the website directory.
Important:
Username must be at least 5 characters long and can only contain lowercase letters, numbers, periods(.), underscores (_), and dashes (-). For example: demo_user123.
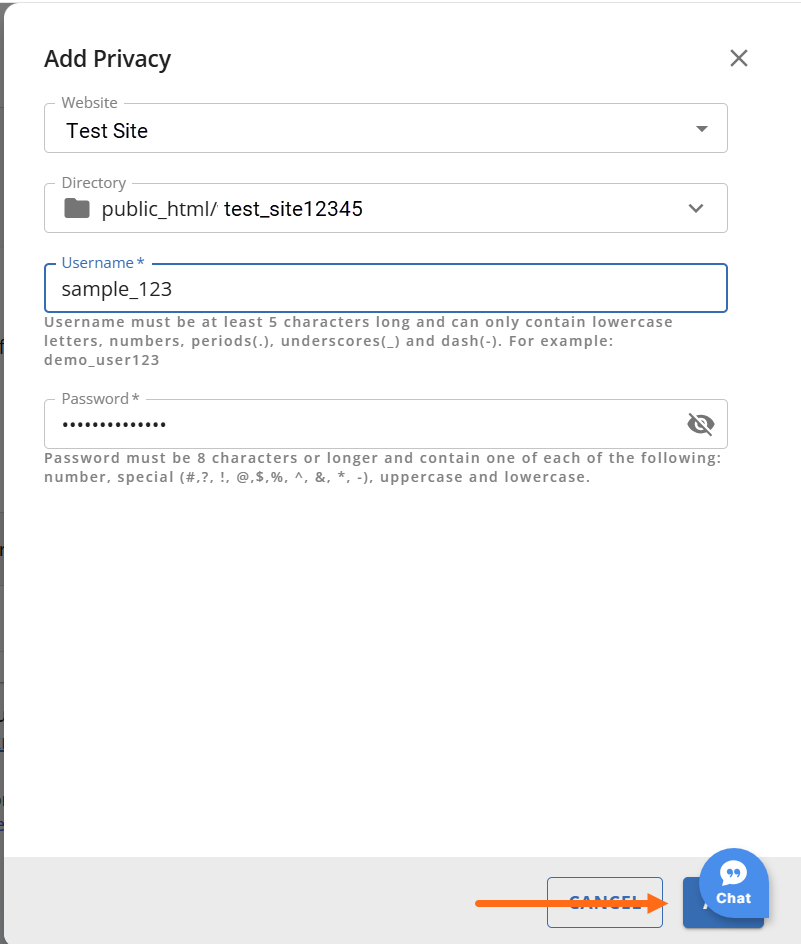
Password must be 8 characters or longer and contain one of each of the following: number, special (#,?, !, @,$,%, ^, &, *, -), uppercase, and lowercase. - Click the Add button below once you have set up your username and password.
- A confirmation banner will appear at the top once you have successfully added the directory privacy.
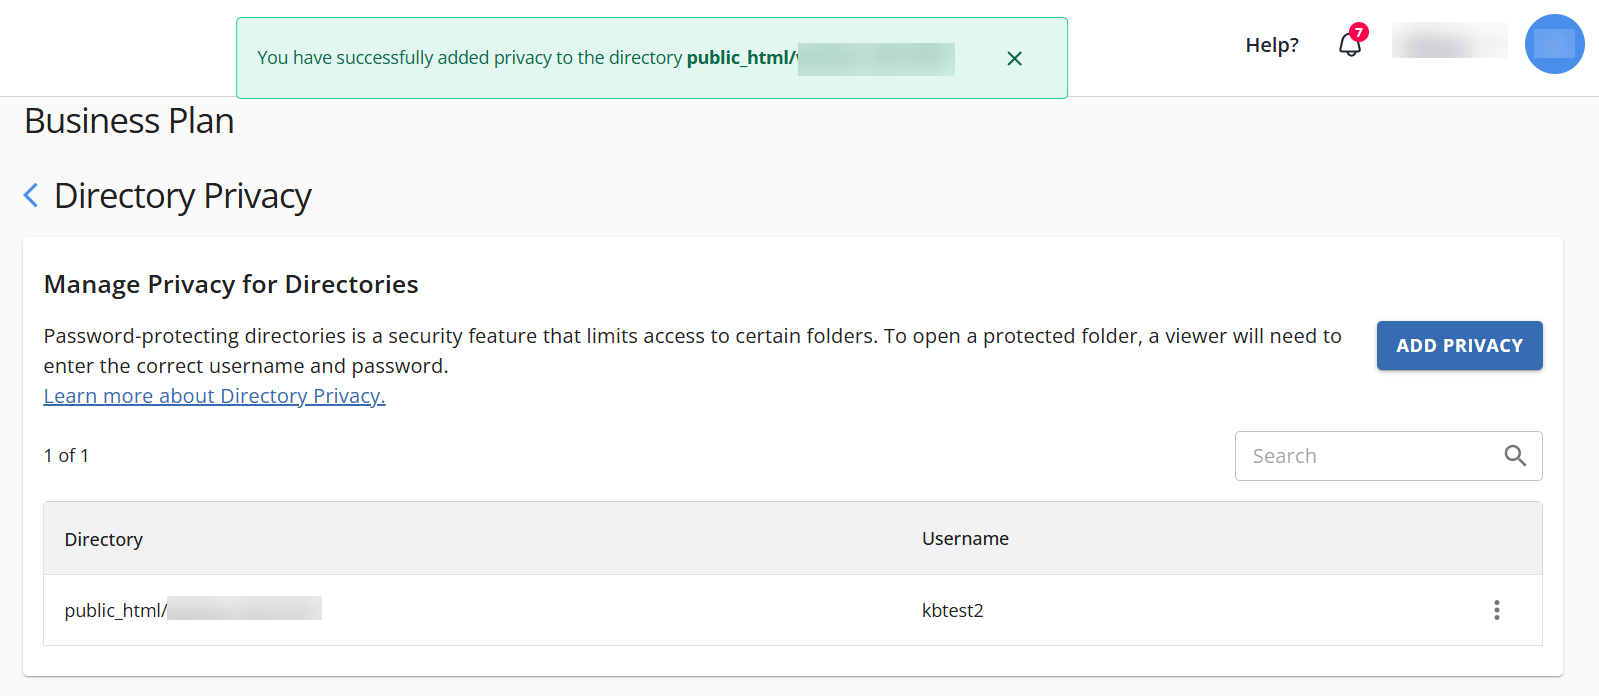
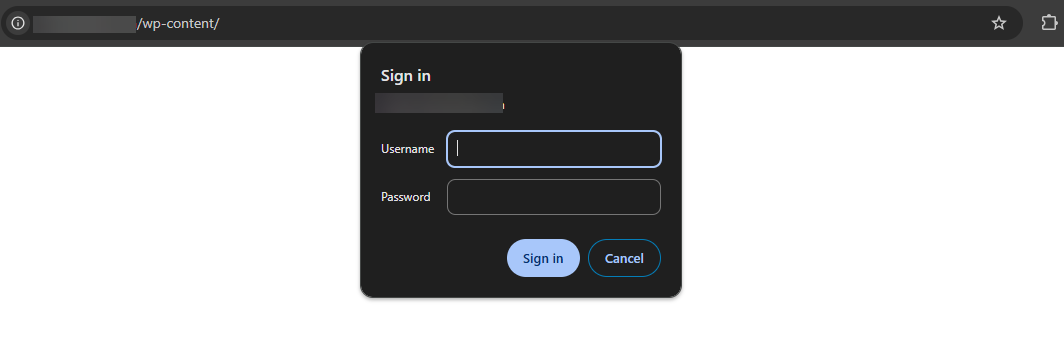
Visiting the directory publicly will prompt you to log in using the Username and Password you had set up.
How to remove Directory Privacy Protection
- Log in to your Customer Portal.
- Go to Websites from the left navigation menu.
- Click Settings next to the website you want to manage.
- You will see a list of tabs on the Settings page. Find and click the Advanced tab.
- Locate the Directory Privacy card under the Advanced tab and click on the Manage button.
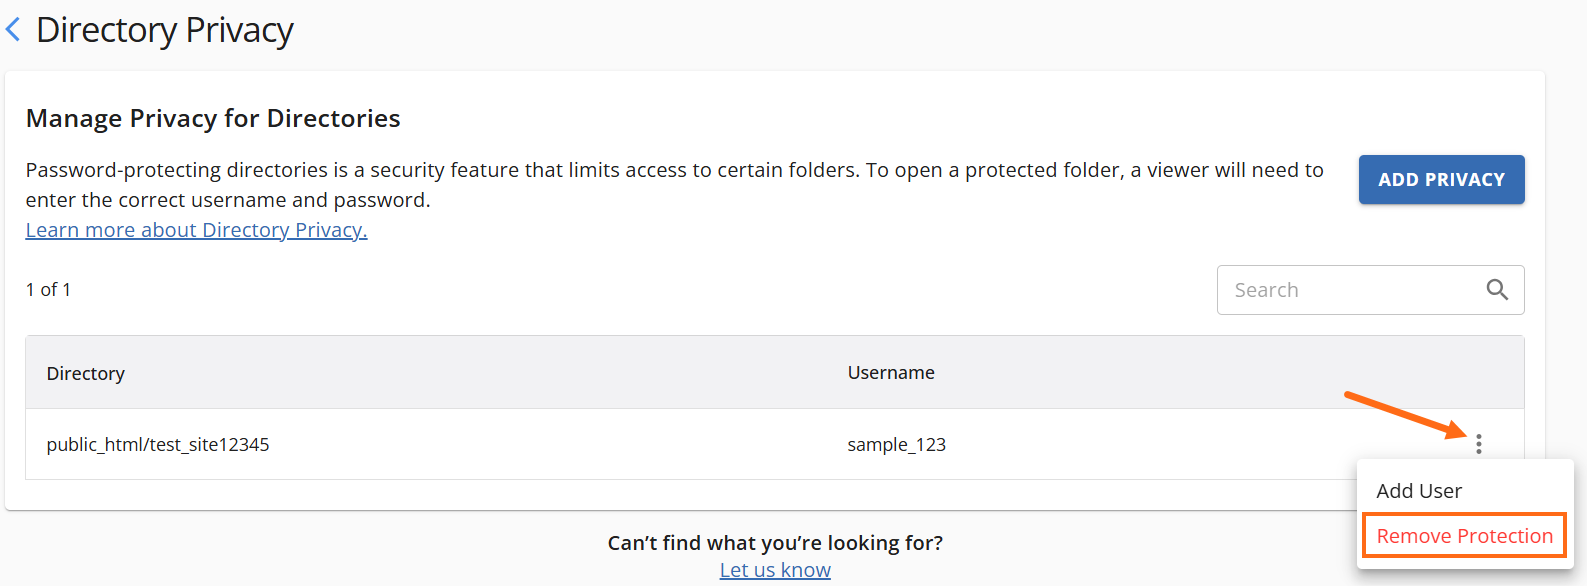
- On the Directory Privacy page, find the directory with the privacy enabled. Click the vertical ellipsis icon on the left side of the corner, then click Remove Protection to remove the directory privacy protection.
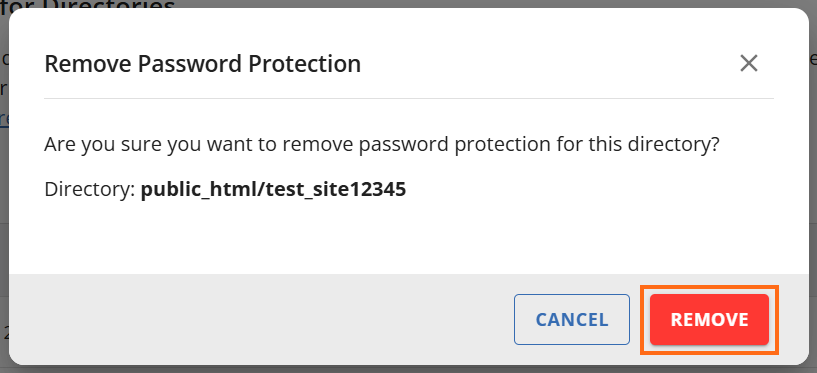
- A pop-up will appear for you to confirm the removal of the directory privacy protection. Just hit the Remove button to complete the process.
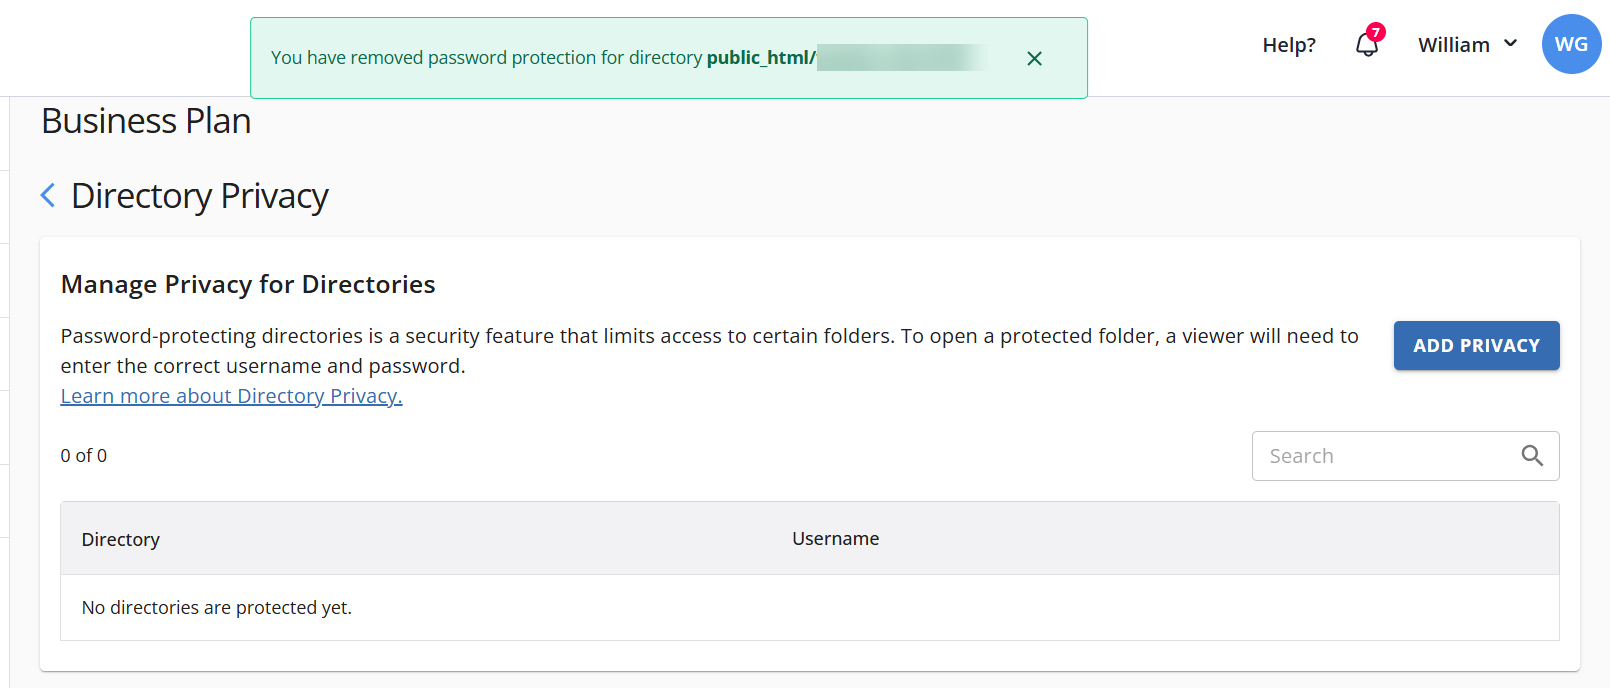
- A confirmation banner will appear once you successfully remove the directory privacy protection.
Did you find this article helpful?