Knowledge Base
Categories: General Information
How do I Create and Manage a Cron Job in Customer Portal
Cron jobs allow you to run scheduled commands automatically at specific times. They are commonly used for maintenance tasks and other unattended server processes.
A working knowledge of Linux commands is recommended before using cron jobs. Review any script with your hosting administrator before adding it as a cron job.
For more information about cron, see:
This article discusses the following topics.
How to create a Cron Job
- Log in to your Customer Portal.
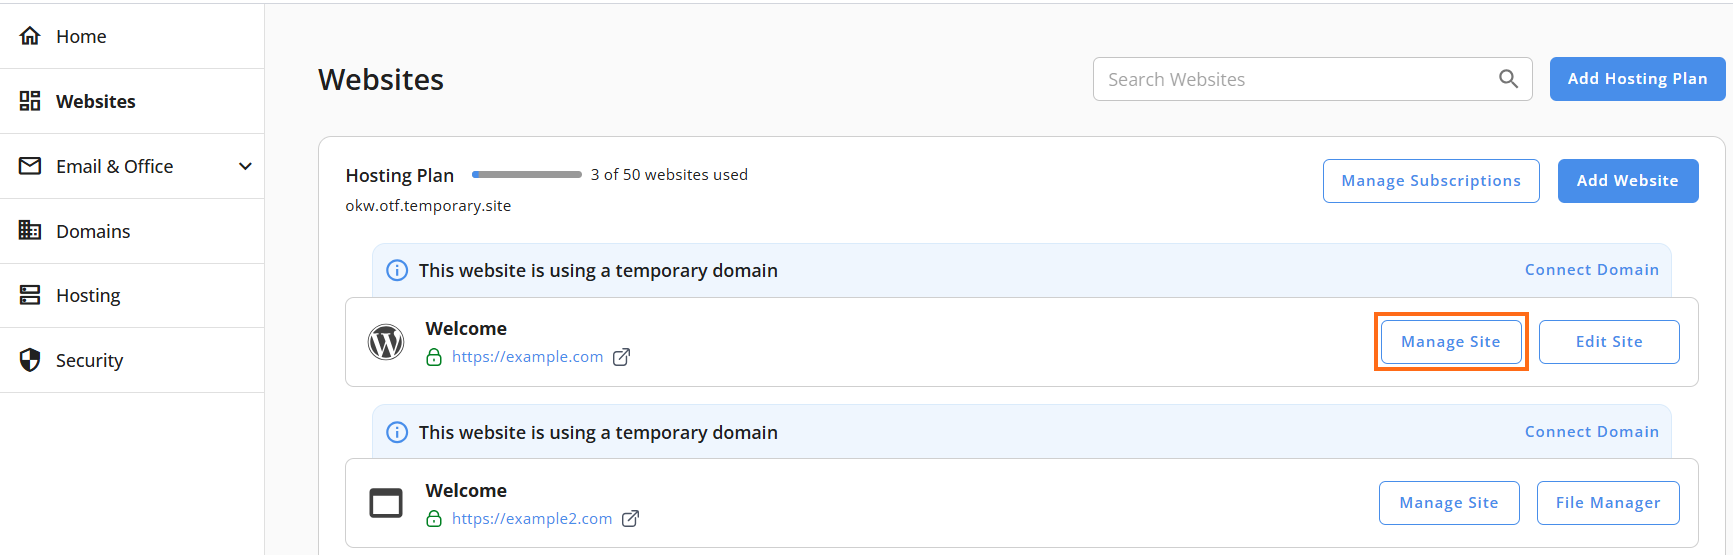
- Go to Websites from the left navigation menu.
- Click Manage Site next to the website you want to manage.
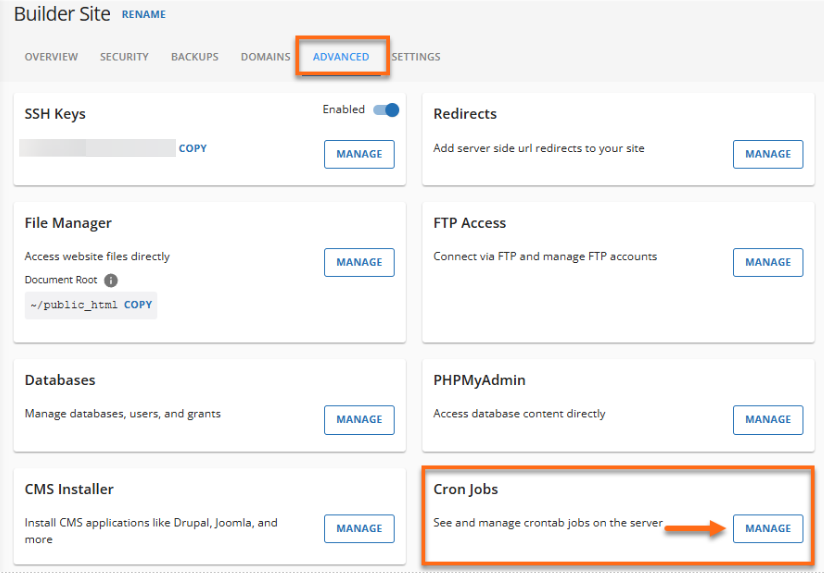
- Click the Advanced tab.
- Under Cron Jobs, click Manage.
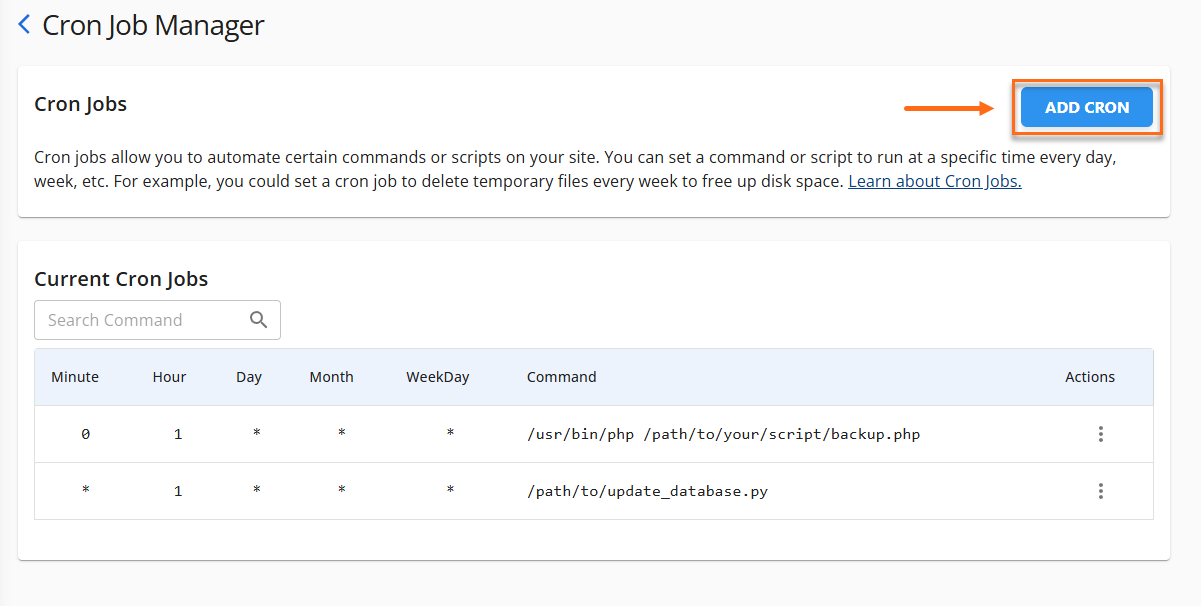
- Click Add Cron.
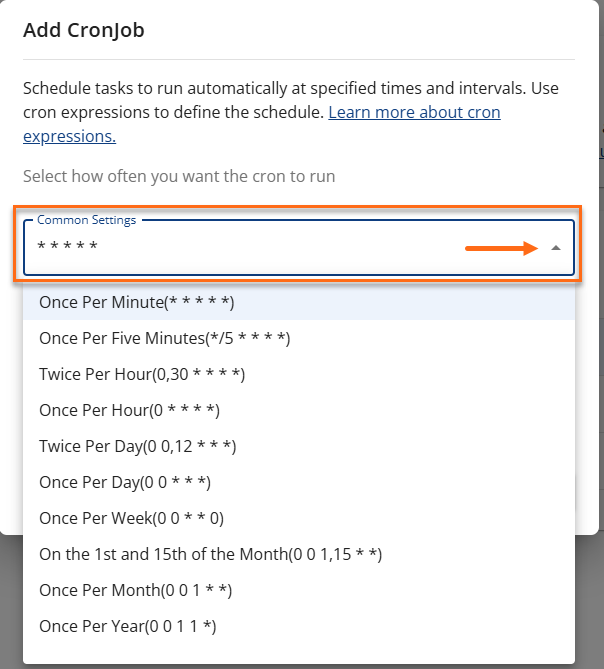
- Select a frequency from the drop-down menu or choose a preset from Common Settings (for example, every 15 minutes or once a year).
- Enter the command in the Command field.
- Click Add.
Congrats on creating your first Cron Job! You've successfully set it up to run a file at the specified time and date with your chosen frequency.
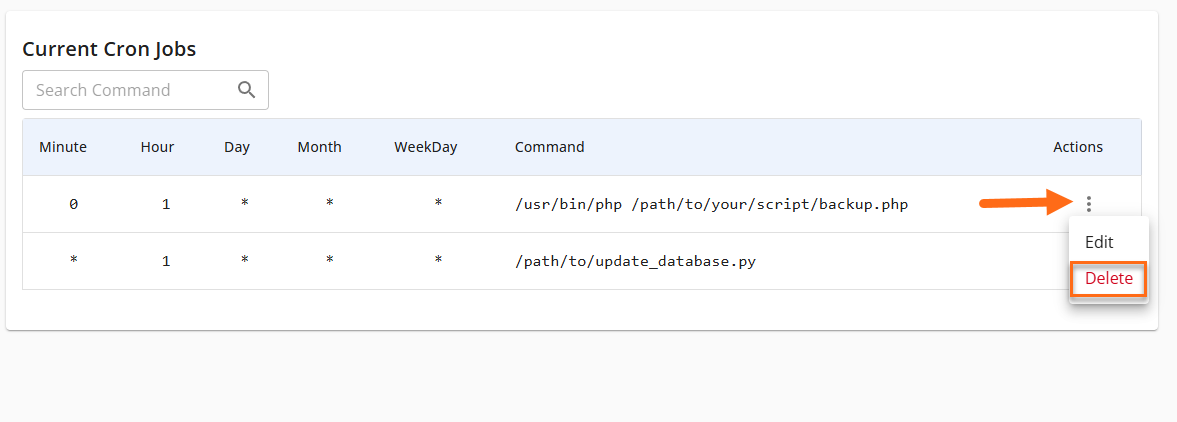
How to edit, view the last run, and delete a Cron Job
Now that you know how to add Cron Jobs in your customer portal, here's how you can edit or delete them in your Cron Job Manager.
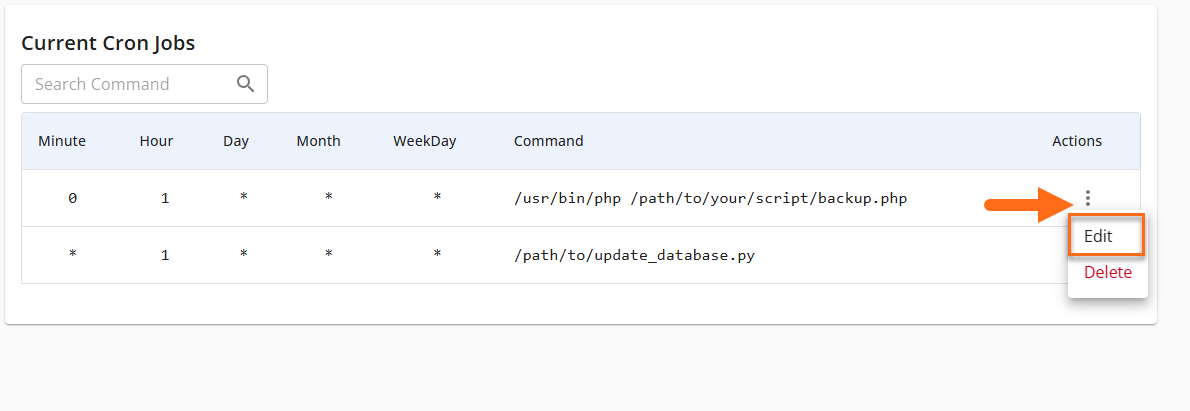
To edit:
- Locate the cron job you want to modify.
- Click the vertical ellipsis (⋮) menu.
- Select Edit.
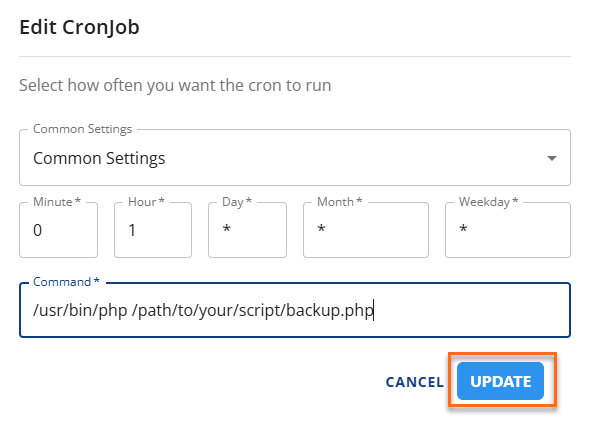
- Make your changes.
- Click Update.
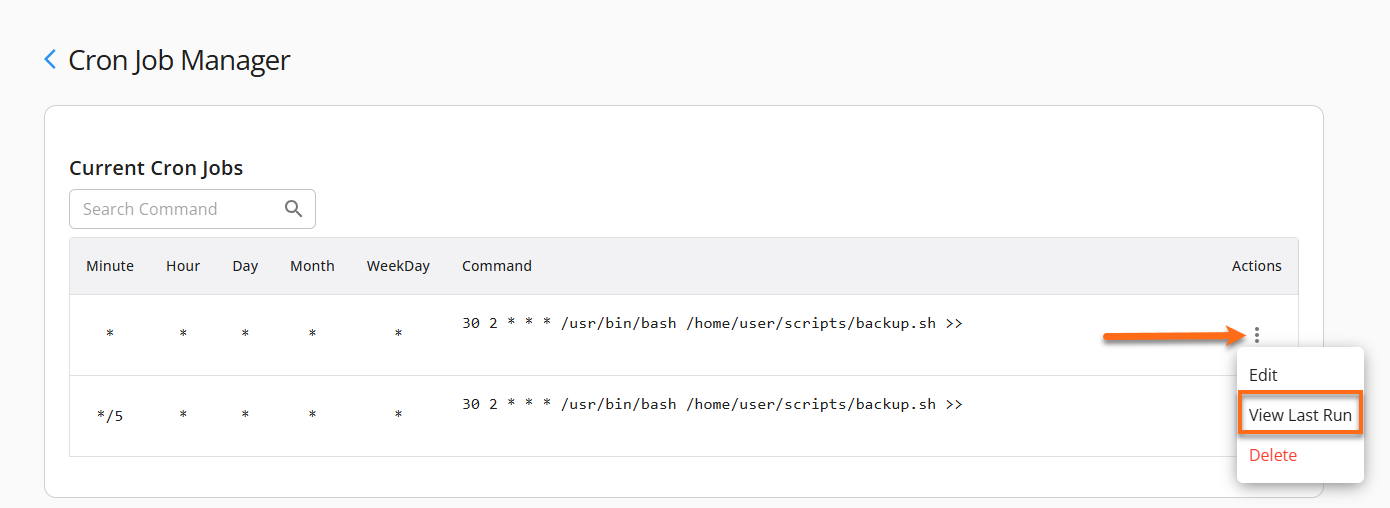
To view the last run:
- Locate the cron job.
- Click the vertical ellipsis (⋮) menu.
- Select View Last Run.
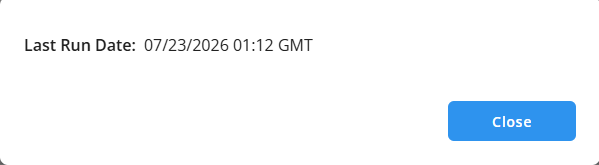
- Review the information displayed in the pop-up window.
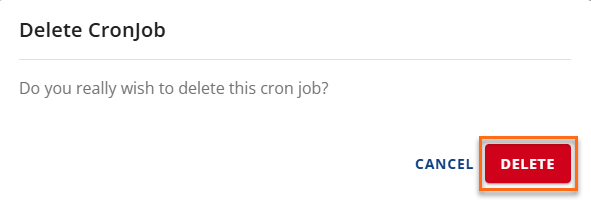
To delete:
- Locate the cron job you want to remove.
- Click the vertical ellipsis (⋮) menu.
- Select Delete.
- Click Delete again to confirm.
Did you find this article helpful?