Knowledge Base
Categories: Weebly
Adding a Slideshow in Weebly
The slideshow element, which is available under the Multimedia category of the Build sidebar, allows you to display your photos in style. It's easy to create and configure your slideshow, and there are even some advanced options that will help you customize your slideshow to fit your web page.
Creating a Slideshow
You can add a slideshow to your page by dragging the Slideshow element to the location on your page where you would like it to appear.
- Choose a slideshow style and click Continue. You can always change your decision later, so don't spend too much time on this step. There will be more slideshow styles to choose from later.
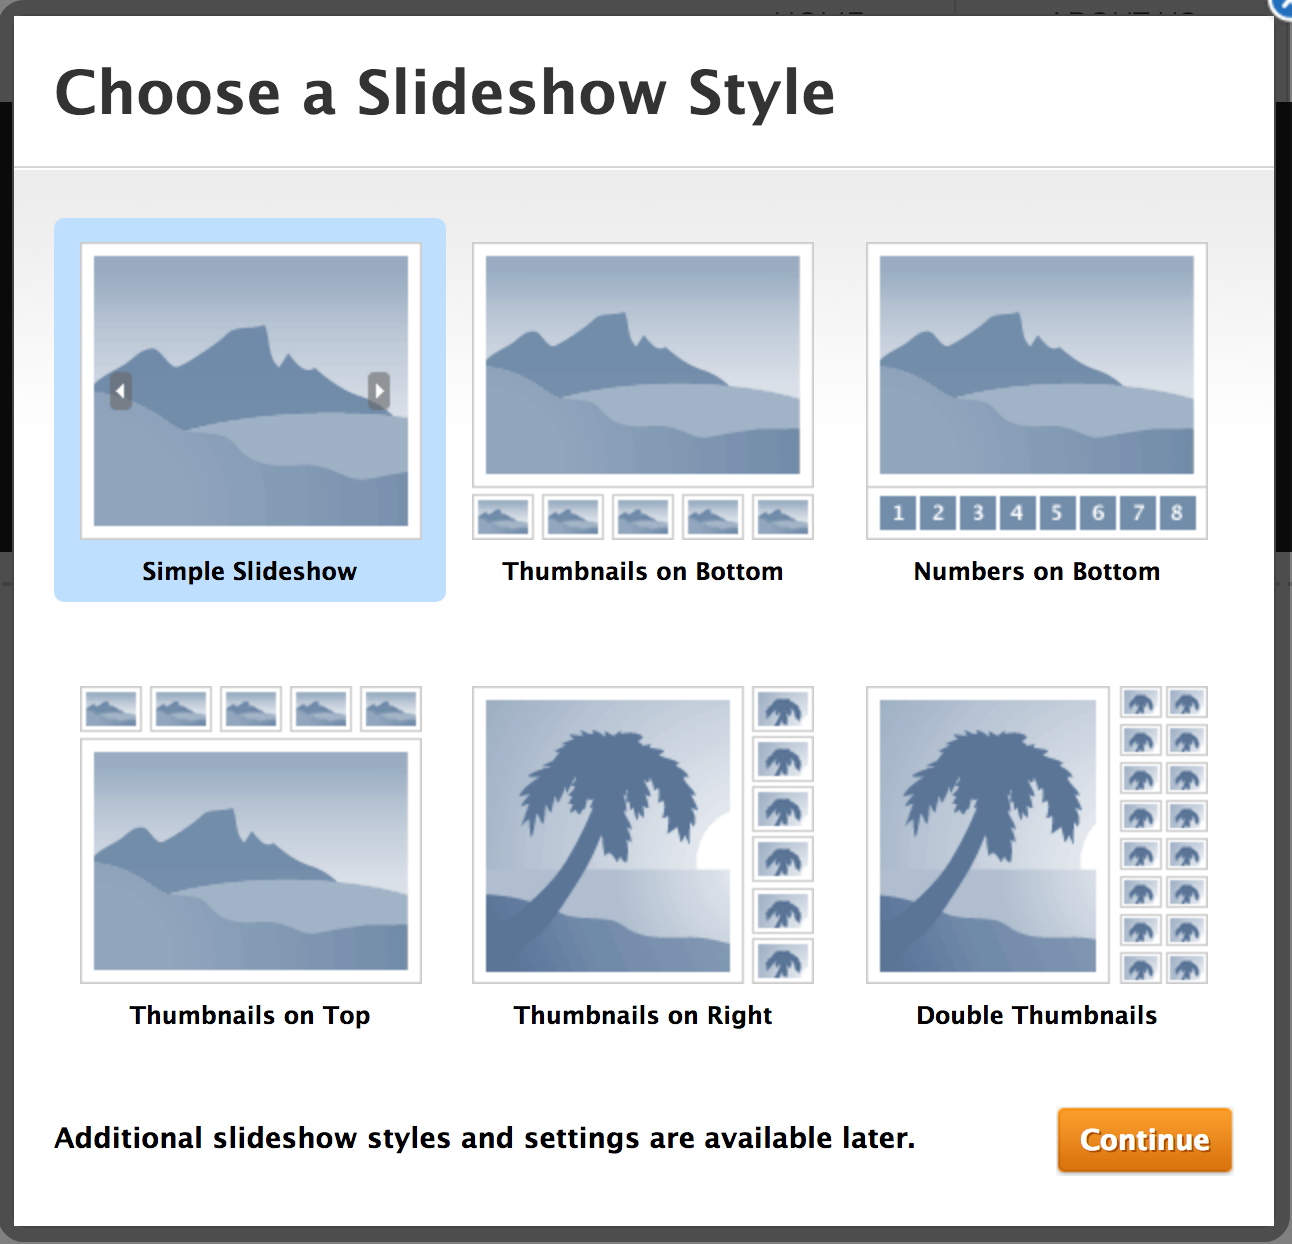
- Once you select the slideshow type, you will be prompted to upload photos. You can either drag and drop your photos from your computer to the dialog box, or you can click the Upload Photos button.
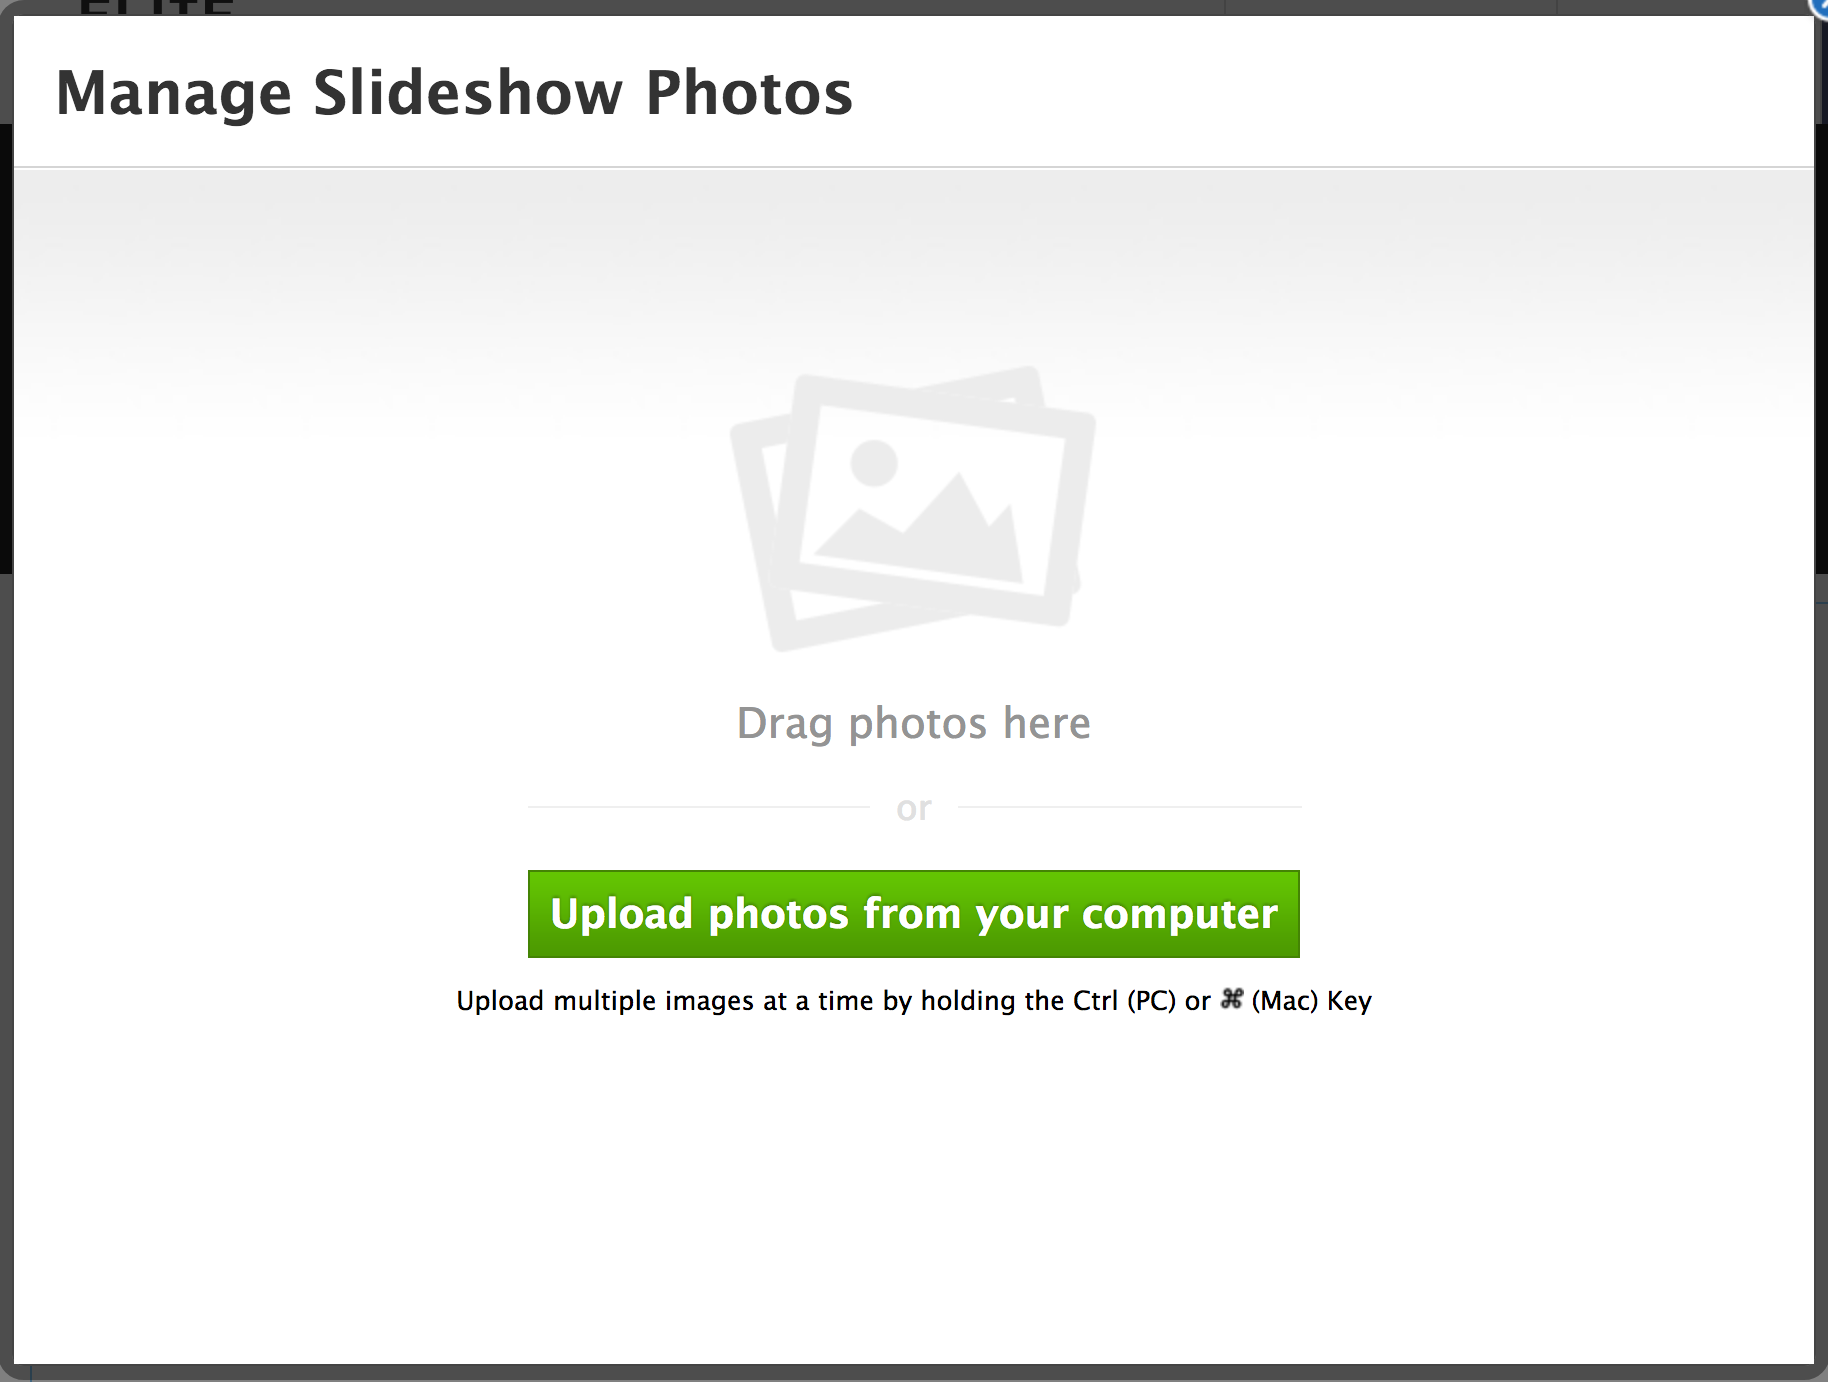
- You can always manage your photos later if you wish to delete or upload more. Depending on how many photos you've selected, it may take them a few minutes to upload.
- Once your photos are done uploading you'll see them all on the slideshow photo management screen.

- You have several options for configuring your slideshow:
- Reorder the frames by dragging and dropping them into place
- Edit captions by clicking on the speech bubble icon on the picture
- Add/edit links by clicking on the chain link icon on the picture
- Remove the image by clicking on the trash can icon on the picture
- Once you're satisfied with your selections, click Save. You'll see the new slideshow on the page.
Customizing Your Slideshow
Once you have created your slideshow, click on the slideshow to use the popup to make the following changes:
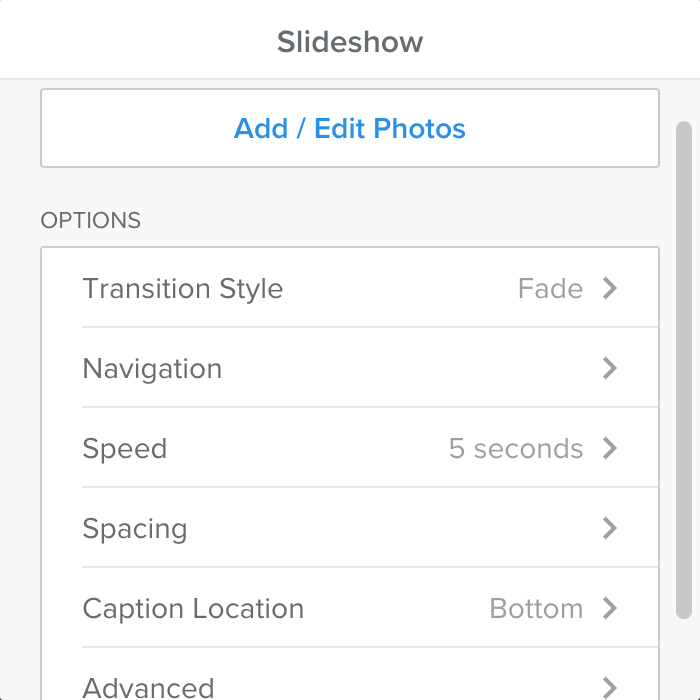
- Use the Add / Edit Photos button to bring up the Manage Slideshow Photos dialog box.
- Select Fade or Slide for the Transition Style. This determines how the slideshow moves from one image to the next.
- Use Navigation to select whether you want to use thumbnails, double thumbnails, numbers or none. You can set the Nav Location to place the navigation bar at the bottom, top, left or right of the slideshow.
- Use Speed to set the speed of the show (how long each image is shown).
- Spacing will let you set the padding above and below slideshow.
- Use Caption Location to set where the caption text will be displayed at the top or bottom of the images (if you have any).
The slideshow will automatically expand to the width of the page or column in which you've placed it.
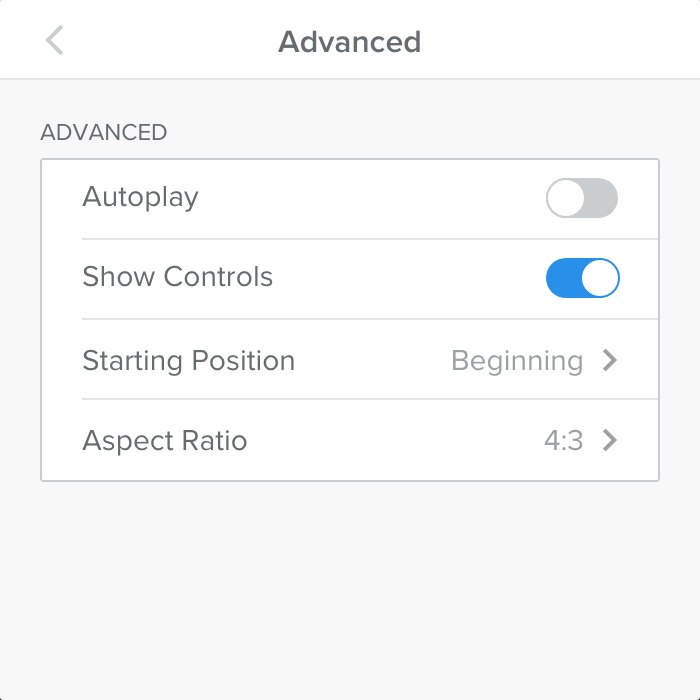
Advanced Options
There are also several advanced options which will allow you to:
- Toggle Autoplay on or off
- Toggle Slideshow Controls either on or off
- Define where the slideshow begins
- Set the aspect ratio (16:9, 4:3, or 3:2) (though the system is very good about determining this automatically)
Did you find this article helpful?